> ## Documentation Index
> Fetch the complete documentation index at: https://support.lumafield.com/llms.txt
> Use this file to discover all available pages before exploring further.
# 回転軸補正(Axis of Rotation Correction)
> 手動補正を適用して二重像を修正するための Reconstruction 機能の使い方
**回転軸補正を適用する理由**
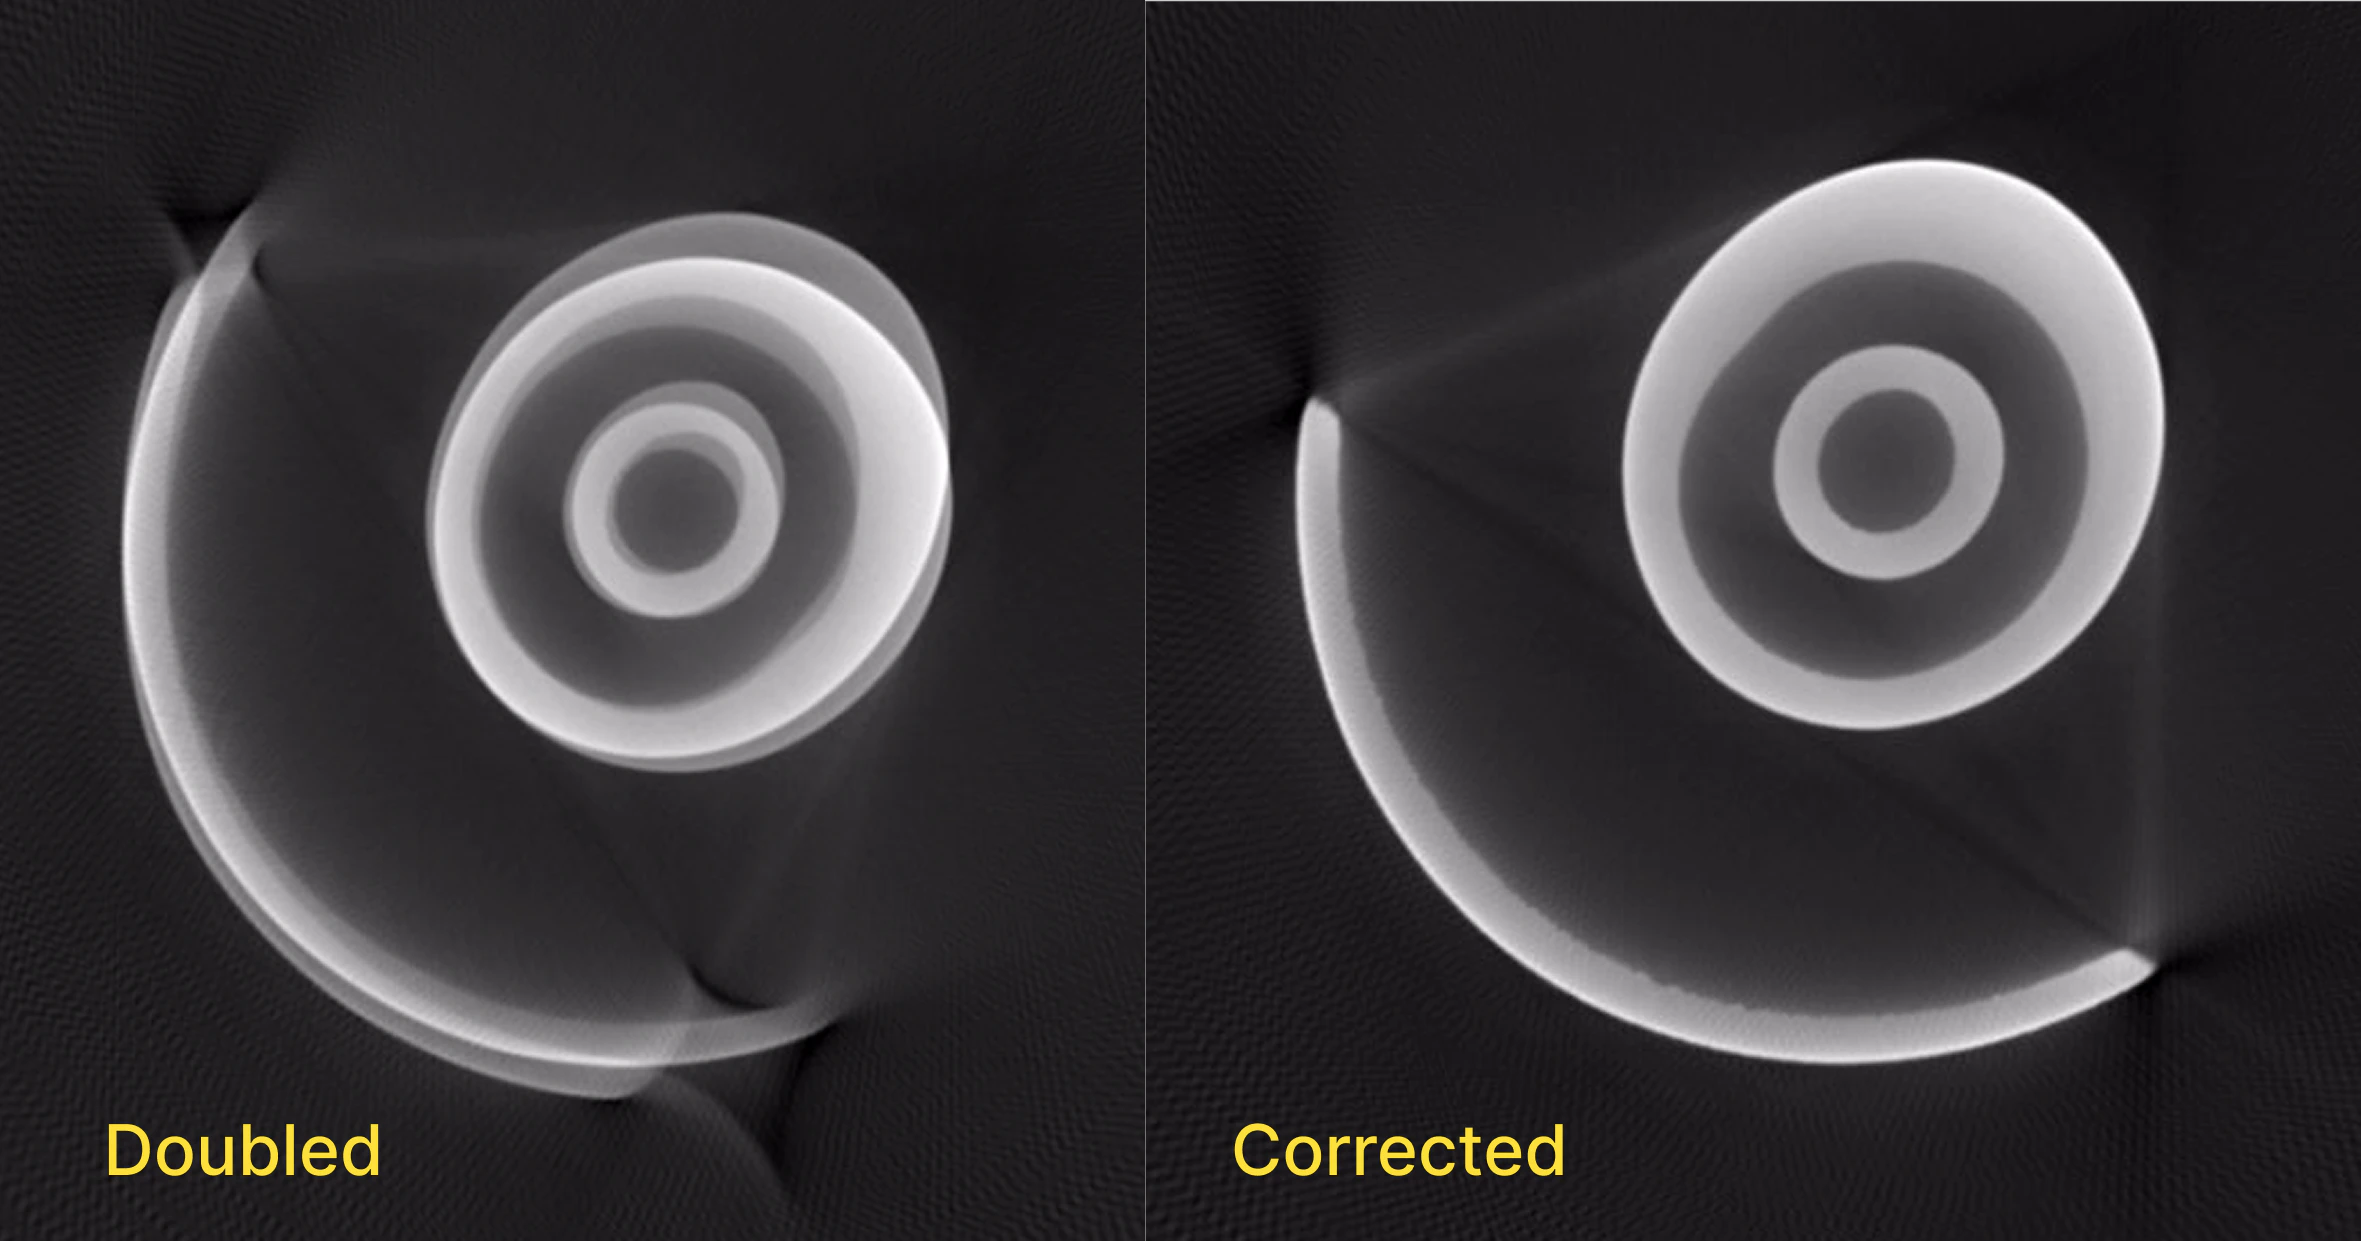
自動再構成で二重像やぼやけが発生した場合、手動の回転軸補正で改善できることがあります。以下は、二重像があるスキャン(左)と回転軸補正後(右)の例です。
 **回転軸補正の適用手順**
1. Toolbar の Correct 機能をクリックします。
2. ワークフローの最初のステップで Axis of Rotation Correction オプションをオンにします。
3. 上下のラインを、部品の上端と下端付近に交差する位置へ移動します。
4. Viewer の両パネルで二重像が最小になるよう、粗いパラメータを選択します。
5. 同様に微調整パラメータを設定します。
6. Reconstruction を開始します。
7. 1 時間以内(多くの場合 30 分前後)で二重像が補正された新しいボリュームが返ってきます。
**回転軸補正の適用手順**
1. Toolbar の Correct 機能をクリックします。
2. ワークフローの最初のステップで Axis of Rotation Correction オプションをオンにします。
3. 上下のラインを、部品の上端と下端付近に交差する位置へ移動します。
4. Viewer の両パネルで二重像が最小になるよう、粗いパラメータを選択します。
5. 同様に微調整パラメータを設定します。
6. Reconstruction を開始します。
7. 1 時間以内(多くの場合 30 分前後)で二重像が補正された新しいボリュームが返ってきます。