> ## Documentation Index
> Fetch the complete documentation index at: https://support.lumafield.com/llms.txt
> Use this file to discover all available pages before exploring further.
# 画面の見方
> Voyager Project Editor の構成要素
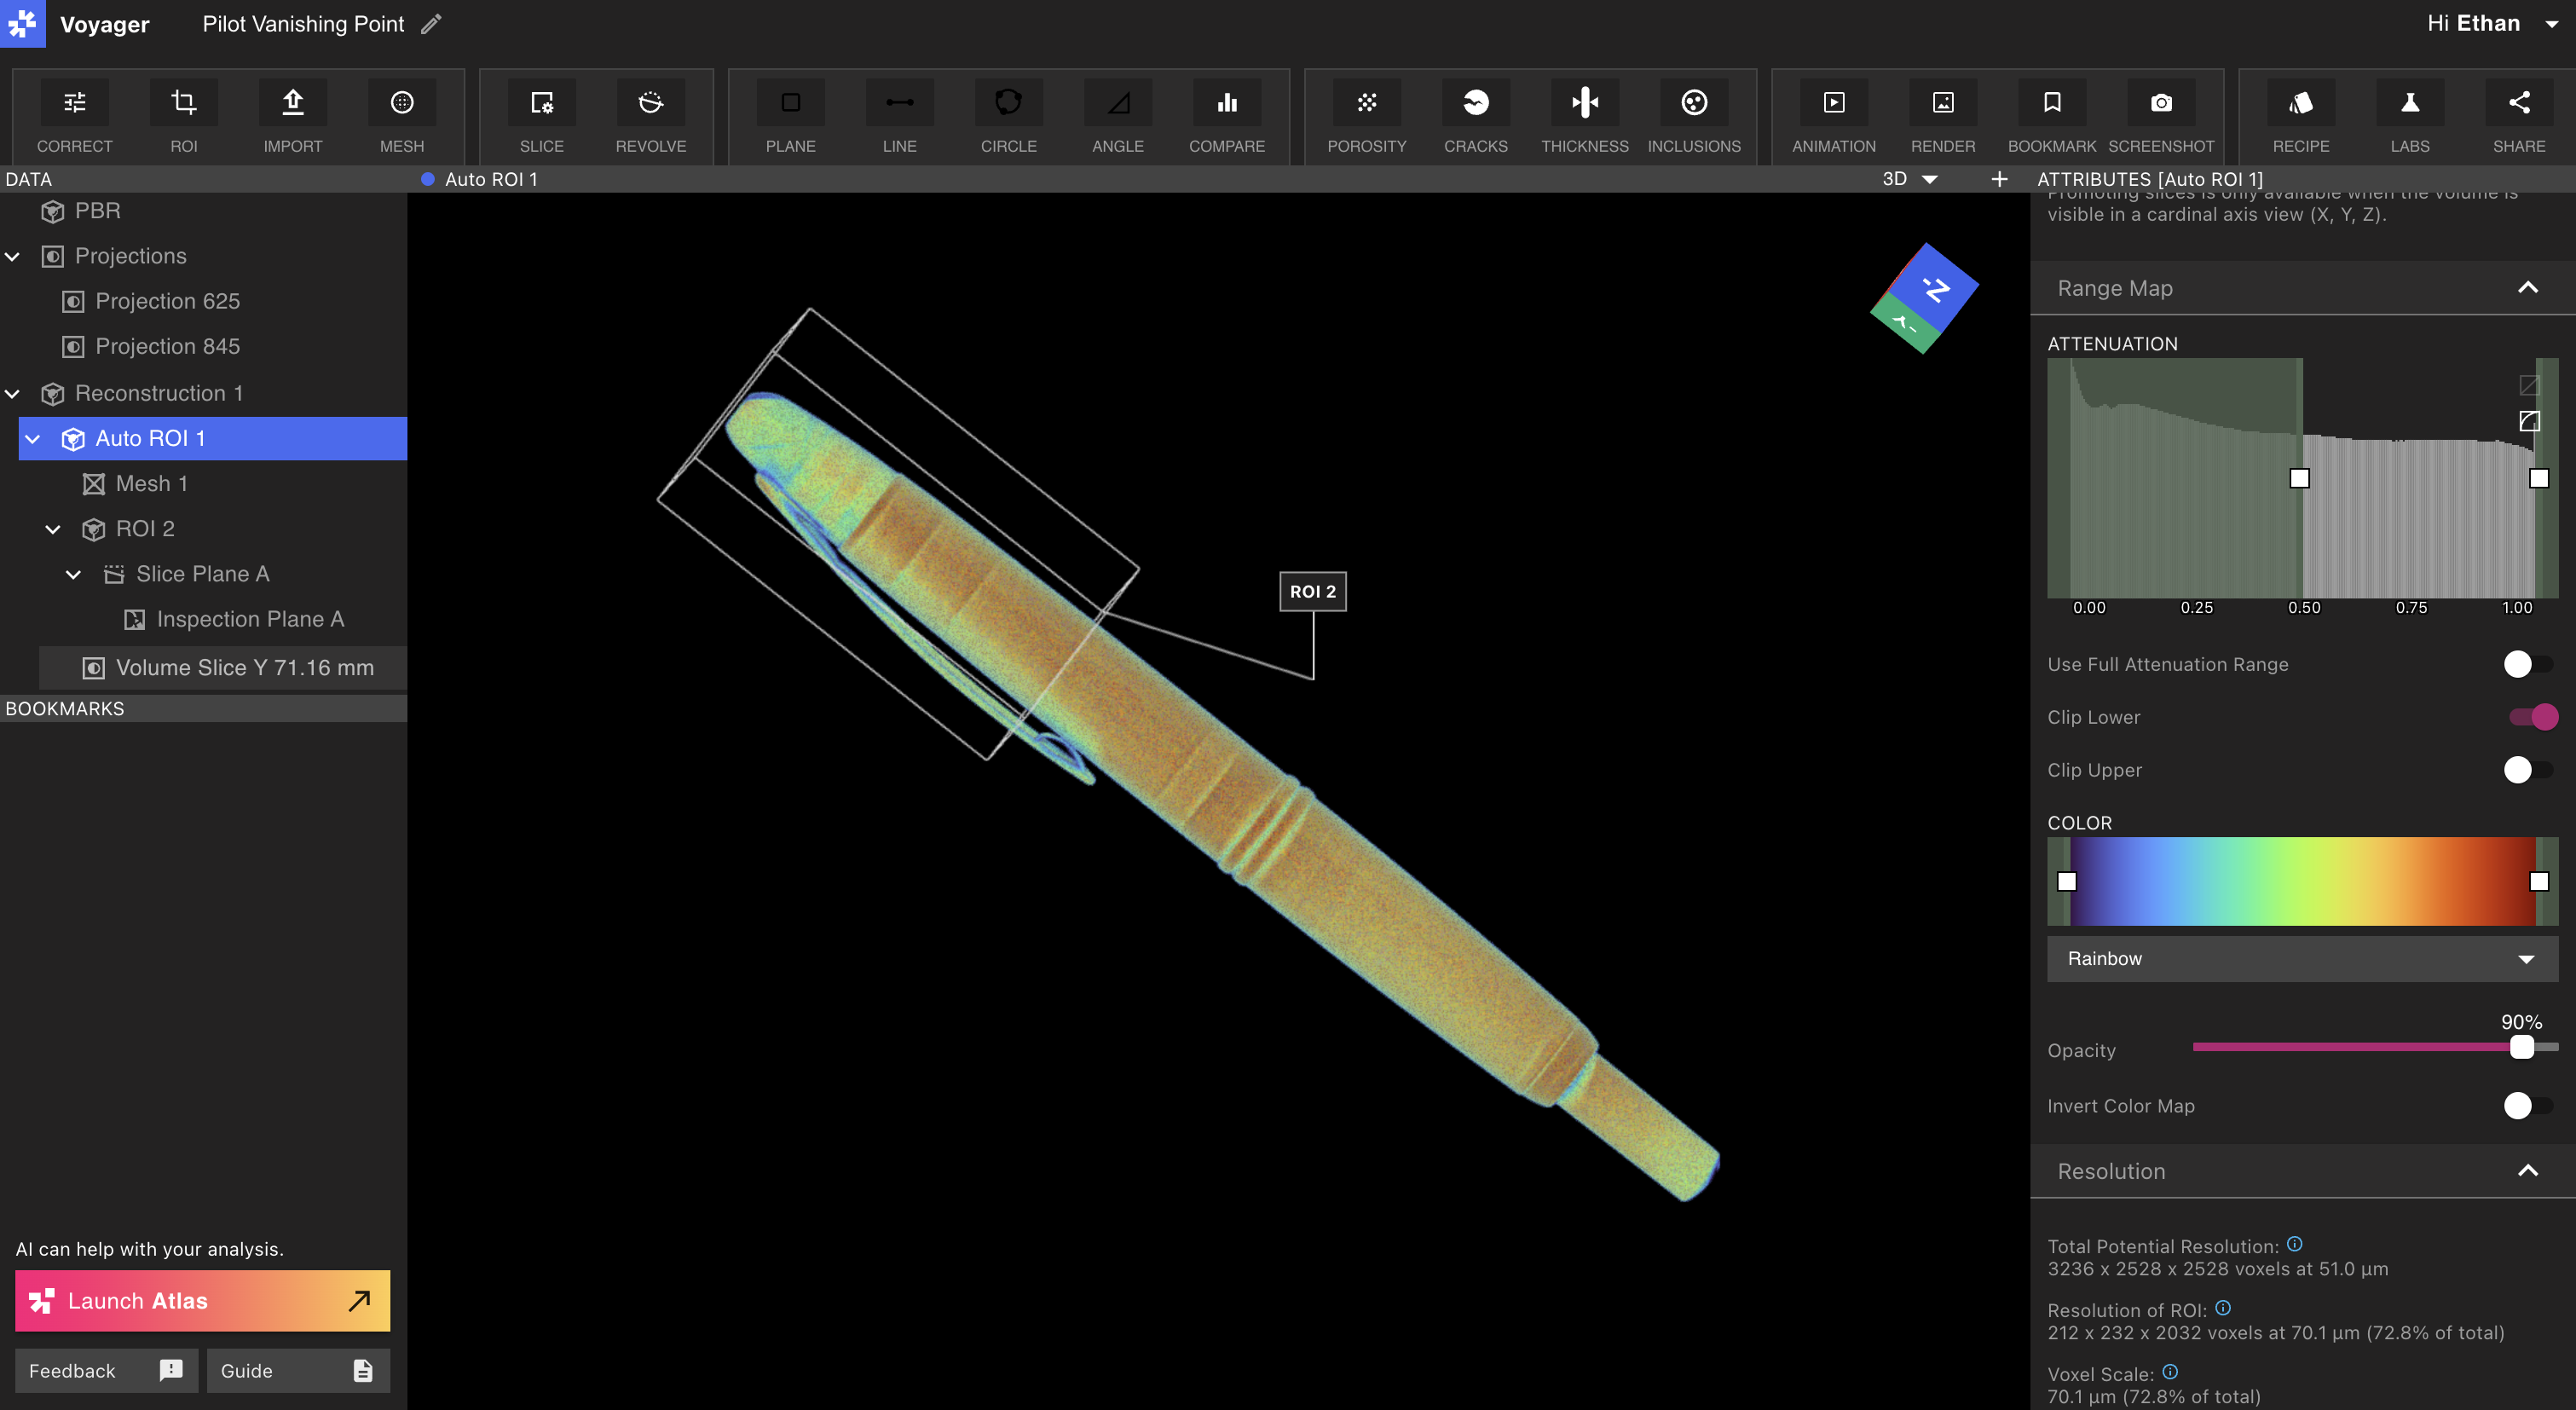
Voyager Project Editor は、Neptune または Triton からのスキャンを解析するための中心的なツールです。本記事では Project Editor の各パートと用途を紹介します。
Viewport
Viewport は Project Editor の大部分を占め、選択したスキャンデータを表示します。
Viewport のレイアウト
Voyager の中央パネルは、**単一** Viewport または **分割** Viewport の 2 つのレイアウトで表示できます。既定では単一 Viewport が表示されます。
**単一 Viewport:** 1 つのデータオブジェクトを画面全体で表示します。表示するオブジェクトを変更するには、[Data Panel](https://support.lumafield.com/ja/voyager/voyager-getting-around#data-panel) からデータオブジェクトを選択します。
**分割 Viewport:** 2 つ目の Viewport を開いて、2 つのデータオブジェクトまたは同じデータオブジェクトの異なるビューを並べて表示します。Viewport 右上の「+」アイコンを選択して分割レイアウトに切り替えます。
Viewport フォーカス(新機能!)
分割 Viewport レイアウトでは、常に 1 つの Viewport が *フォーカス* されます。フォーカスされた Viewport は上部のハイライトバーで示されます(下の画像の「Mesh 1」)。Voyager 右側の [Attributes Panel](https://support.lumafield.com/ja/voyager/voyager-getting-around#attributes-panel) には、フォーカスされた Viewport の属性が表示されます。
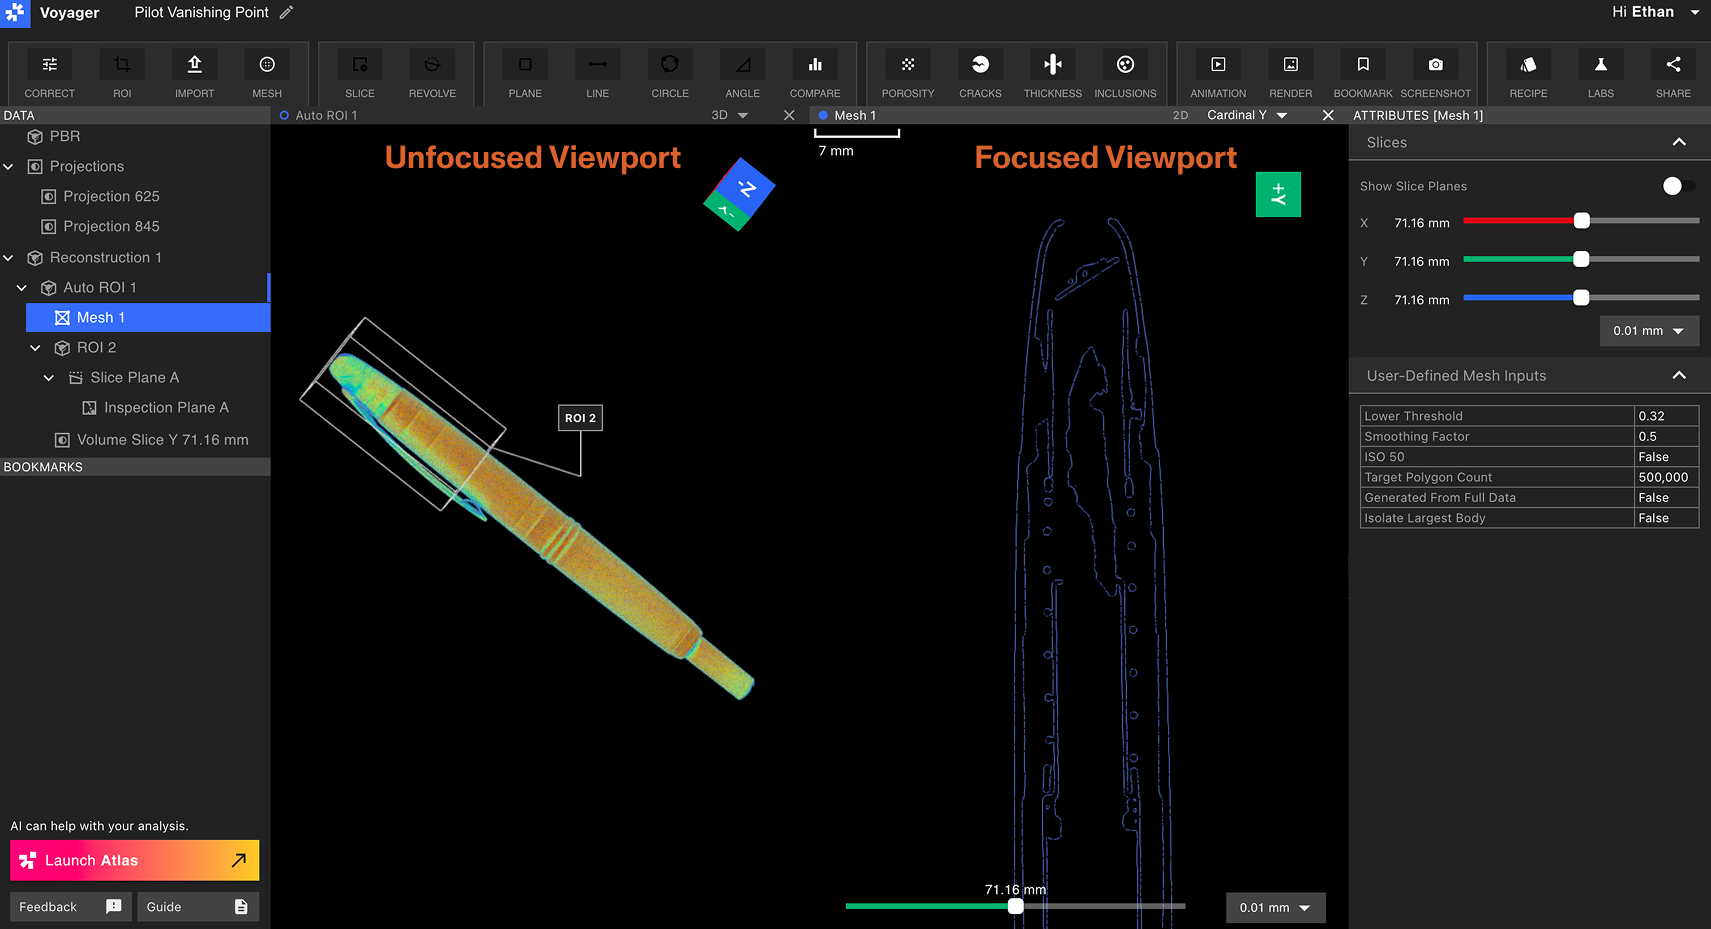 Viewport 内の任意の場所をクリックしてフォーカスを切り替えます。フォーカスされた Viewport のデータオブジェクト(上の画像の「Mesh 1」)は Data Panel で青くハイライトされ、*フォーカスされていない* Viewport のデータオブジェクト(上の画像の「Auto ROI 1」)は Data Panel で小さな青いマーカーが表示されます。
分割 Viewport レイアウトを終了するには、いずれかの Viewport 右上の「X」アイコンを選択して閉じ、単一 Viewport レイアウトに戻ります。
Viewport 内の任意の場所をクリックしてフォーカスを切り替えます。フォーカスされた Viewport のデータオブジェクト(上の画像の「Mesh 1」)は Data Panel で青くハイライトされ、*フォーカスされていない* Viewport のデータオブジェクト(上の画像の「Auto ROI 1」)は Data Panel で小さな青いマーカーが表示されます。
分割 Viewport レイアウトを終了するには、いずれかの Viewport 右上の「X」アイコンを選択して閉じ、単一 Viewport レイアウトに戻ります。
2D と 3D ビュー
Reconstruction、ROI、Slice Plane、Mesh、Analysis Results の Data Object を選択すると、Viewport 右上のドロップダウンで 2D/3D モードを切り替えできます。
2D ビュー
2D ビューでは、パン、スクラブ、ズームが可能です。X、Y、Z の既定カーディナル軸に加え、プロジェクト内で作成した Slice Plane も表示されます。
Viewport 内をクリック&ドラッグしてパンします。マウスまたはトラックパッドでズームイン/アウトします。
Viewport 下のスライダーで 2D ビューのスライスをスクラブできます。隣のドロップダウンでスライス精度を変更でき、左上のスケールバーが現在表示しているデータのスケールを示します。

3D ビュー
3D ビューでは回転とズームが可能です。Viewport 内をクリック&ドラッグして回転します。
Viewcube
Viewport 内でクリック&ドラッグして部品を周回すると、Viewcube が部品の現在の向きに合わせて回転します。Viewcube には、部品の向きを精密に選択するコントロールも含まれています。
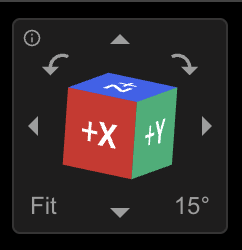 **カーディナル矢印:** Viewcube 右下で指定された角度だけ、選択した方向に Viewport を周回します。
**左右の曲線矢印:** Viewcube 右下で指定された角度だけ、選択した方向に Viewport をロールします。
**角度スケール(右下):** 周回とロール操作の感度を切り替えます。
**フィット(左下):** 部品がビュー内に完全に収まるように Viewport のデータをスケールします。
**ヘルプ(左上):** 「i」アイコンにマウスを合わせると、Viewcube のキーボードショートカットが表示されます。
**カーディナル矢印:** Viewcube 右下で指定された角度だけ、選択した方向に Viewport を周回します。
**左右の曲線矢印:** Viewcube 右下で指定された角度だけ、選択した方向に Viewport をロールします。
**角度スケール(右下):** 周回とロール操作の感度を切り替えます。
**フィット(左下):** 部品がビュー内に完全に収まるように Viewport のデータをスケールします。
**ヘルプ(左上):** 「i」アイコンにマウスを合わせると、Viewcube のキーボードショートカットが表示されます。
Data Panel
Data Panel は Project Editor 左側の「Data」ラベルの下に表示されます。Data Panel の各項目は Data Object を表し、Projections、Reconstruction、ROI、Plane、Analysis Results のいずれかです。Data Object の詳細は [Data Objects + Workflows](/ja/voyager/voyager-data-objects-and-workflows) をご覧ください。
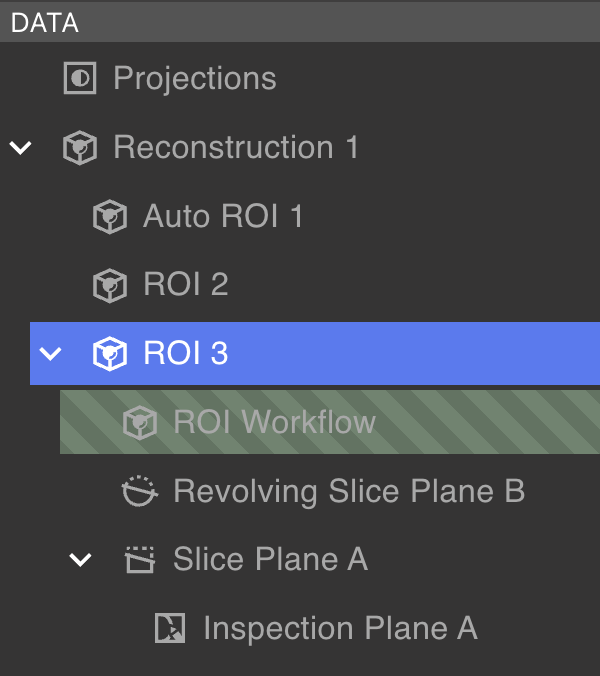 Data Object はツリー構造で整理され、一部の Data Object は子オブジェクトを持ちます。親 Data Object の横にあるキャレットを使って子の展開/折りたたみができます。Data Object を選択すると、対応するデータがViewportに表示されます。
緑のストライプでハイライトされた Data Object は処理中であり、[Workflow](/ja/voyager/voyager-data-objects-and-workflows) が進行中であることを示します。Workflow が送信済みで未完了の場合、処理中の Data Object は Data Panel に表示されません。
Data Object はツリー構造で整理され、一部の Data Object は子オブジェクトを持ちます。親 Data Object の横にあるキャレットを使って子の展開/折りたたみができます。Data Object を選択すると、対応するデータがViewportに表示されます。
緑のストライプでハイライトされた Data Object は処理中であり、[Workflow](/ja/voyager/voyager-data-objects-and-workflows) が進行中であることを示します。Workflow が送信済みで未完了の場合、処理中の Data Object は Data Panel に表示されません。
Data Panel の操作
Data Object を右クリックすると削除または名前変更ができます。
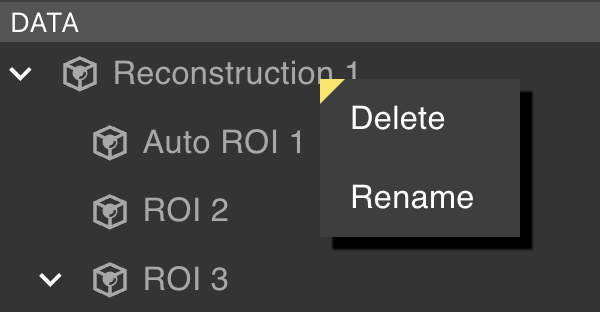 子を持つ Data Object は削除できません。親を削除する前にすべての子 Data Object を削除してください。
Bookmarks Panel
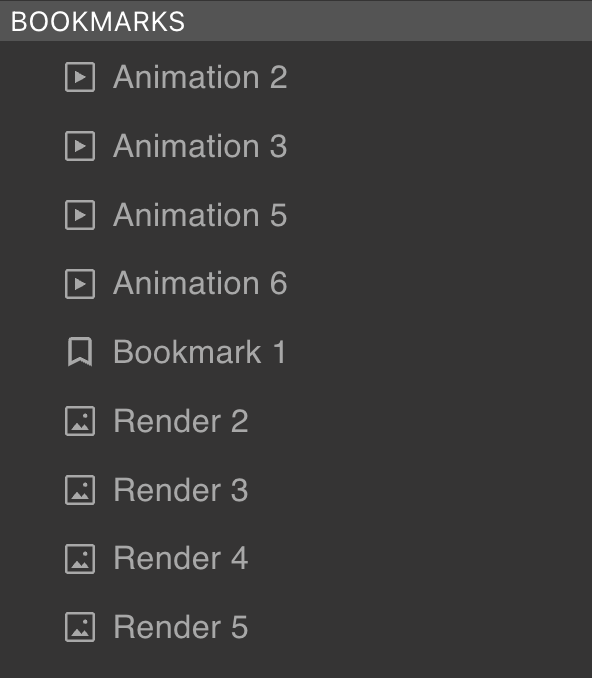
Bookmarks Panel は Data Panel の下にあります。Bookmarks、Renders、Animations が含まれます。任意の項目を右クリックして削除、名前変更、またはブックマークオブジェクトのリンクコピーができます。共有されたブックマークリンクを表示するには、共同作業者がプロジェクトへのアクセス権を持っている必要があります。
 Toolbar は Project Editor 上部に表示されます。選択した Data Object で利用可能なツールがハイライトされ、利用できないツールはグレー表示になります(特定の Data Object タイプでのみ機能するため)。
 ツールの選択で、次のいずれかが実行されます。
* 新しい Data Object を作成する
* 新しいブックマークオブジェクトを作成する
* Attributes Panel に新しい属性を表示する
* Workflow Editor を開く
ツールの選択で、次のいずれかが実行されます。
* 新しい Data Object を作成する
* 新しいブックマークオブジェクトを作成する
* Attributes Panel に新しい属性を表示する
* Workflow Editor を開く
Attributes Panel
Project Editor 右側の Attributes Panel には、選択した Data Object の属性と可視化設定が表示されます。利用可能な属性は Data Object の種類によって異なります。
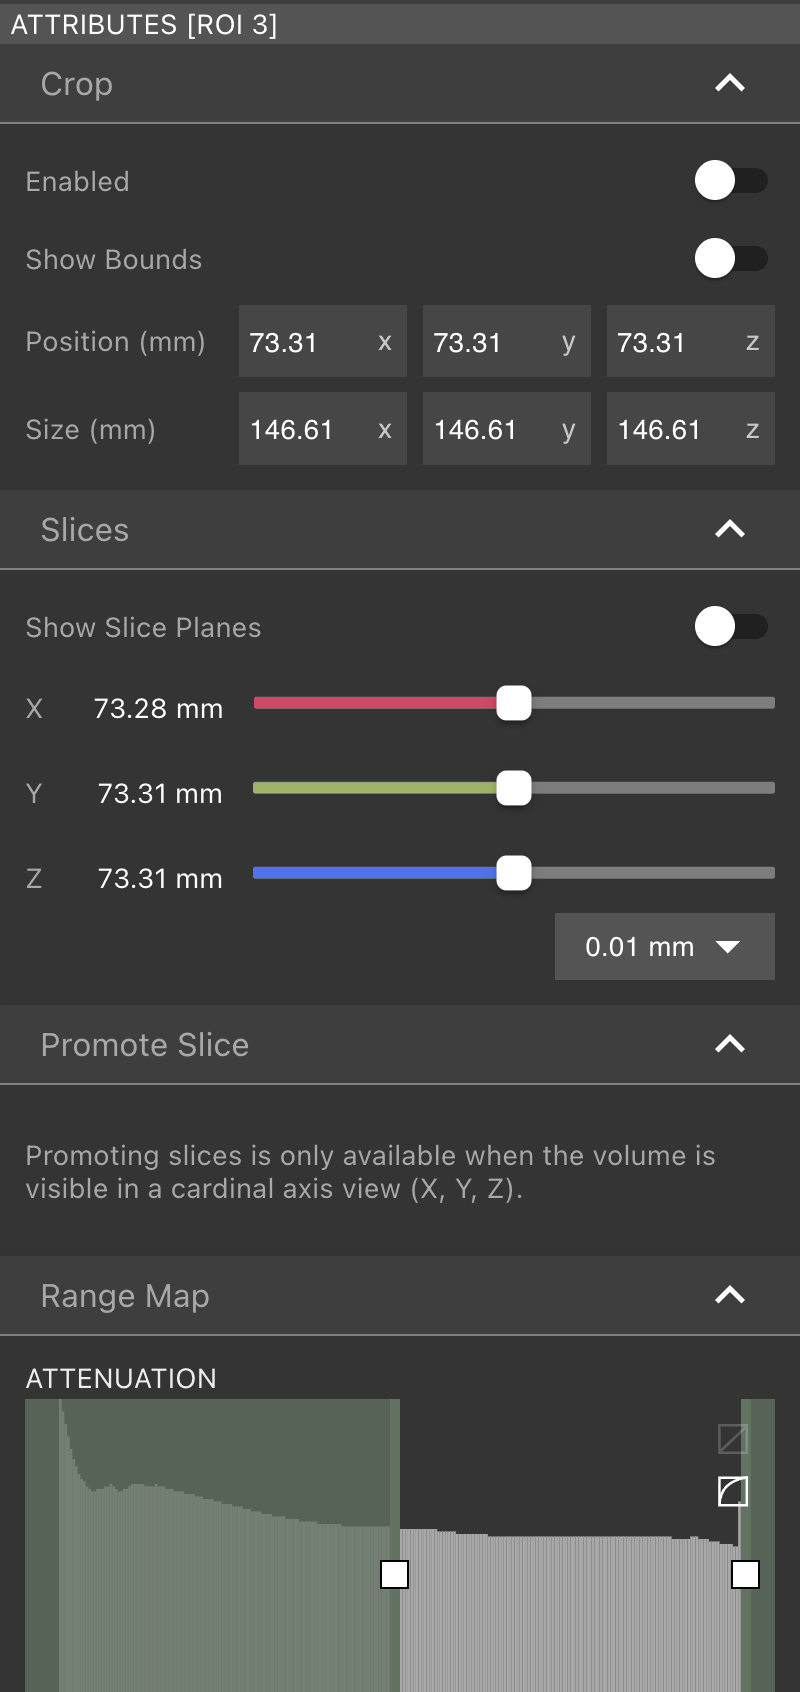 Attributes の詳細は [Data Objects + Workflows](/ja/voyager/voyager-data-objects-and-workflows) をご覧ください。
Workflow Editor
ROI、ポロシティ、クラック、Thickness、介在物の各ツールを選択すると、Workflow Editor が Project Editor 右側の Attributes Panel を置き換えます。ユーザーは進行中の [Workflows](/ja/voyager/voyager-data-objects-and-workflows) を切り替えても進捗を失いません。
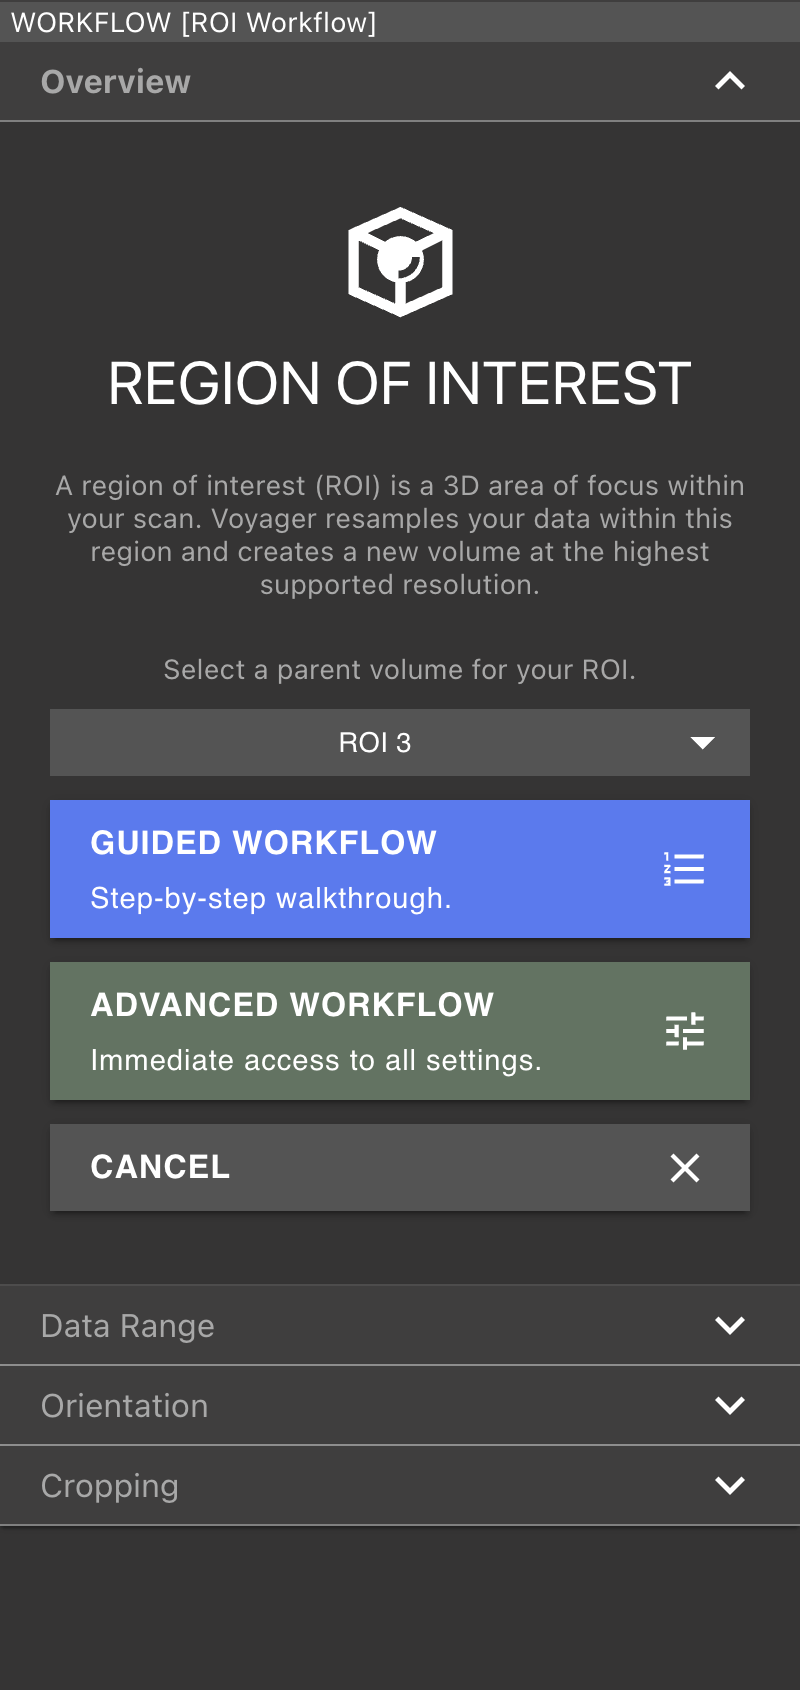
Navigation Bar
Project Editor 左上には、プロジェクト名の変更と [Project Dashboard](/ja/voyager/voyager-dashboard) への移動ツールがあります。
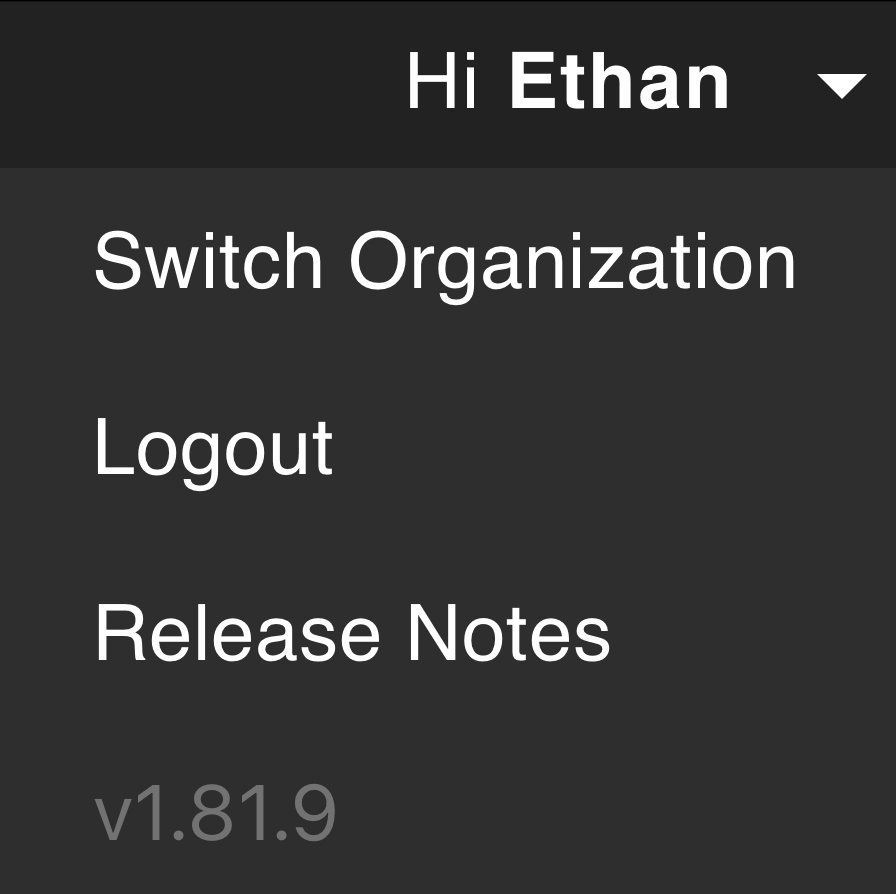
 Project Editor 右上のメニューから、別の [Organization](/ja/platform/organization-workspaces-and-members) への切り替え(複数の Organization に所属している場合)、ログアウト、[Voyager リリースノート](/ja/platform/voyager-release-notes) の表示、Voyager の現在のバージョン番号の確認ができます。
Help Panel
Project Editor 左下には、Voyager の AI アシスタントである Atlas の起動、フィードバック送信、サポートドキュメントを開くための操作があります。