> ## Documentation Index
> Fetch the complete documentation index at: https://support.lumafield.com/llms.txt
> Use this file to discover all available pages before exploring further.
# 検査平面(Inspection Planes)
> 3D データを固定平面として作成し、2D 測定を可能にする
検査平面は、スキャンの継続的な検査を行うための基盤です。Inspection Plane ツールを使って 2D 平面のデータを Data Object として固定し、測定と可視化に活用します。
**Reconstruction または ROI** の場合、Cardinal、Revolving、Custom Slice Plane から Inspection Plane を作成できます。**Mesh またはメッシュ比較** の場合は、Cardinal Slice のみから Inspection Plane を作成できます。
Inspection Plane の作成と寸法測定の手順は、Cardinal/Custom/Revolving Slice Plane いずれの場合も同じです。
検査平面の作成
1. 寸法測定したい Data Object(Reconstruction、ROI、Revolving/Custom Slice Plane、Mesh、メッシュ比較)を選択します。
2. Viewport パネルの任意の 2D ビュー、または分割ビューの場合は左側パネルを選択します。これは Cardinal 2D スライス軸、Revolving Slice Plane、Custom Slice Plane のいずれでも構いません。Revolving/Custom Slice Plane は Data Panel から直接選択することもできます。
3. Viewport 下部のスライダー、または Attributes Panel のスライダーでスライス位置を指定します。
4. Plane Tool を選択して現在の平面を固定し、新しい Inspection Plane Data Object を生成します。
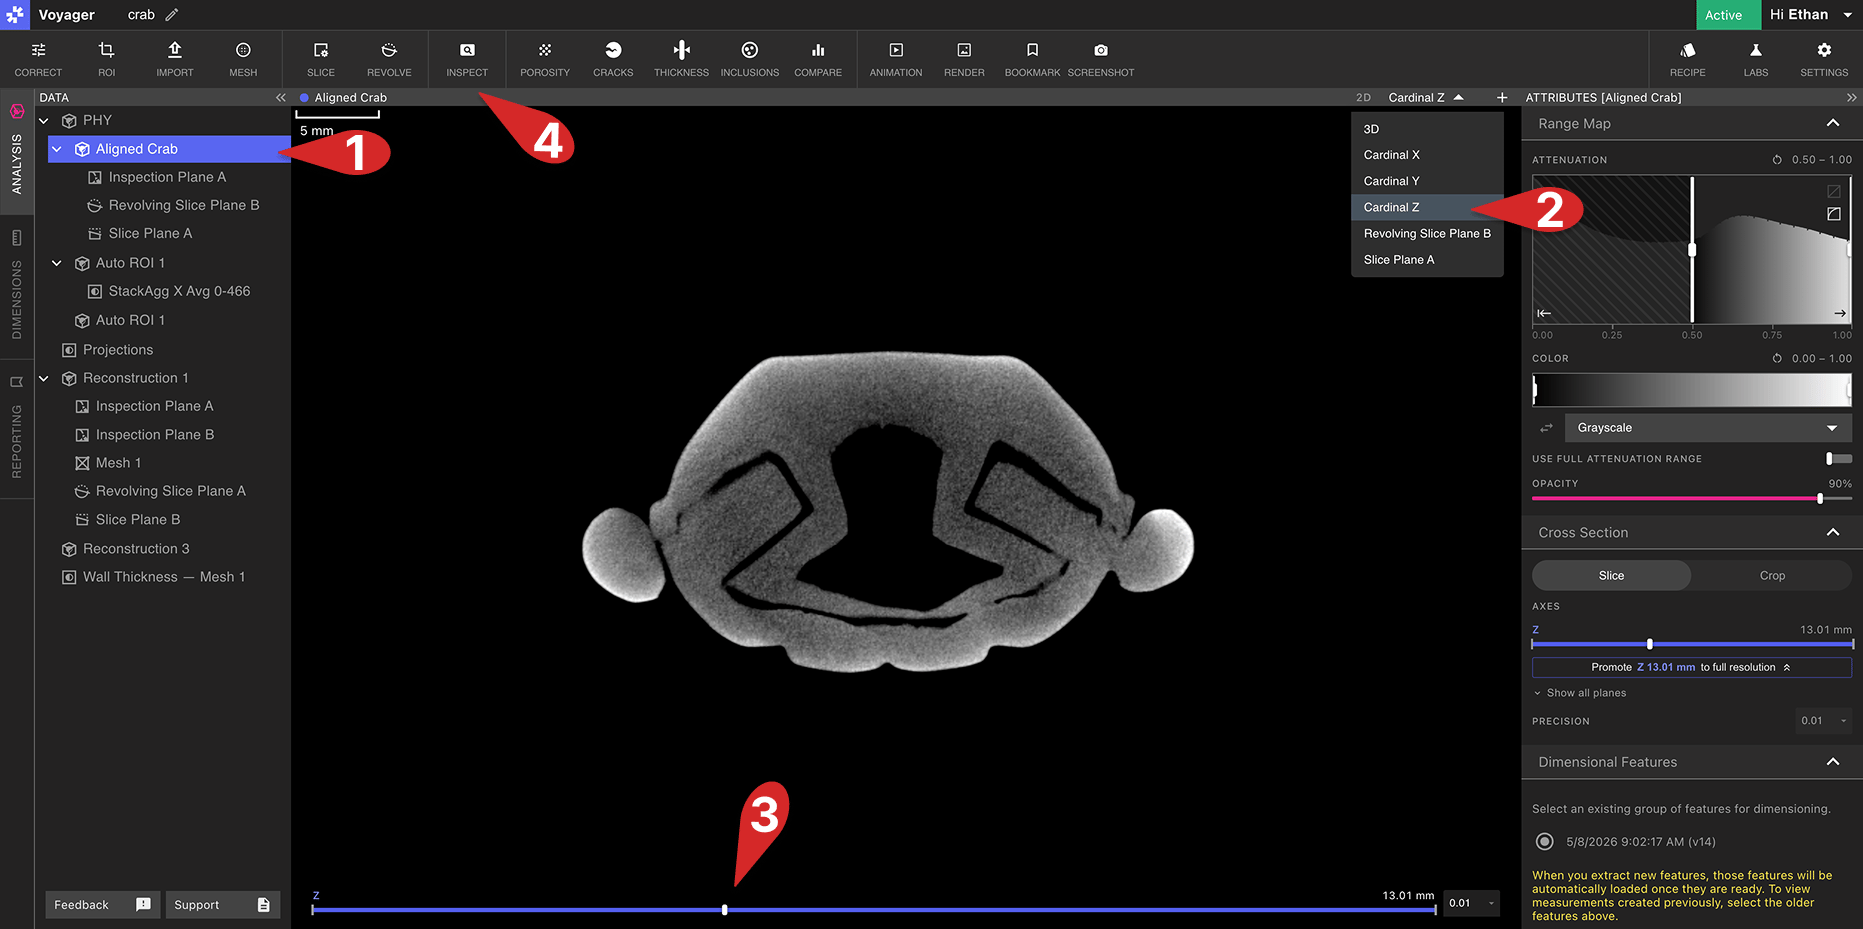 作成後は、Data Panel で直接選択するか、Viewport 右上の View ドロップダウンから選択して Inspection Plane にアクセスできます。
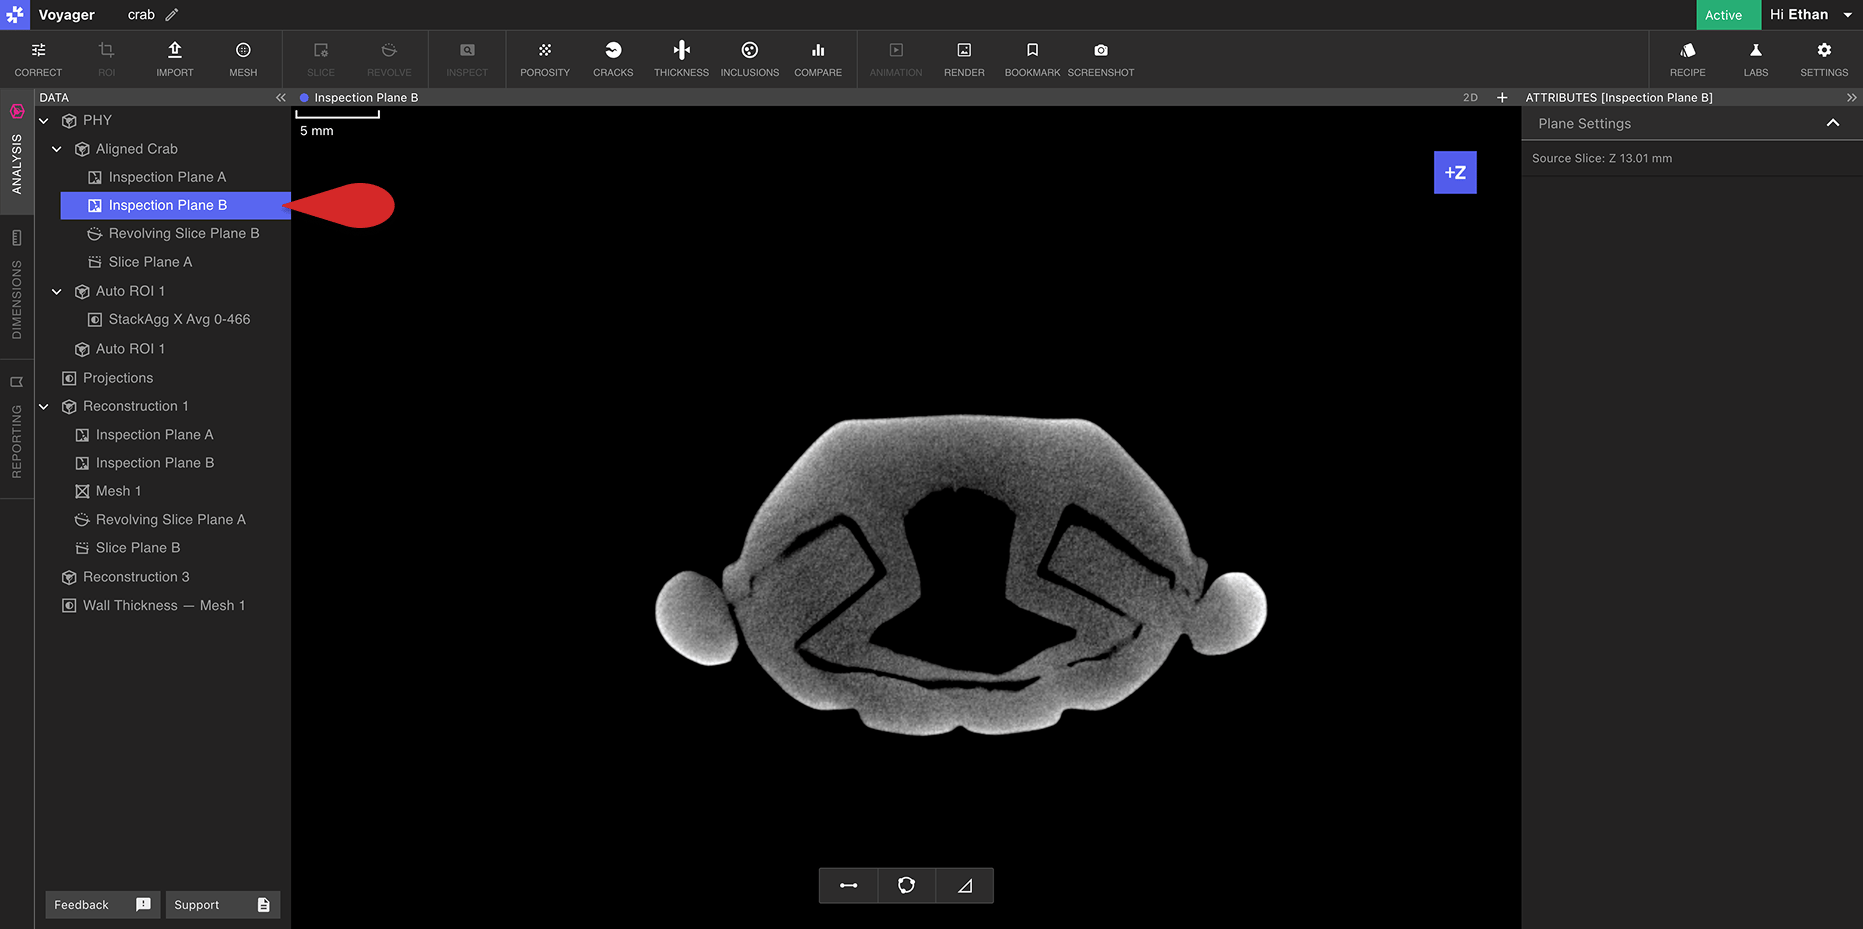
測定
Inspection Plane ではスキャンデータの 2D 測定が可能です。Inspection Plane 上での測定方法は [Measurement Tools](/ja/voyager/voyager-measurement-tools) を参照してください。