> ## Documentation Index
> Fetch the complete documentation index at: https://support.lumafield.com/llms.txt
> Use this file to discover all available pages before exploring further.
# レンダーツール(Render Tool)
> 共有しやすく、プレゼンやマーケティング素材に活用できる高品質な可視化画像を作成する
Render Tool は、Voyager プロジェクトからダウンロード可能な画像を生成します。以下のカスタマイズが可能です。
* ファイル形式: **PNG**、**JPEG**
* 透明背景トグル(PNG のみ)
* サイズ:
* 3840 x 2160(4K)
* 1920 x 1920(正方形)
* 1920 x 1080(標準)
* 1640 x 856(横長)
* 360 x 800(モバイル)
Render Tool を手動で使うだけでなく、[Recipes](/ja/recipes/recipes-intro) を設定して Render Bookmarks を自動生成することもできます。
スキャンデータの **動画** を生成する場合は [Animation Tool](/ja/voyager/voyager-animation-tool) を参照してください。
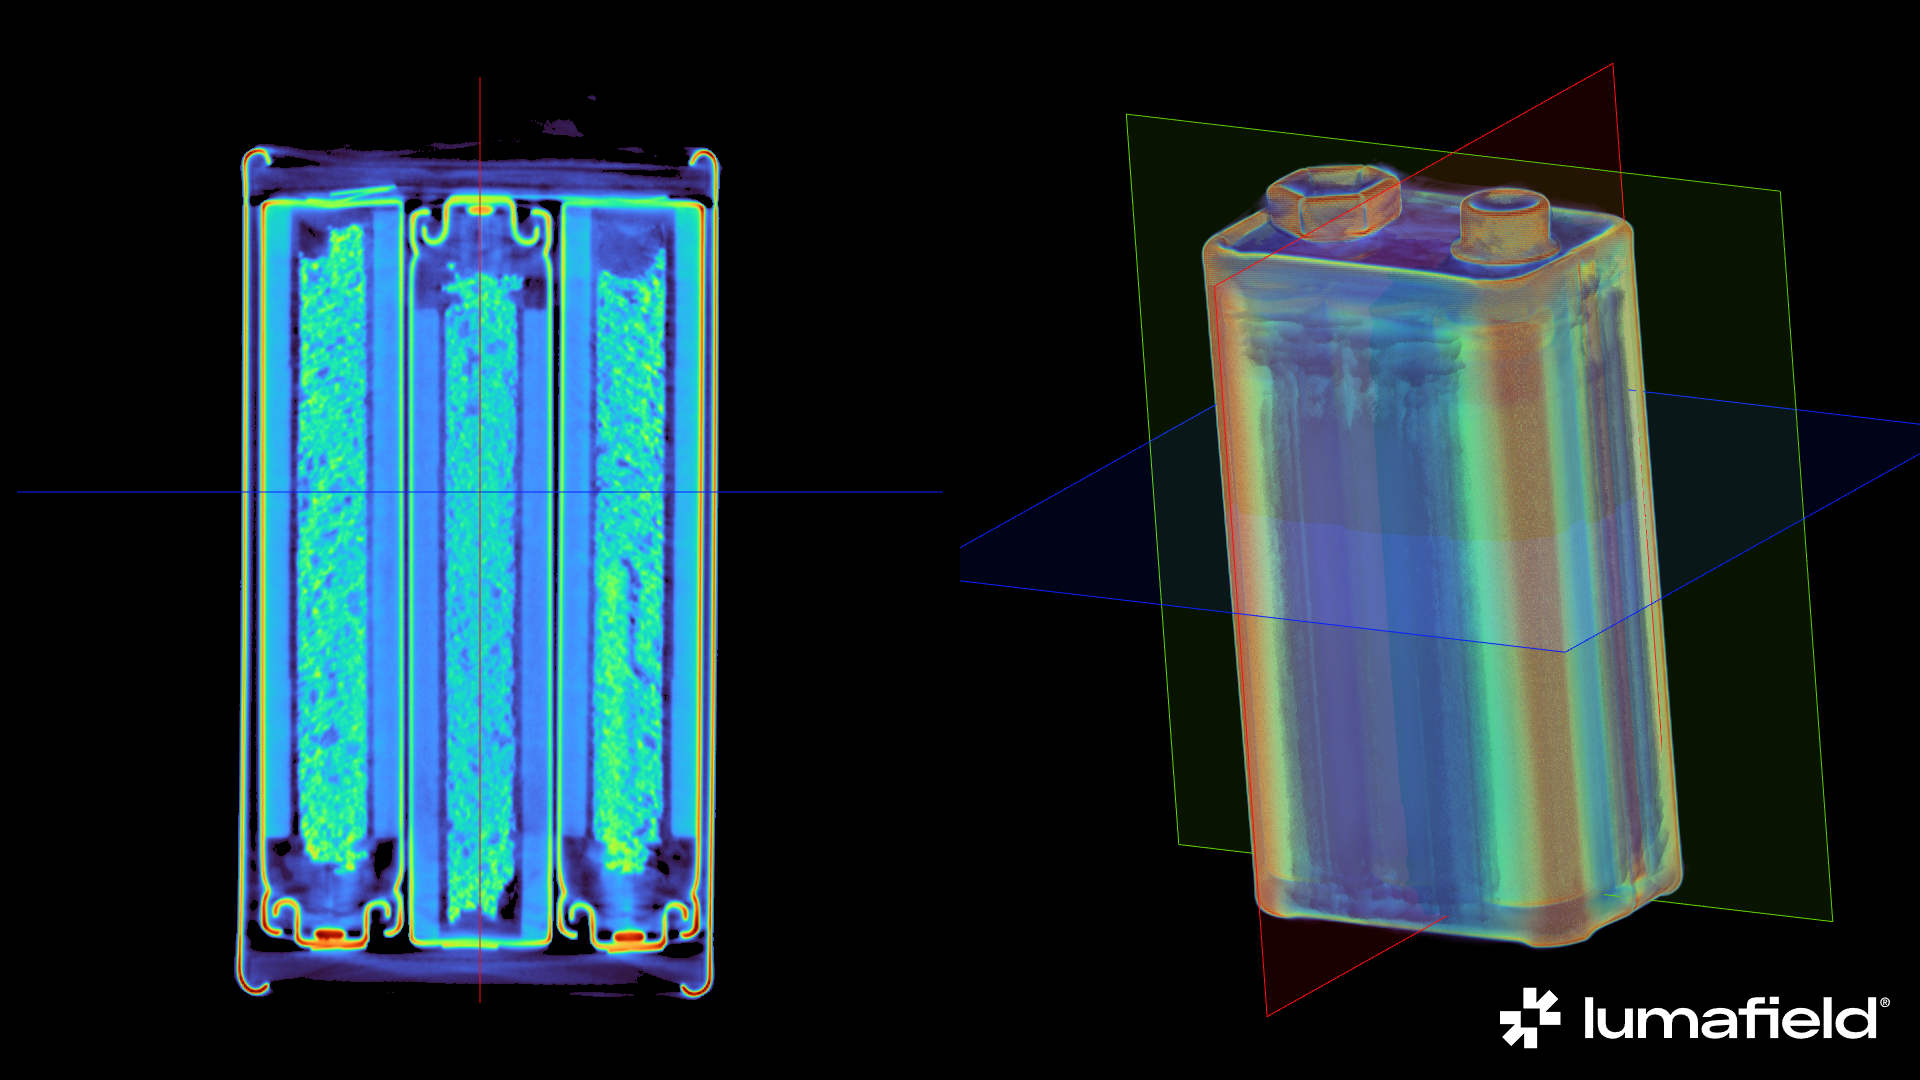 *Voyager から直接ダウンロードしたレンダーの例*
Render の作成
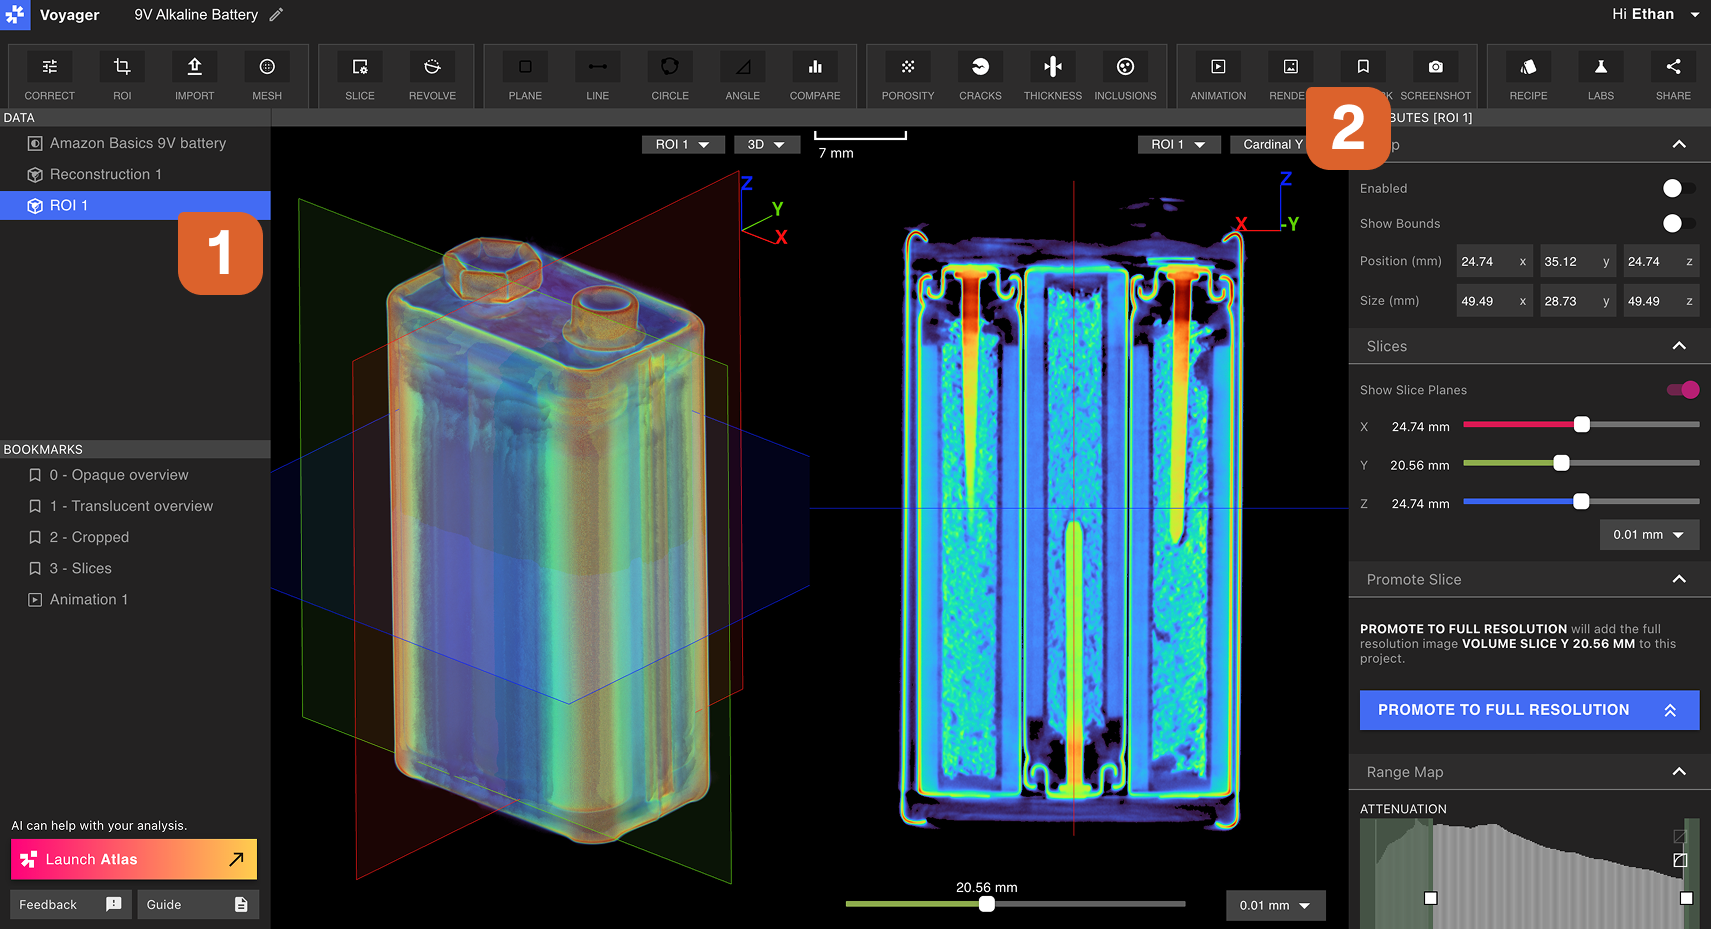
Data Panel の任意の Data Object、または Bookmarks Panel のブックマークオブジェクトを選択し、Toolbar から Render Tool を選択します。
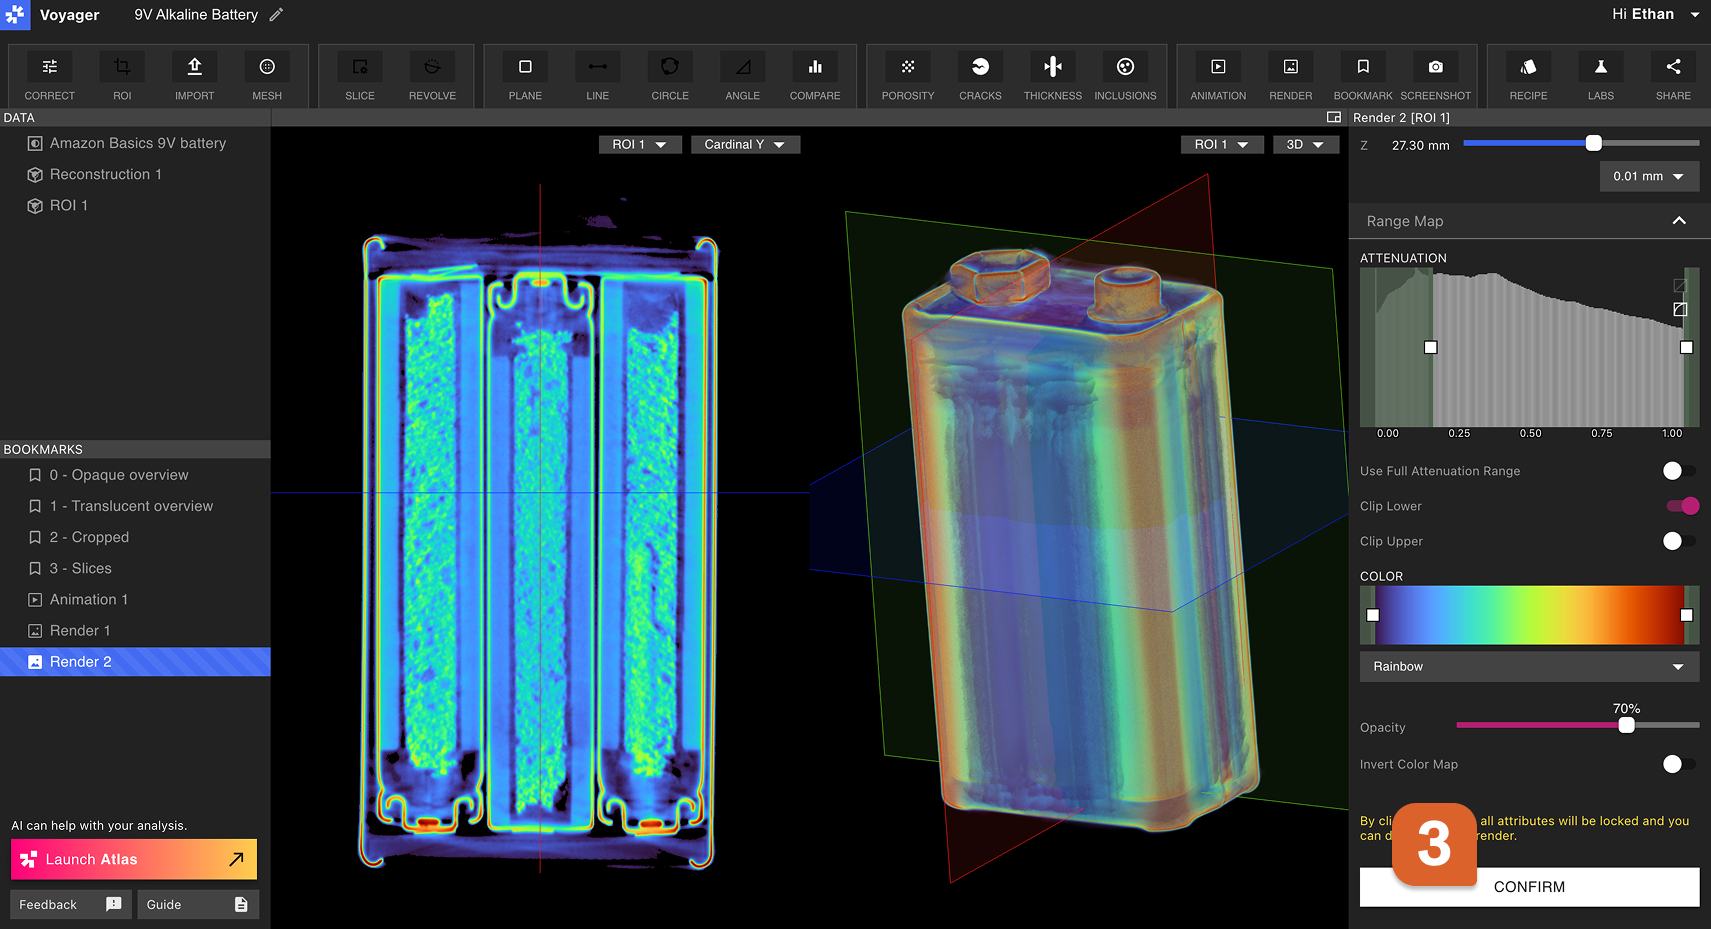
 Render Editor が右側パネルに表示されます。Crop、Slice、Range Map タブで可視化設定を選択し、Viewportで向きや視点を調整します。設定が完了したら Render Editor の Confirm を選択します。
Render の表示・ダウンロード・共有
新しく作成した Render は Bookmarks Panel から選択して開きます。
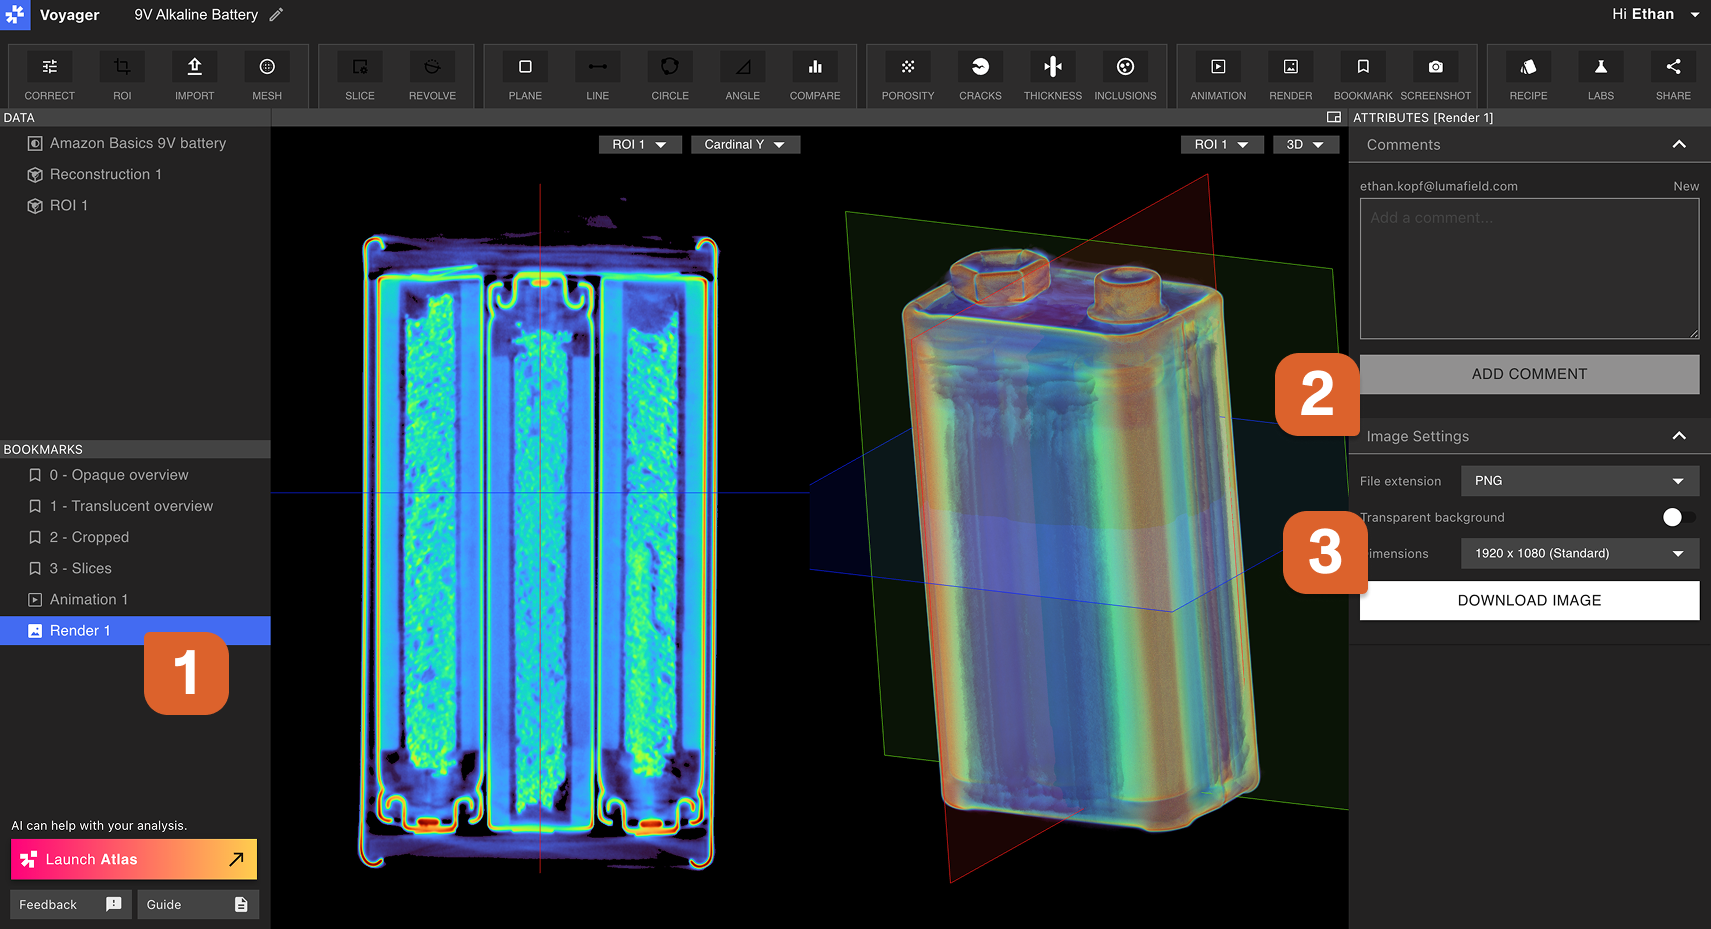 Render を **ダウンロード** するには、Attributes Panel の Image 設定タブで設定を選び、Generate Image を選択します。生成の進捗は Attributes Panel の Renders タブに表示されます。生成が完了すると自動的にダウンロードされます。
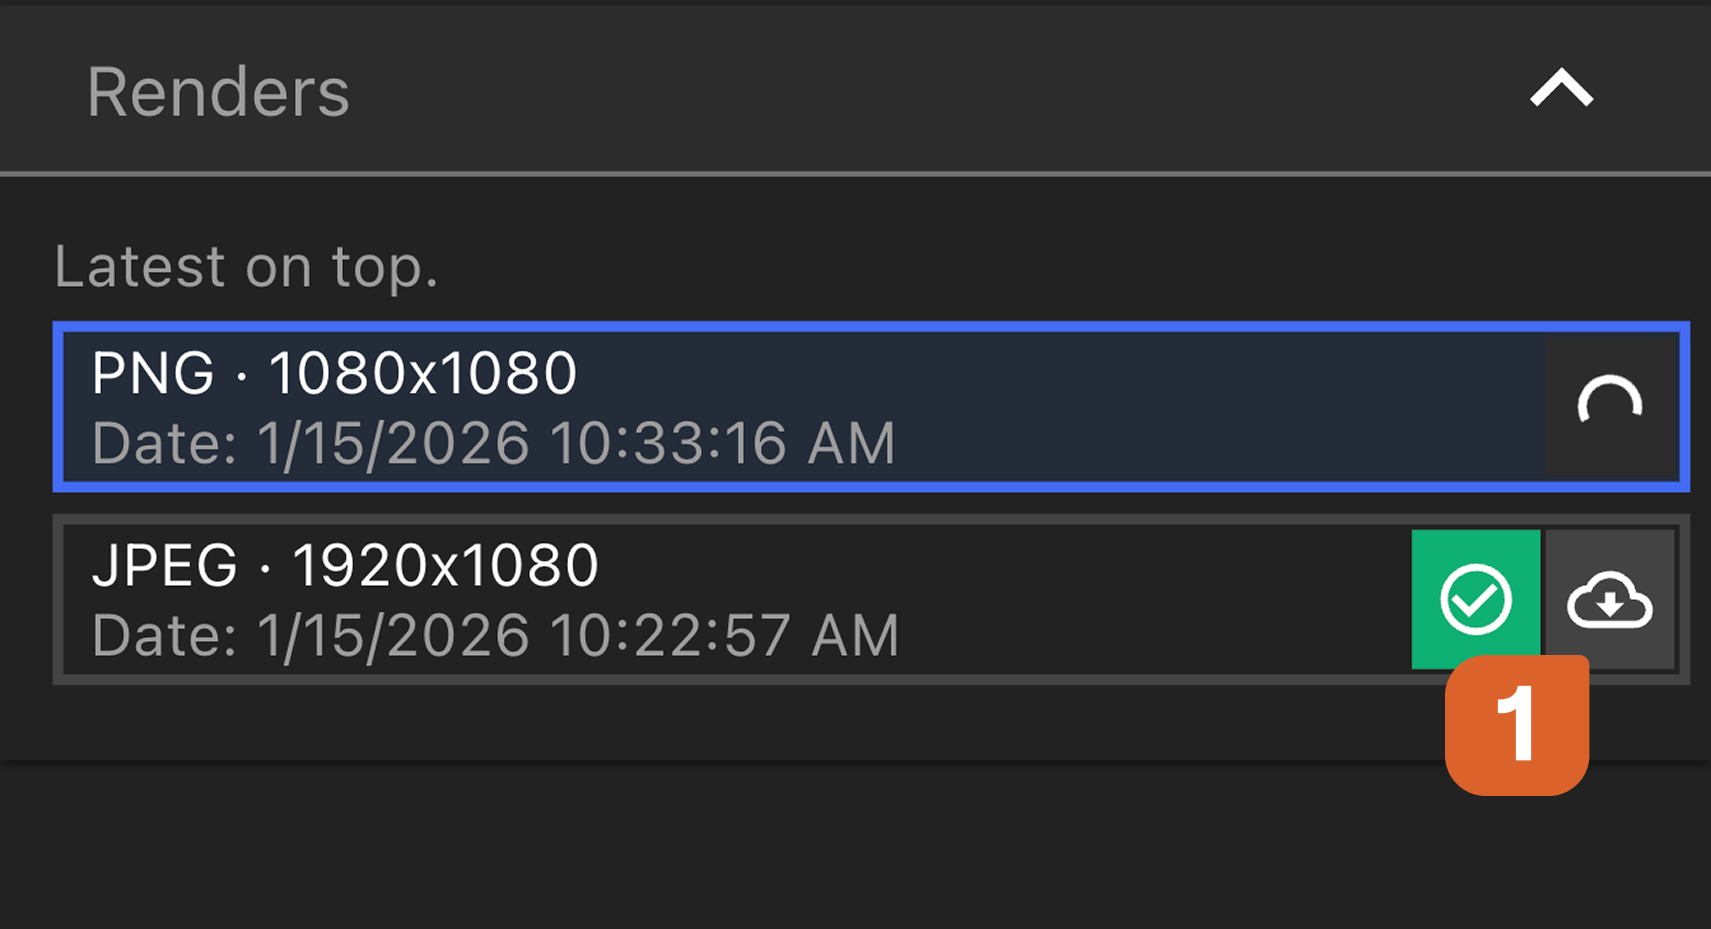 初回のダウンロードは時間がかかる場合がありますが、同じ設定での 2 回目以降は速くなります。
Render の **リンクをコピー** するには、Data Panel で Render を右クリックして Copy Link を選択します。受け取ったユーザーはプロジェクト内の Render ブックマークに直接アクセスできます。右クリックメニューから Render の **名前変更** や **削除** も可能です。
初回のダウンロードは時間がかかる場合がありますが、同じ設定での 2 回目以降は速くなります。
Render の **リンクをコピー** するには、Data Panel で Render を右クリックして Copy Link を選択します。受け取ったユーザーはプロジェクト内の Render ブックマークに直接アクセスできます。右クリックメニューから Render の **名前変更** や **削除** も可能です。