> ## Documentation Index
> Fetch the complete documentation index at: https://support.lumafield.com/llms.txt
> Use this file to discover all available pages before exploring further.
# 运行您的第一次扫描
> 在您的 Neptune 上设置扫描
介绍
Lumafield 的 Neptune 扫描仪为办公室、工厂或实验室环境提供了便捷的工作流程。通过触摸屏界面和附带的固定套件,任何人都可以快速准备和配置零件进行检测。按照以下步骤在您的 Neptune 上运行扫描。
扫描仪启动
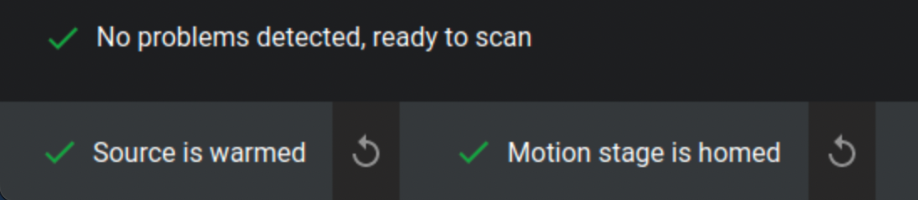
在开始之前,请确保扫描仪已正确归位和预热。如果这些步骤尚未完成,请参阅 [Neptune 机器初始化](/zh-Hans/neptune/neptune-initialization)指南。确认界面左下角显示绿色复选标记,表明系统已准备就绪。
运行扫描的四个步骤
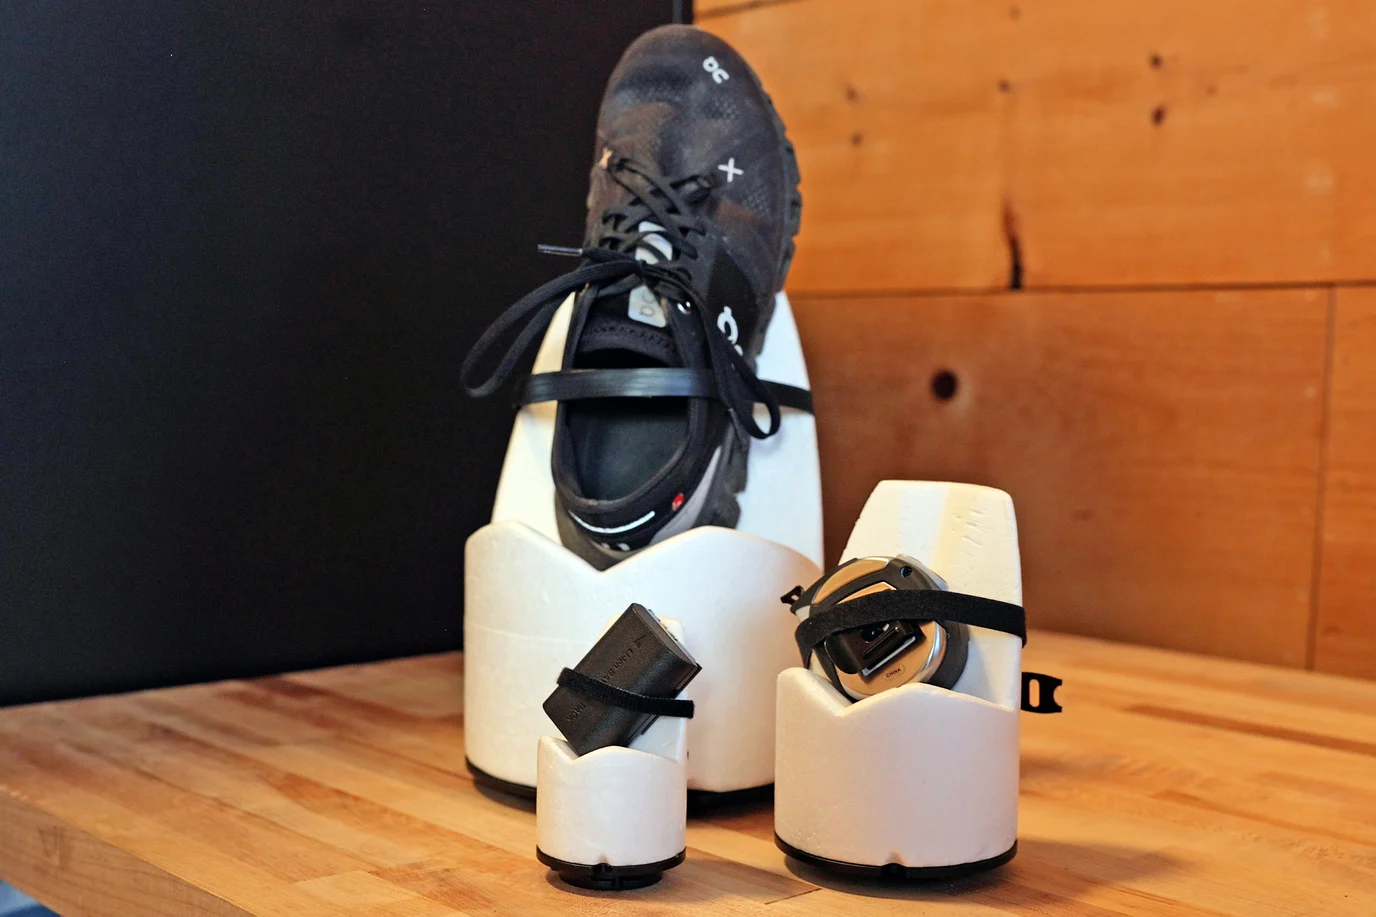 每台 Lumafield 扫描仪都包含一个专用固定套件。使用这些组件将您的零件抬高到旋转台上方并将其牢固固定。确保扫描时旋转台不在视野 (FOV) 范围内。
**固定最佳实践:**
* **重量限制:** 旋转台支持的最大样品重量为 5 kg(11 磅)。
* **密度:** 使用低密度固定材料(如泡沫)以便在分析过程中更容易隔离您的零件。
* **方向:** 倾斜平坦表面以减少扫描伪影并提高图像质量。
* **稳定性:** 确保零件完全静止以防止运动相关错误。
* **定制:** 使用 ¼-20 螺纹底板设计适合您零件几何形状的定制构建板。
请参阅 [Neptune 固定指南](/zh-Hans/neptune/neptune-fixturing-guide)了解更多详情。
每台 Lumafield 扫描仪都包含一个专用固定套件。使用这些组件将您的零件抬高到旋转台上方并将其牢固固定。确保扫描时旋转台不在视野 (FOV) 范围内。
**固定最佳实践:**
* **重量限制:** 旋转台支持的最大样品重量为 5 kg(11 磅)。
* **密度:** 使用低密度固定材料(如泡沫)以便在分析过程中更容易隔离您的零件。
* **方向:** 倾斜平坦表面以减少扫描伪影并提高图像质量。
* **稳定性:** 确保零件完全静止以防止运动相关错误。
* **定制:** 使用 ¼-20 螺纹底板设计适合您零件几何形状的定制构建板。
请参阅 [Neptune 固定指南](/zh-Hans/neptune/neptune-fixturing-guide)了解更多详情。
 **可选:** 设置一个分析方案以在扫描完成后运行。
**重要:** 请在门打开的状态下执行此步骤。否则会显著增加机械碰撞的风险,可能导致 X 射线源或探测器严重损坏。
在扫描仪门打开的情况下,将固定装置固定到旋转台上并逐渐增加放大倍率。定期进行完整的 360° 旋转,以验证零件和固定装置与 X 射线源、滤光轮和探测器之间保持足够的间距。
**Neptune Microfocus 演示**
**可选:** 设置一个分析方案以在扫描完成后运行。
**重要:** 请在门打开的状态下执行此步骤。否则会显著增加机械碰撞的风险,可能导致 X 射线源或探测器严重损坏。
在扫描仪门打开的情况下,将固定装置固定到旋转台上并逐渐增加放大倍率。定期进行完整的 360° 旋转,以验证零件和固定装置与 X 射线源、滤光轮和探测器之间保持足够的间距。
**Neptune Microfocus 演示**
 **Neptune Standard & High Power 演示**
 设置好放大倍率后,关闭扫描仪门并启用 X 射线。选择"VERIFY BOUNDS"以确保零件保持在 FOV 内。如果零件的任何部分超出画面,它将不会出现在扫描中。为避免这种情况,请降低放大倍率并重复验证过程,直到整个零件成功包含在 FOV 内。
 **可选:** 拥有 [Expanded Volume Module](/zh-Hans/neptune/neptune-expanded-volume) 的用户可以使用偏移滑块,允许物体的部分超出画面,同时仍确保完整重建。请参阅 [Neptune 定位指南](/zh-Hans/neptune/neptune-positioning-guide)了解更多信息。
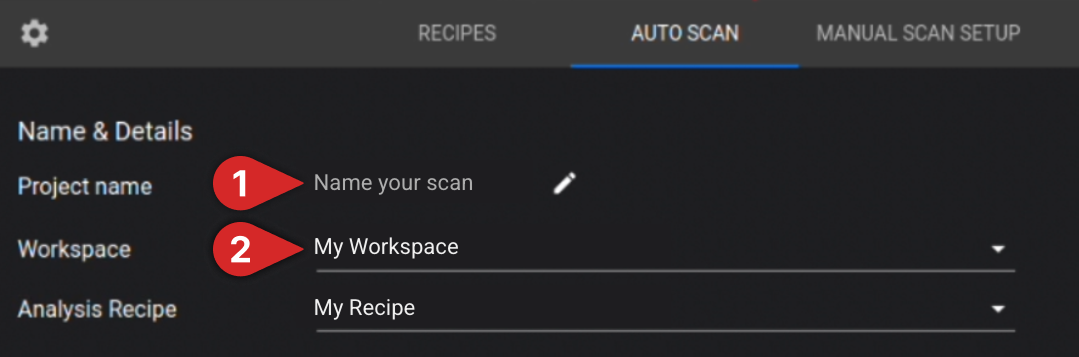
开始扫描前必须选择以下自动扫描设置:
* **选择材料类型:** 指定您的零件是"Mono-material"还是"Multi-material"
* **设置扫描时间:** 使用滑块或手动输入所需时间来调整扫描持续时间
**可选:** 拥有 [Expanded Volume Module](/zh-Hans/neptune/neptune-expanded-volume) 的用户可以使用偏移滑块,允许物体的部分超出画面,同时仍确保完整重建。请参阅 [Neptune 定位指南](/zh-Hans/neptune/neptune-positioning-guide)了解更多信息。
开始扫描前必须选择以下自动扫描设置:
* **选择材料类型:** 指定您的零件是"Mono-material"还是"Multi-material"
* **设置扫描时间:** 使用滑块或手动输入所需时间来调整扫描持续时间
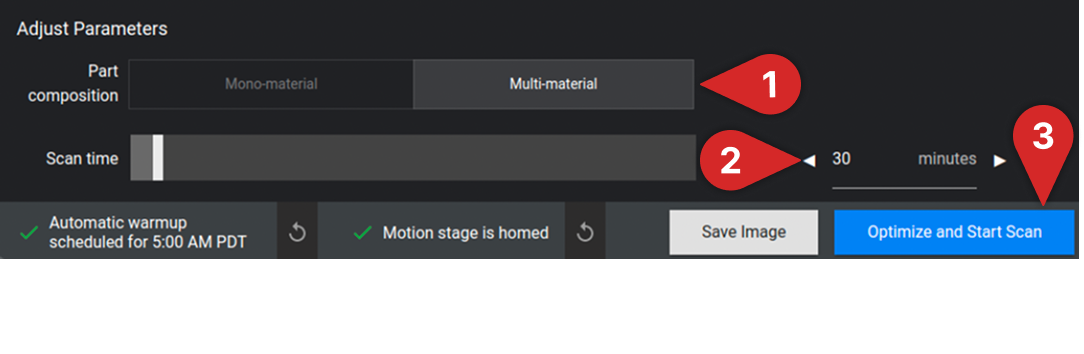 **注意:** 增加扫描时间通常可以提高扫描质量。
选择"Optimize and Start Scan"开始扫描!
有关如何配置扫描设置的更多信息,请阅读 [Neptune 自动扫描设置指南](/zh-Hans/neptune/neptune-auto-scan-settings-guide)。
**注意:** 增加扫描时间通常可以提高扫描质量。
选择"Optimize and Start Scan"开始扫描!
有关如何配置扫描设置的更多信息,请阅读 [Neptune 自动扫描设置指南](/zh-Hans/neptune/neptune-auto-scan-settings-guide)。