> ## Documentation Index
> Fetch the complete documentation index at: https://support.lumafield.com/llms.txt
> Use this file to discover all available pages before exploring further.
# 界面导览
> Voyager 项目编辑器的组成部分
Voyager Project 编辑器是 Voyager 的核心工具,用于分析来自 Neptune 或 Triton 扫描仪的扫描。本文介绍了 Project 编辑器的各个部分及其使用方法。
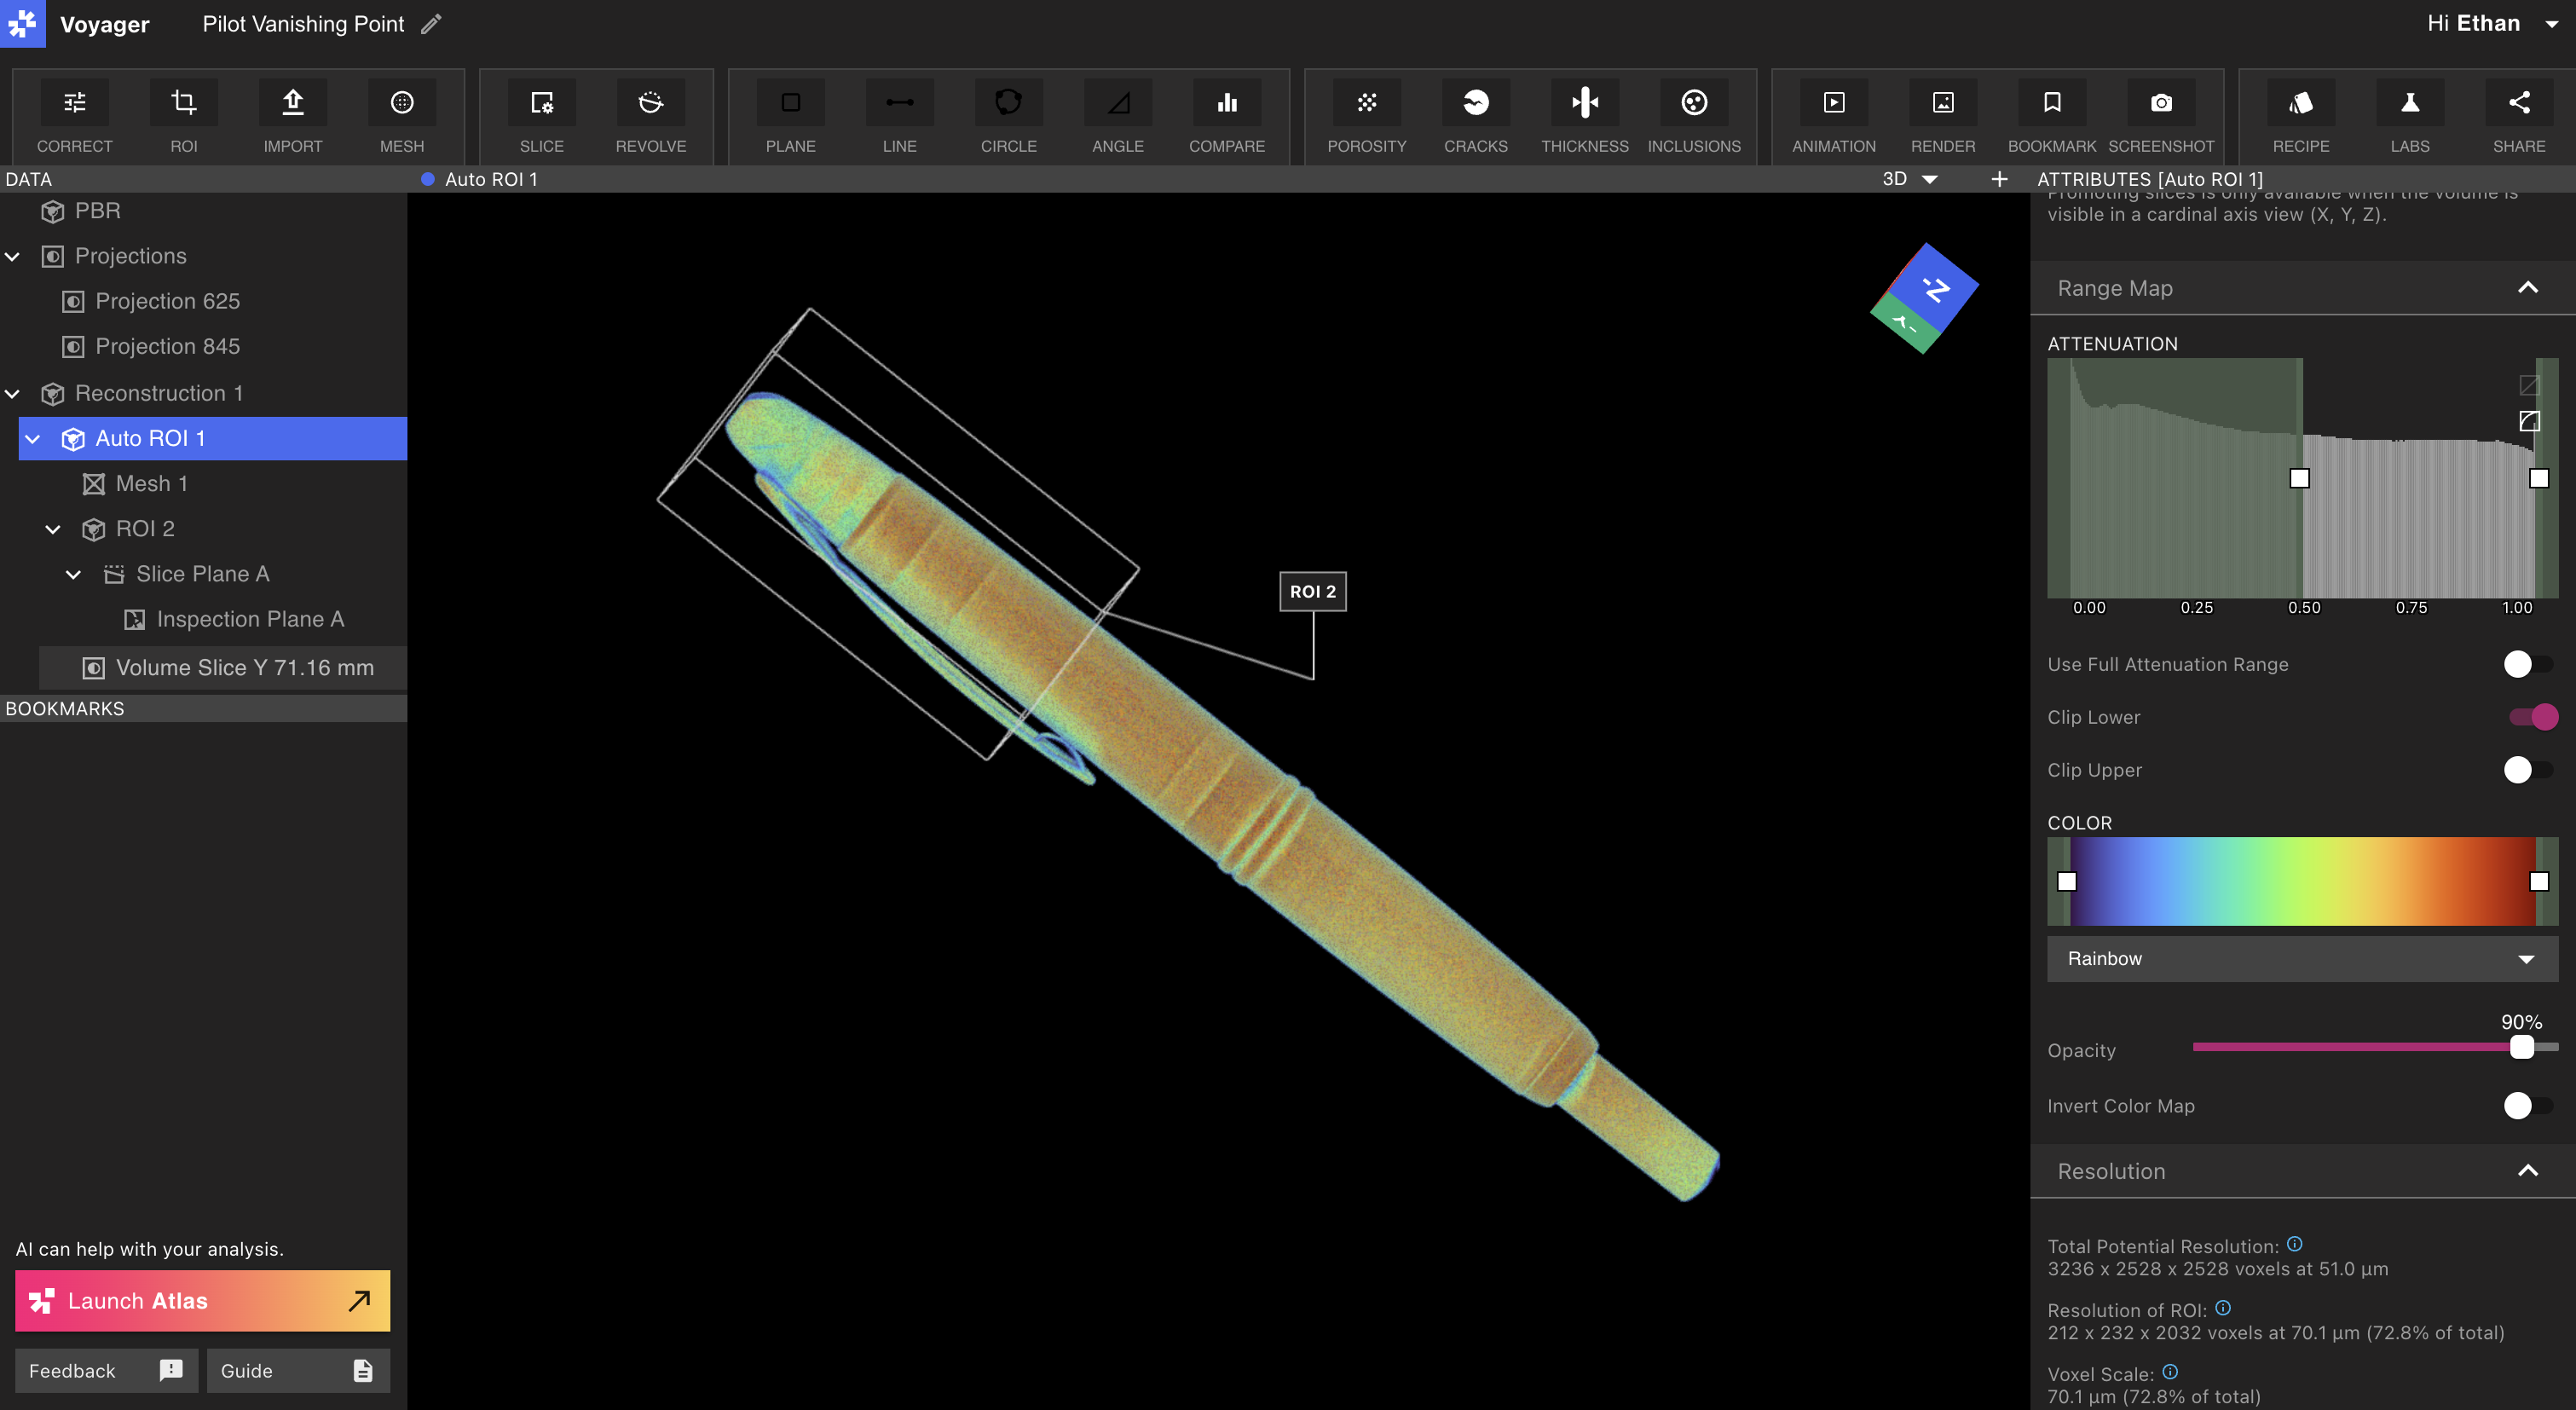
Viewport
Viewport 占据 Project 编辑器的大部分并显示选定的扫描数据。
Viewport 布局
Voyager 的中央面板可以配置为显示一个**单个** Viewport 或两个**分割** Viewport。默认情况下,Voyager 的中央面板显示单个 Viewport。
**单一 Viewport:** 使用单一 Viewport 在屏幕上以大尺寸查看一个数据对象。通过从[数据面板](/zh-Hans/voyager/voyager-getting-around#data-panel)中选择数据对象来更改当前对象。
**分割 Viewport:** 打开第二个 Viewport 以并排查看两个数据对象或同一数据对象的不同视图。选择 Viewport 右上角的“+”图标可从单个 Viewport 切换到分割 Viewport 布局。
Viewport 焦点(新!)
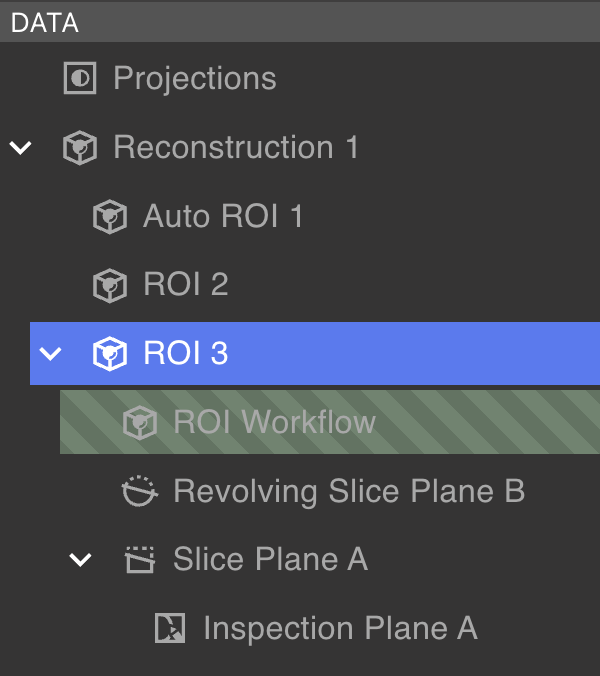
在分割 Viewport 布局中,单个 Viewport 一次保持\_聚焦\_状态,如 Viewport 顶部突出显示的条所示(下图中的“Mesh 1”)。 Voyager 右侧的[属性面板](/zh-Hans/voyager/voyager-getting-around#attributes-panel) 显示聚焦 Viewport 的属性。
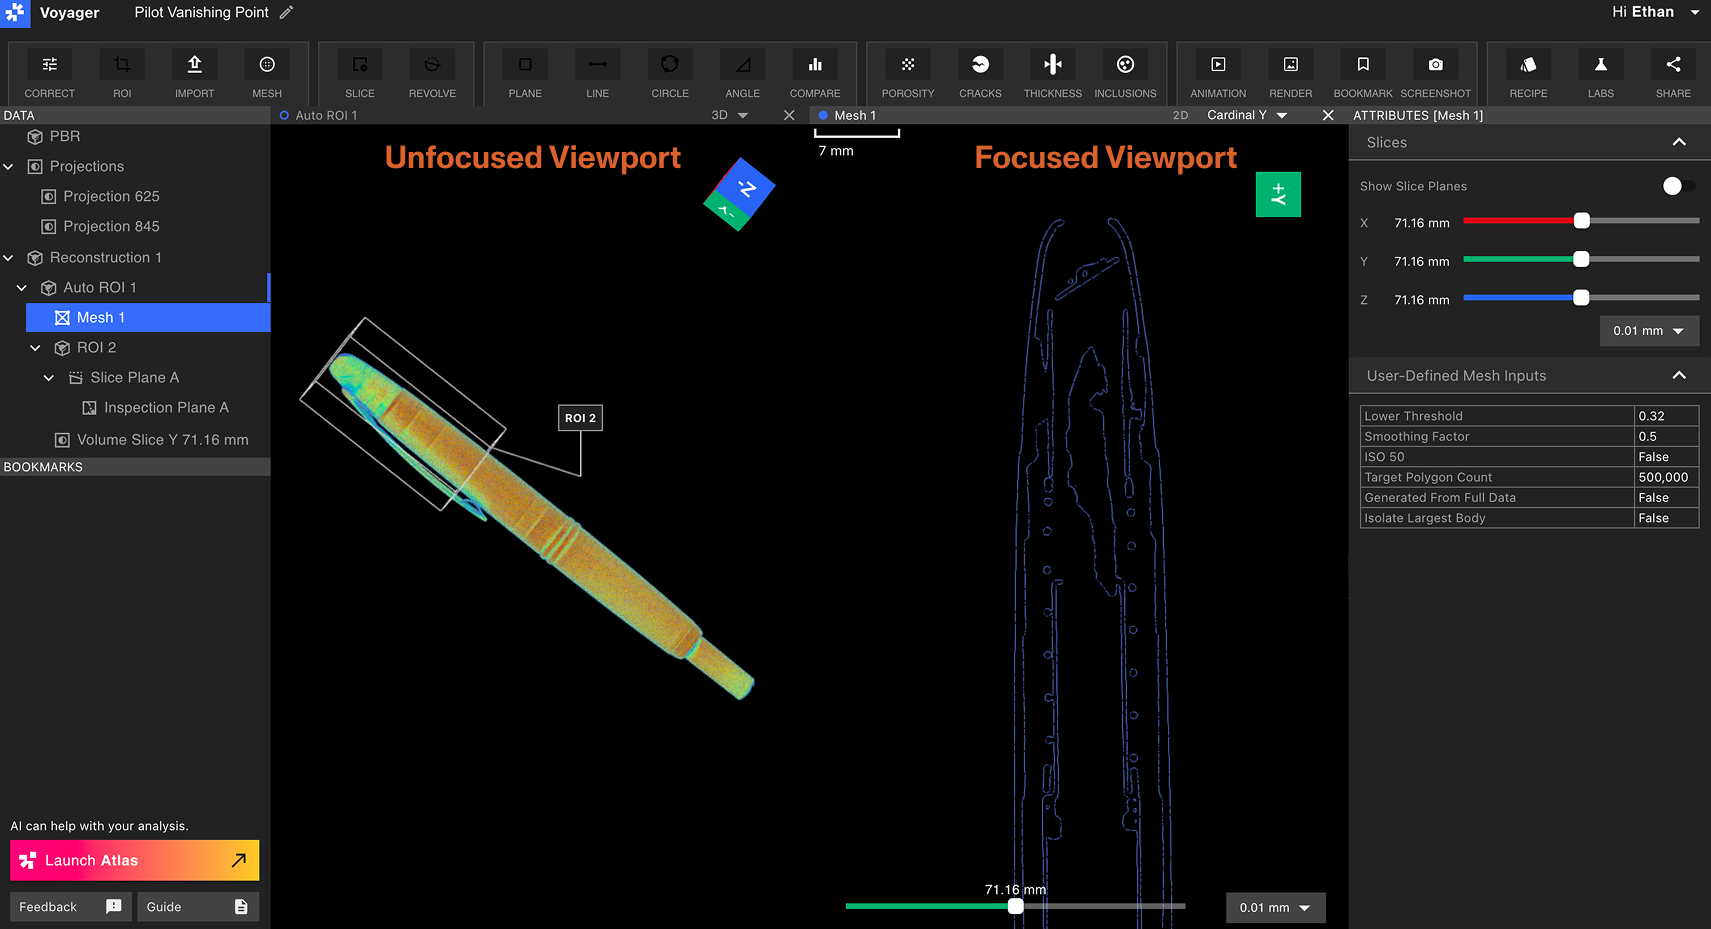 通过选择该 Viewport 中的任意位置来选择要聚焦的 Viewport。由聚焦 Viewport(上图中的“Mesh 1”)表示的数据对象将在数据面板中以蓝色突出显示,而\_unfocused\_ Viewport 中的数据对象(上图中的“Auto ROI 1”)在数据面板中显示一个小的蓝色标记。
要退出分割 Viewport 布局,请选择任一打开的 Viewport 右上角的“X”图标将其关闭并返回到单个 Viewport 布局。
通过选择该 Viewport 中的任意位置来选择要聚焦的 Viewport。由聚焦 Viewport(上图中的“Mesh 1”)表示的数据对象将在数据面板中以蓝色突出显示,而\_unfocused\_ Viewport 中的数据对象(上图中的“Auto ROI 1”)在数据面板中显示一个小的蓝色标记。
要退出分割 Viewport 布局,请选择任一打开的 Viewport 右上角的“X”图标将其关闭并返回到单个 Viewport 布局。
2D 和 3D 视图
当选择重建、ROI、切片平面、Mesh 或 Analysis 结果数据对象时,可以使用 Viewport 面板右上角的下拉菜单切换 2D 和 3D 模式。
2D 视图
在 2D 视图中,用户可以平移、拖动和缩放。 2D 视图包括默认的 X、Y 和 Z 基轴,以及在 Project 中创建的任何切片平面。
在 Viewport 中单击并拖动以进行平移。使用鼠标或触控板控件进行放大和缩小。
使用 Viewport 下方的滑块来浏览 2D 视图的切片。相邻的下拉菜单更改切片精度,左上角的比例尺表示视图中数据的比例。

3D 视图
在 3D 视图中,用户可以旋转和缩放。通过在 Viewport 中单击并拖动来旋转。
Viewcube
在 Viewport 中单击并拖动以绕行旋转零件时,Viewcube 会绕行旋转以匹配零件的当前方向。 Viewcube 还包括用于精确选择零件所需方向的控件。
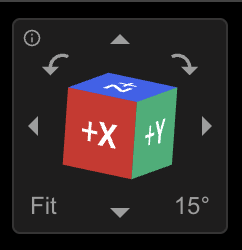 \*\*基数箭头:\*\*沿选定方向绕 Viewport 旋转 Viewcube 右下角指定的量。
**左/右弯曲箭头:** 将 Viewport 沿选定方向滚动 Viewcube 右下角指定的量。
\*\*度数刻度(右下):\*\*切换轨道和滚动动作的灵敏度。
\*\*适合(左下角):\*\*缩放 Viewport 中的数据,使零件完全适合视图。
**帮助(左上)**:将鼠标悬停在“i”图标上可查看 Viewcube 的键盘快捷键。
\*\*基数箭头:\*\*沿选定方向绕 Viewport 旋转 Viewcube 右下角指定的量。
**左/右弯曲箭头:** 将 Viewport 沿选定方向滚动 Viewcube 右下角指定的量。
\*\*度数刻度(右下):\*\*切换轨道和滚动动作的灵敏度。
\*\*适合(左下角):\*\*缩放 Viewport 中的数据,使零件完全适合视图。
**帮助(左上)**:将鼠标悬停在“i”图标上可查看 Viewcube 的键盘快捷键。
数据面板
数据面板出现在 Project 编辑器左侧的“数据”标签下方。数据面板中的每个项目代表一个数据对象,可以是以下之一:Projections、重建、ROI、平面或 Analysis 结果。有关数据对象的更多信息,请参阅[数据对象 + 工作流程](/zh-Hans/voyager/voyager-data-objects-and-workflows)一文。
 数据对象以树形结构排列在数据面板内,其中一些数据对象包含子数据对象。使用父数据对象旁边的插入符号来展开或折叠其子对象。选择数据对象会在 Viewport 中显示其数据。
以绿色条纹突出显示的数据对象是正在进行的数据对象,表示[工作流程](/zh-Hans/voyager/voyager-data-objects-and-workflows)正在进行中。一旦工作流程提交但尚未完成,处理数据对象将不会出现在数据面板中。
数据对象以树形结构排列在数据面板内,其中一些数据对象包含子数据对象。使用父数据对象旁边的插入符号来展开或折叠其子对象。选择数据对象会在 Viewport 中显示其数据。
以绿色条纹突出显示的数据对象是正在进行的数据对象,表示[工作流程](/zh-Hans/voyager/voyager-data-objects-and-workflows)正在进行中。一旦工作流程提交但尚未完成,处理数据对象将不会出现在数据面板中。
数据面板控件
右键单击数据对象可将其删除或重命名。
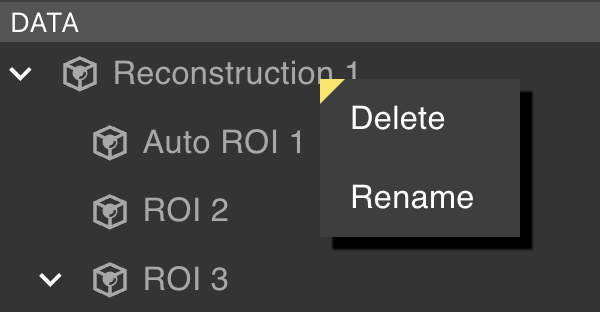 无法删除具有子项的数据对象。在删除父数据对象之前删除所有子数据对象。
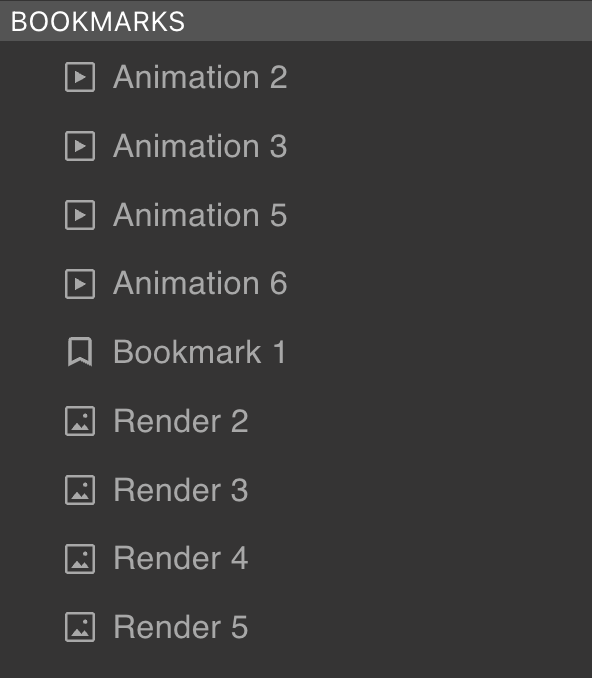
书签面板
书签面板位于数据面板下方。它包含书签、渲染和动画。右键单击任何项目可删除、重命名或复制书签对象的链接。协作者必须具有 Project 访问权限才能查看共享书签链接。
 工具栏显示在 Project 编辑器的顶部。可用于所选数据对象的工具会突出显示;不可用的工具显示为灰色,因为某些工具仅对特定数据对象类型起作用。
 选择工具可以执行以下操作之一:
* 创建一个新的数据对象
* 创建一个新的书签对象
* 在属性面板中显示新属性
* 打开工作流程编辑器
选择工具可以执行以下操作之一:
* 创建一个新的数据对象
* 创建一个新的书签对象
* 在属性面板中显示新属性
* 打开工作流程编辑器
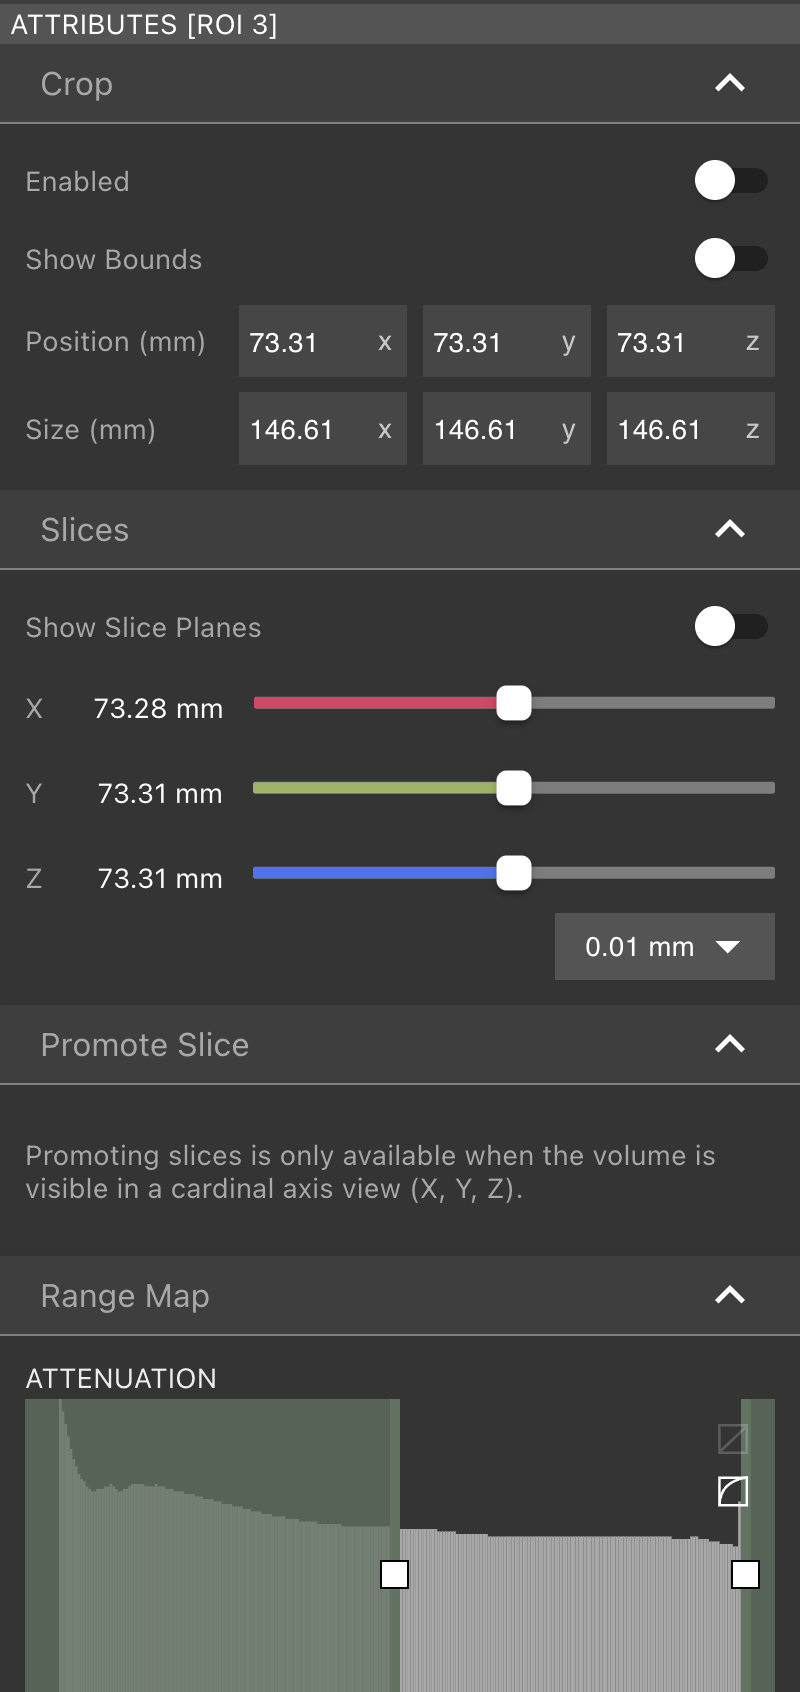
属性面板
Project 编辑器右侧的属性面板显示所选数据对象的属性和可视化设置。可用属性因数据对象类型而异。
 有关属性的更多详细信息,请参阅[数据对象 + 工作流程](/zh-Hans/voyager/voyager-data-objects-and-workflows) 页面。
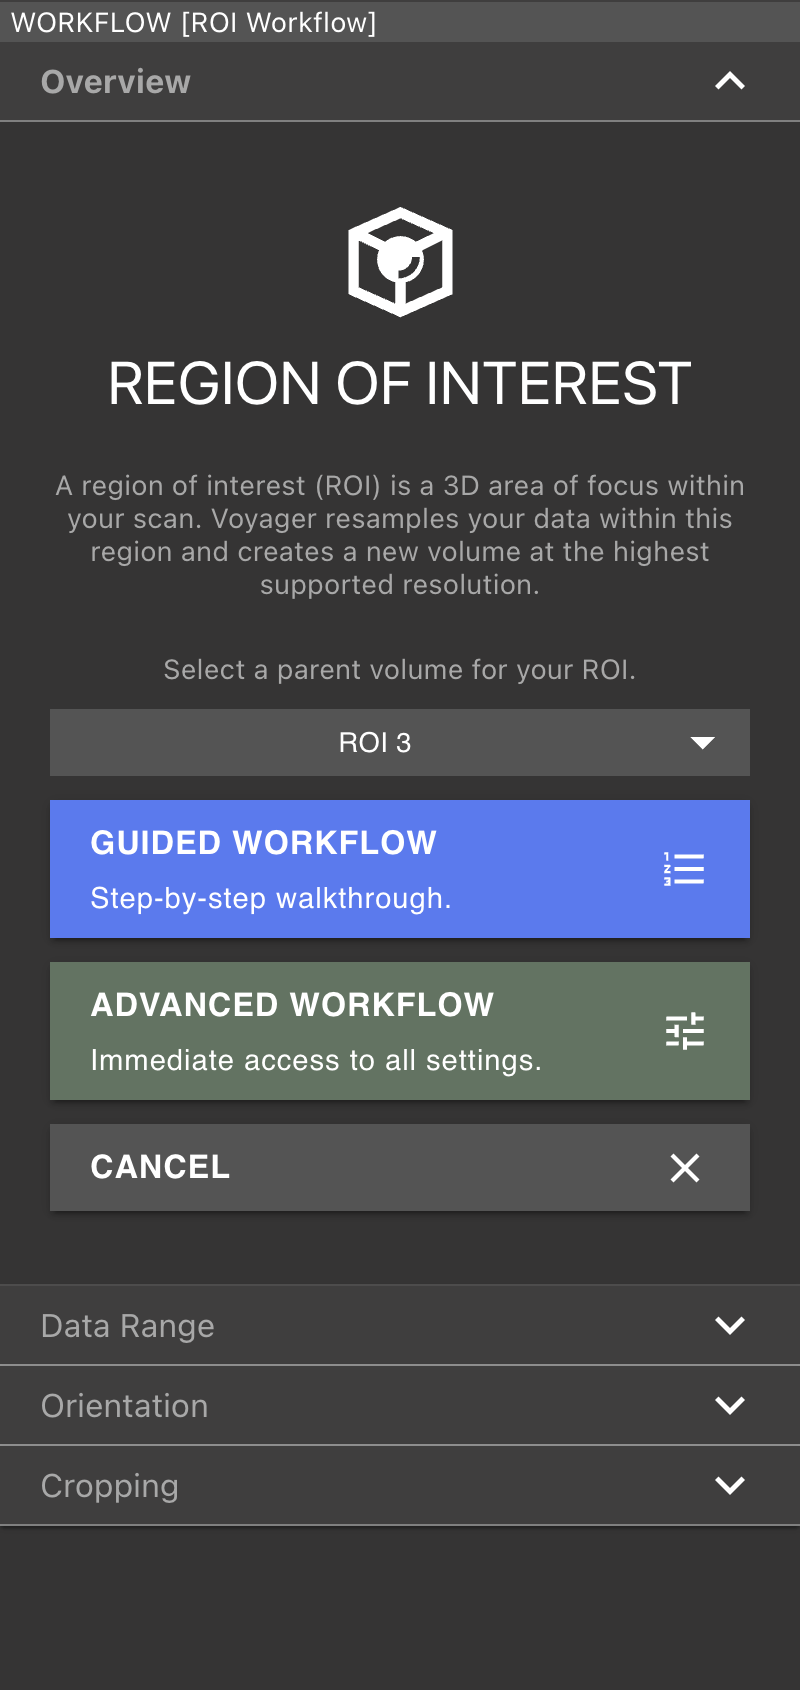
工作流程编辑器
选择 ROI、孔隙度、裂纹、厚度或夹杂物工具时,工作流程编辑器将替换 Project 编辑器右侧的属性面板。用户可以在活动的[工作流程](/zh-Hans/voyager/voyager-data-objects-and-workflows)之间切换,而不会丢失进度。
导航栏
在 Project 编辑器的左上角,可以使用工具来重命名 Project 并导航回 [Project Dashboard](/zh-Hans/voyager/voyager-dashboard)。
 选择Project编辑器右上角的菜单切换到另一个[组织](/zh-Hans/platform/organization-workspaces-and-members)(如果您属于多个组织),注销,打开[Voyager发行说明](/zh-Hans/platform/voyager-release-notes),查看Voyager的当前版本号。

帮助面板
Project 编辑器的左下角包含启动 Atlas(Voyager 的 AI 助手)的控件;发送反馈;并打开支持文档。