> ## Documentation Index
> Fetch the complete documentation index at: https://support.lumafield.com/llms.txt
> Use this file to discover all available pages before exploring further.
# 渲染工具
> 创建易于共享的高质量扫描数据可视化、无缝插入演示文稿并增强营销资产
渲染工具从 Voyager Project 生成可下载图像。使用以下自定义选项创建图像:
* 文件类型:**PNG**、**JPEG**
* 透明背景切换(适用于 PNG)
* 方面:
* 3840 x 2160 (4K)
* 1920 x 1920(方形)
* 1920 x 1080(标准)
* 1640 x 856(横向)
* 360 x 800(移动)
除了通过渲染工具手动创建渲染外,[Recipes](/zh-Hans/recipes/recipes-intro) 还可以配置为自动生成渲染书签。
要生成扫描数据的**视频**,请访问[动画工具](/zh-Hans/voyager/voyager-animation-tool)文章。
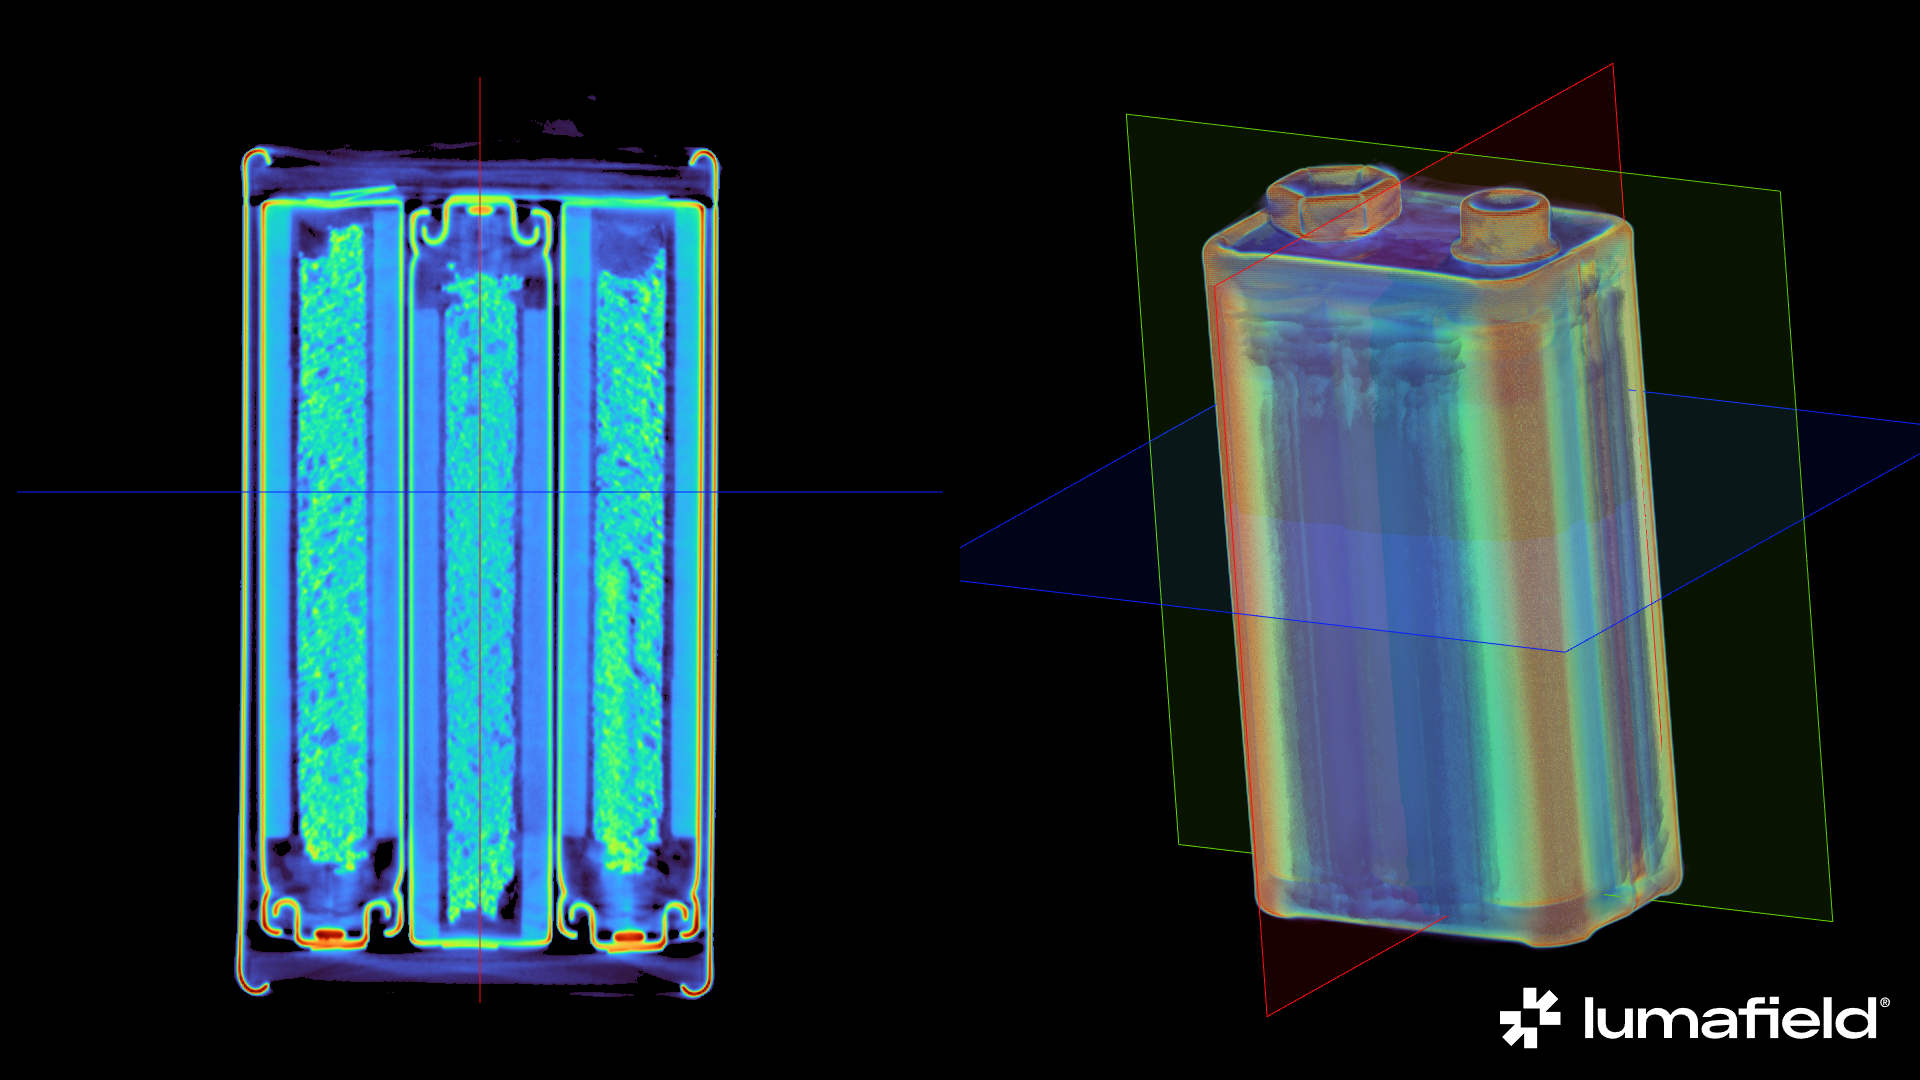 *直接从 Voyager 下载的渲染示例*
创建渲染
从数据面板中选择任何数据对象,或从书签面板中选择书签对象,然后从工具栏中选择渲染工具。
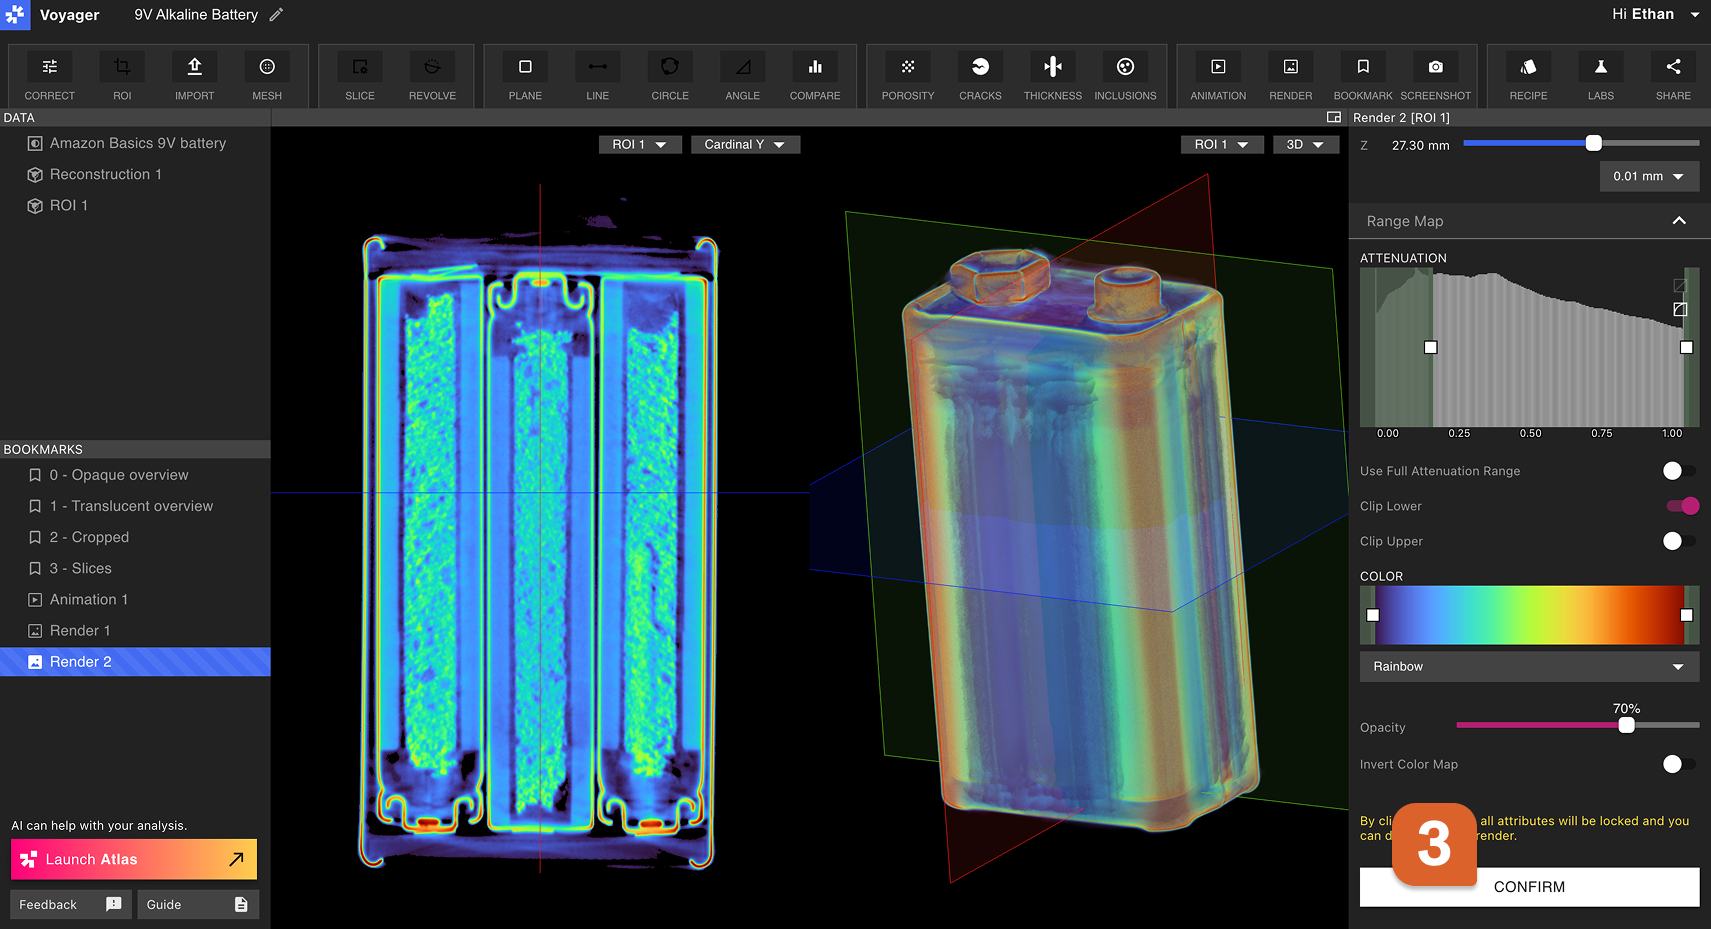
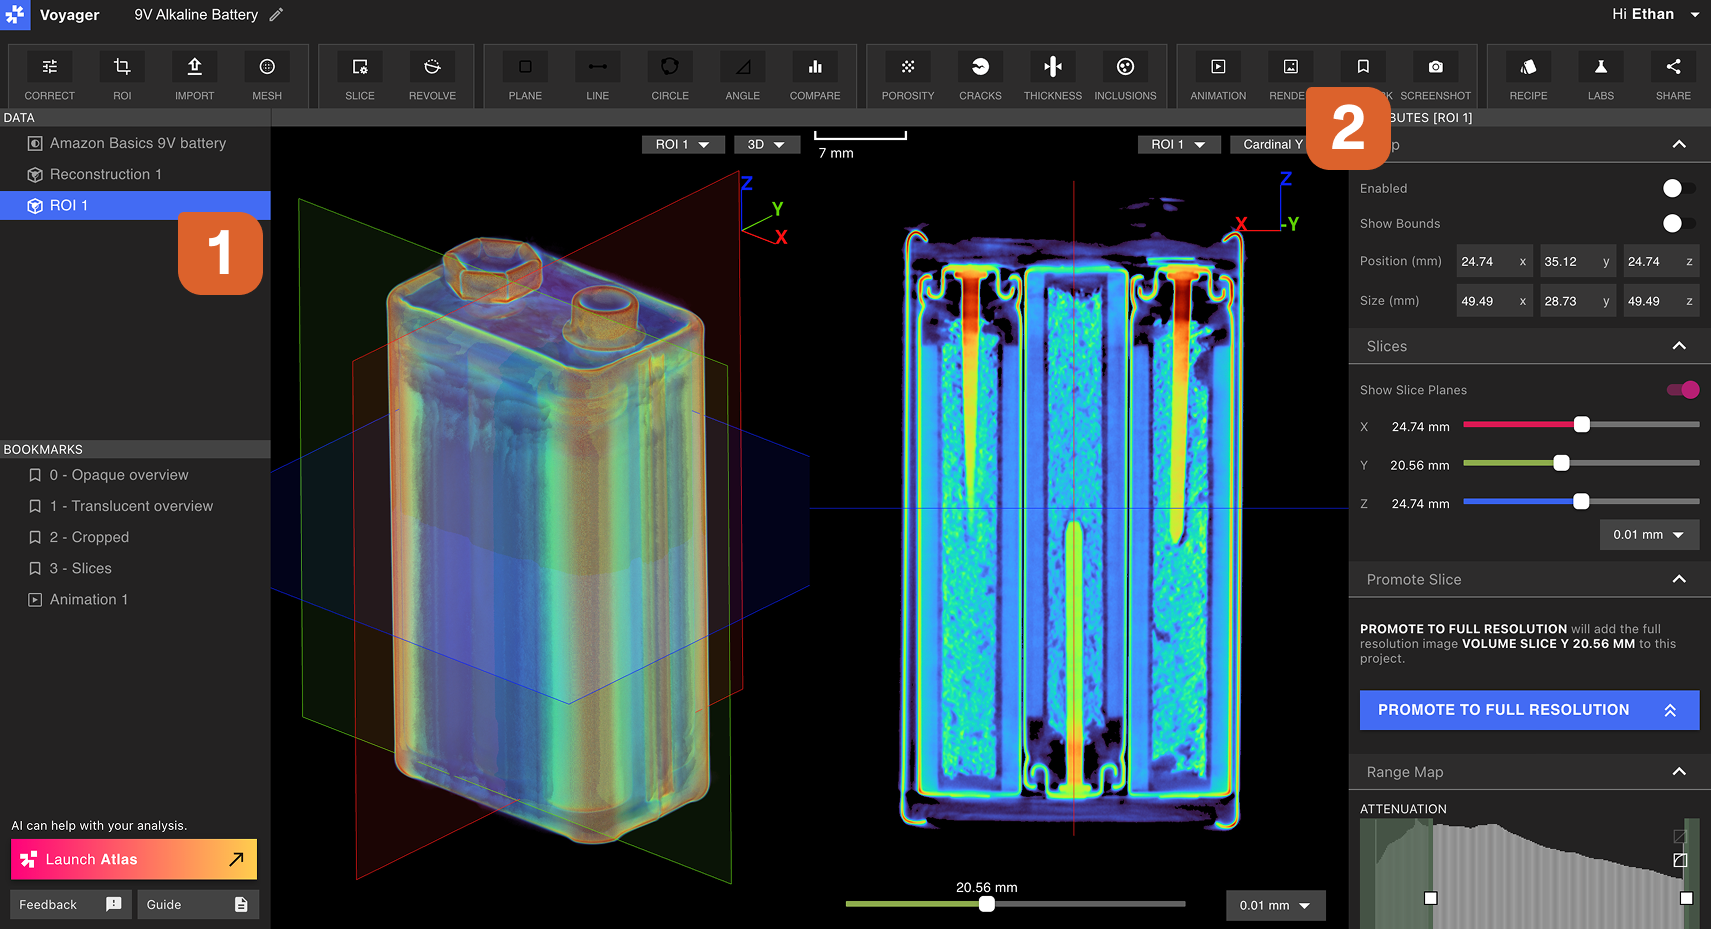 渲染编辑器将在右侧面板中打开。在“裁剪”、“切片”和“范围图”选项卡中选择所有所需的可视化设置。将 Viewport 中的数据操纵到所需的视图和方向。对可视化设置感到满意后,在渲染编辑器中选择“确认”。
查看、下载和共享渲染
通过在书签面板中选择新创建的渲染来打开它。
 要**下载**渲染,请在属性面板的图像设置选项卡中选择所需的设置,然后选择生成图像。生成进度显示在属性面板的渲染选项卡中。当渲染完全生成后,它将自动下载。
 首次下载可能会很慢,但使用相同设置的后续下载会很快。
要**复制到渲染的链接**,请从数据面板中右键选择渲染,然后选择复制链接。收到该链接的用户将直接进入 Project 内的渲染书签。还可以从右键选择菜单中**重命名**或**删除**。
首次下载可能会很慢,但使用相同设置的后续下载会很快。
要**复制到渲染的链接**,请从数据面板中右键选择渲染,然后选择复制链接。收到该链接的用户将直接进入 Project 内的渲染书签。还可以从右键选择菜单中**重命名**或**删除**。