> ## Documentation Index
> Fetch the complete documentation index at: https://support.lumafield.com/llms.txt
> Use this file to discover all available pages before exploring further.

# 光束硬化校正

> 使用 BHC 校正光束硬化偽影並減少 Voyager 軟體中的條紋偽影。

光束硬化是一種 CT 偽影，源自多色 X 射線源：較低能量的光子比高能量的光子吸收更多。光束的平均能量隨著穿過材料而增加（光束“變硬”）。

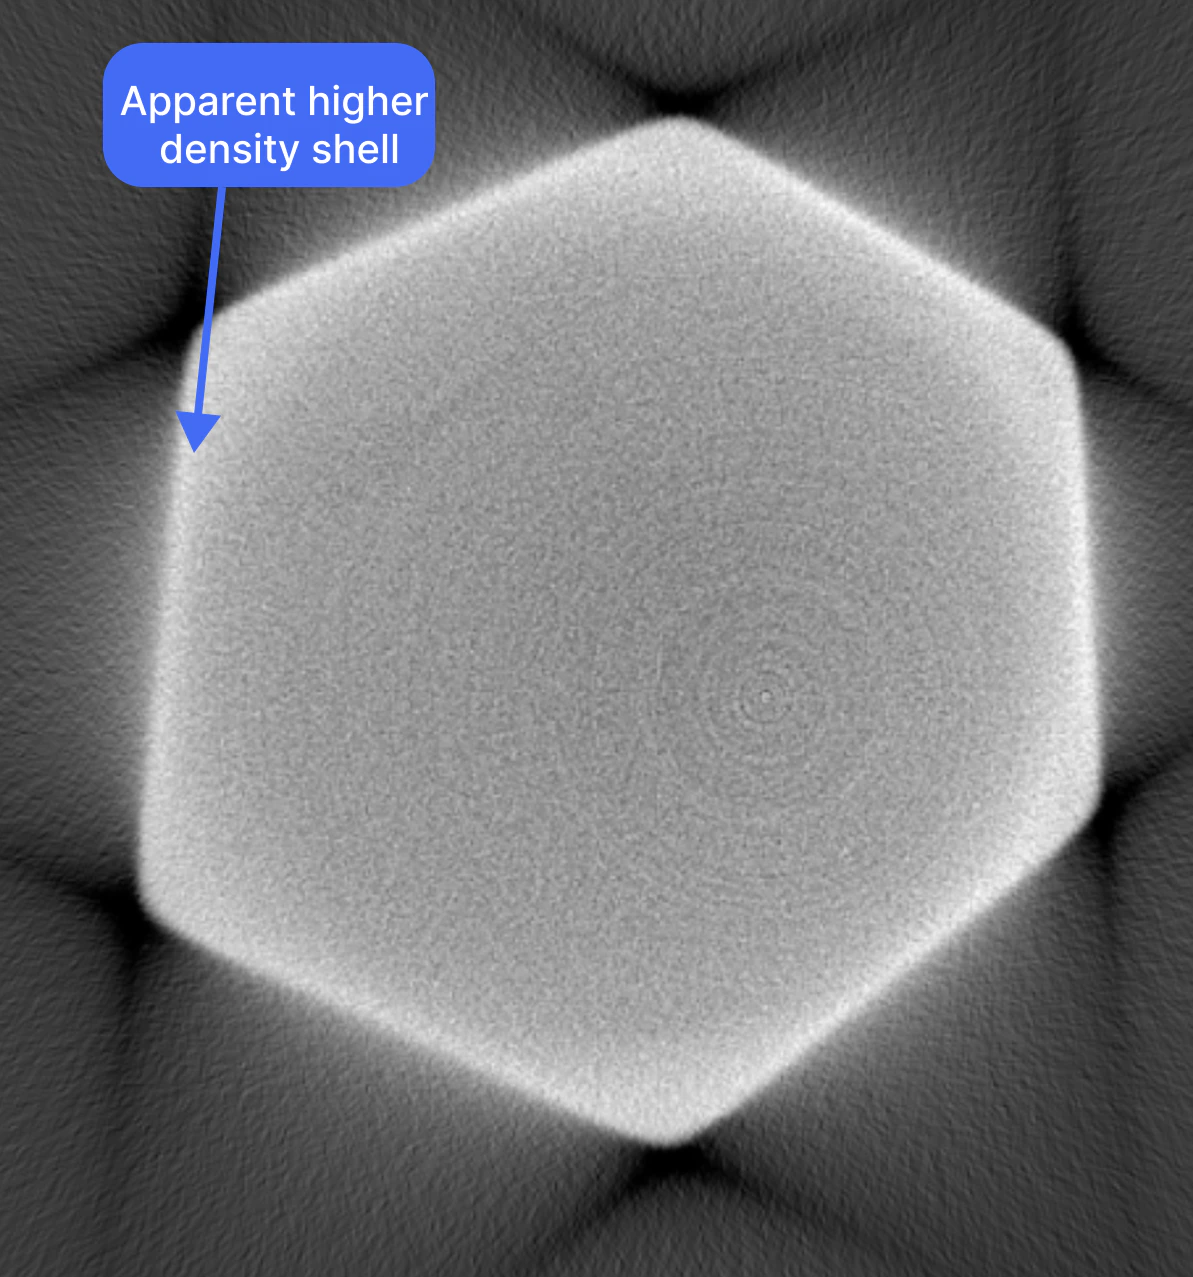
顯示特徵**杯形**（中心比邊緣更暗）和密集物件之間的深色**條紋**的重建可以受益於光束硬化校正。在下圖中，儘管零件是單一材料，但零件邊緣的密度似乎高於中心。

<Frame>
  <img src="https://mintcdn.com/lumafield/UbVLuU7Qf_3Jq5qF/images/BHC_Shell.png?fit=max&auto=format&n=UbVLuU7Qf_3Jq5qF&q=85&s=7382bd0827baf6f5dce088c4b321219d" alt="BHC Shell" width="1193" height="1277" data-path="images/BHC_Shell.png" />
</Frame>

<h2 id="how-to-run-bhc">
  如何運行BHC
</h2>

按一下工具列中的「更正」按鈕以開啟更正工作流程。

<Frame>
  <img src="https://mintcdn.com/lumafield/UbVLuU7Qf_3Jq5qF/images/Correct_icon.png?fit=max&auto=format&n=UbVLuU7Qf_3Jq5qF&q=85&s=474b7e06a413c5825aa1f01a3aeb8eb3" alt="Correct Icon" title="Correct Icon" style={{ width:"22%" }} width="380" height="298" data-path="images/Correct_icon.png" />
</Frame>

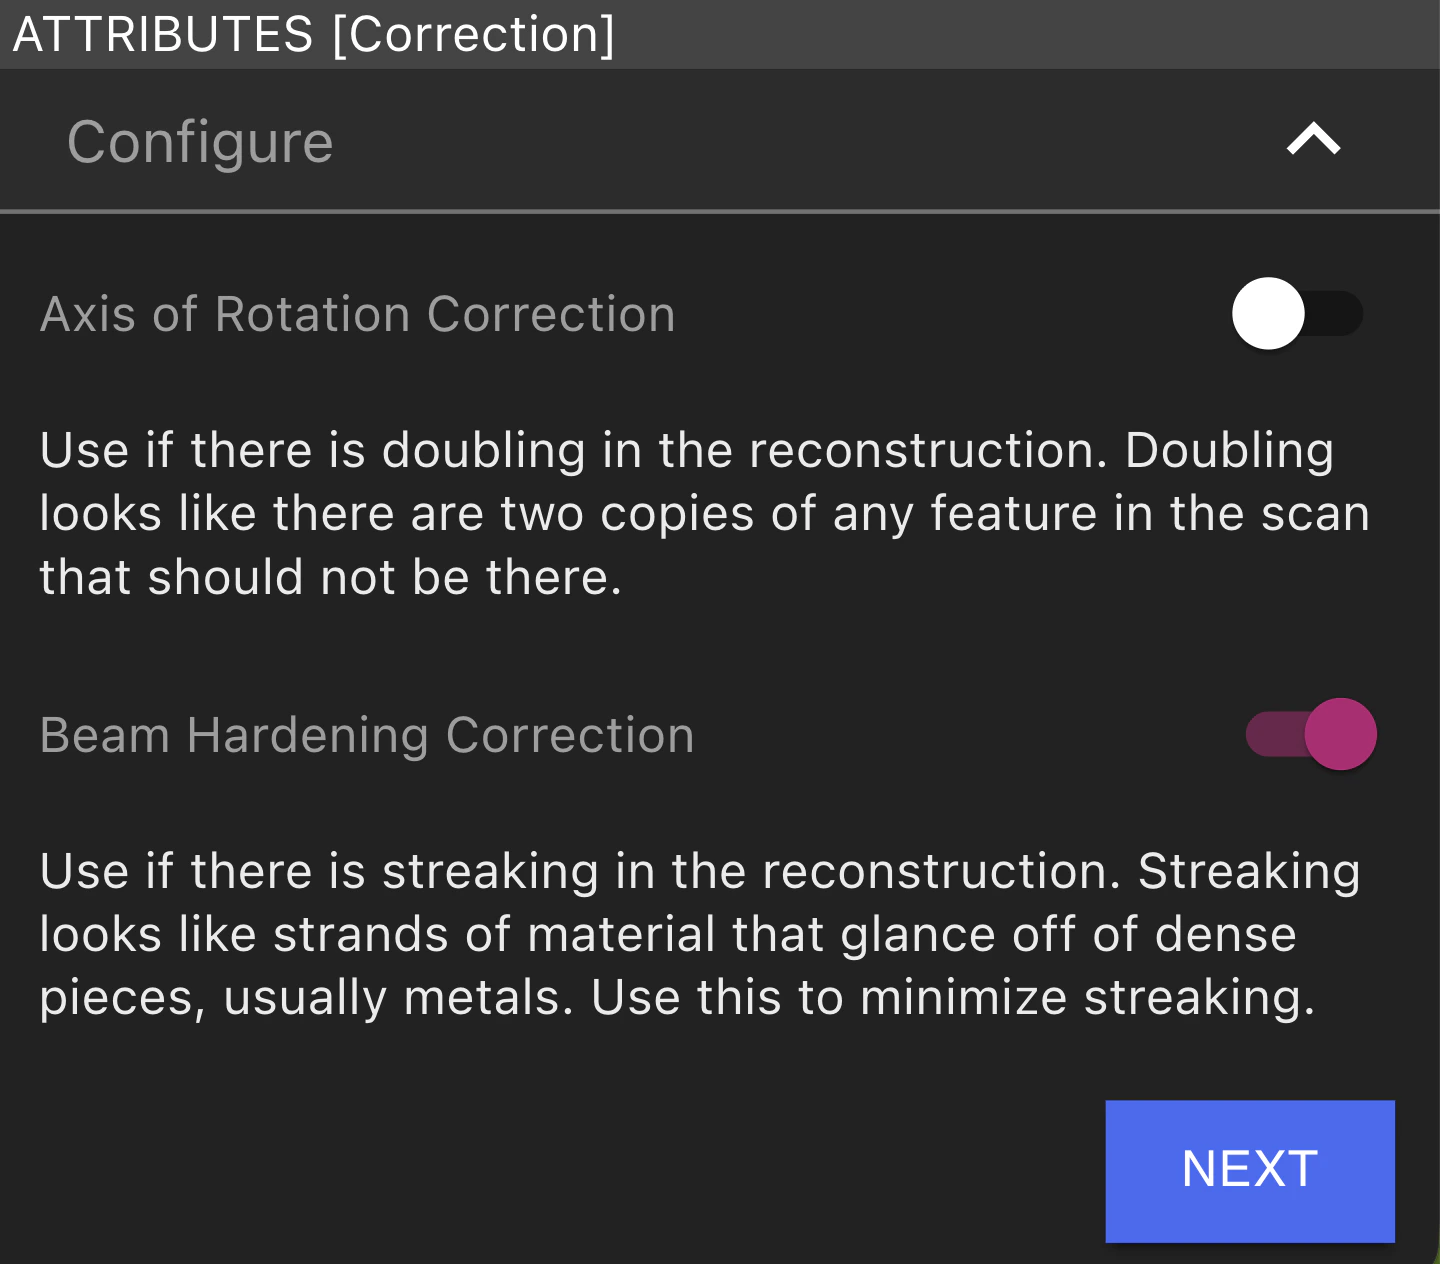
確保“光束硬化校正”選項已打開，然後按一下“下一步”。

<Frame>
  <img src="https://mintcdn.com/lumafield/UbVLuU7Qf_3Jq5qF/images/BHC_Attributes.png?fit=max&auto=format&n=UbVLuU7Qf_3Jq5qF&q=85&s=78e4ff6dc1fa0f35b26976428fd0d351" alt="BHC Panel" lightAlt="BHC Panel" darkAlt="BHC Panel" width="1440" height="1264" data-path="images/BHC_Attributes.png" />
</Frame>

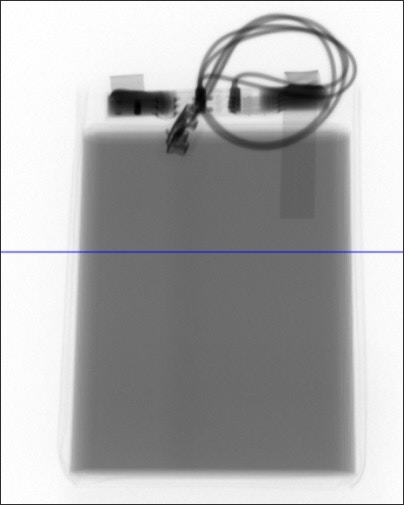
調整滑塊，使線與感興趣區域中的零件相交（即可能存在光束硬化偽影的較暗、較密集的區域）。選擇“下一步”並等待產生校正影像。

<Frame>
  <img src="https://mintcdn.com/lumafield/qkr1hx2ghaKlpeTJ/images/bhc-2.jpg?fit=max&auto=format&n=qkr1hx2ghaKlpeTJ&q=85&s=bd8d9334f4838f71765a36a69648acee" alt="Bhc 2" width="404" height="505" data-path="images/bhc-2.jpg" />
</Frame>

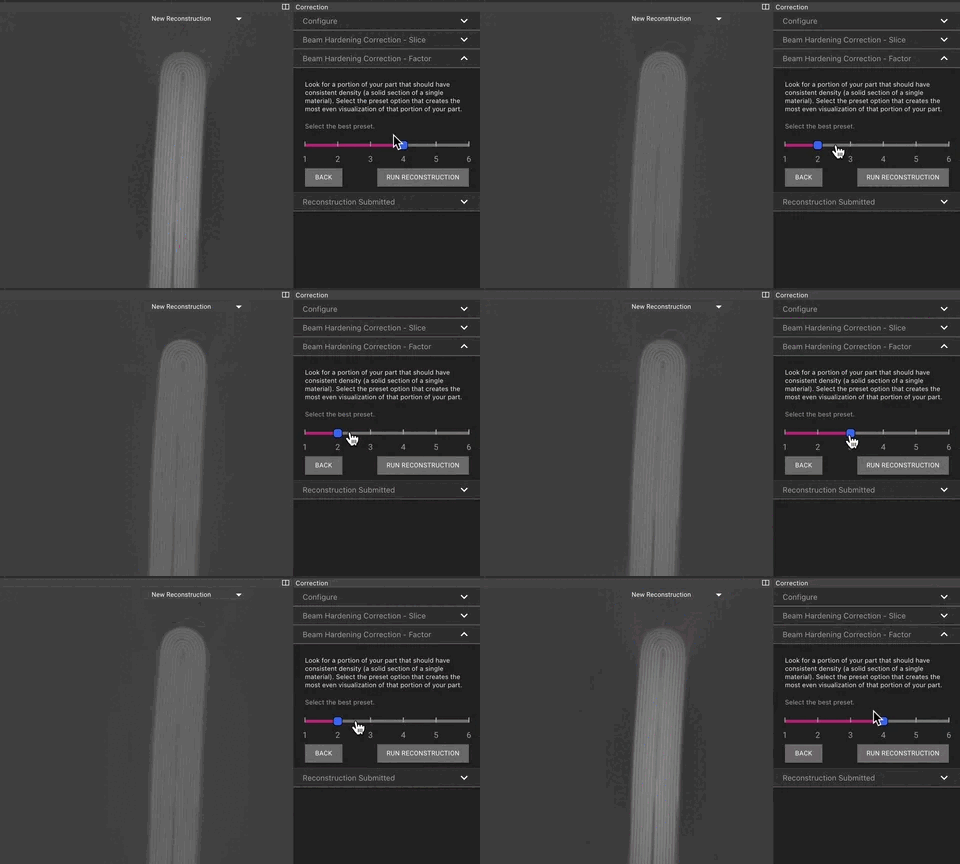
一旦校正預覽圖像可用，請加載它們並選擇 BHC 設置，使單一材質的亮度盡可能一致。按一下執行重建並等待其產生（此新重建將顯示在資料標籤中的其他重建清單中）。

<Frame>
  <img src="https://mintcdn.com/lumafield/qkr1hx2ghaKlpeTJ/images/bhc-3.gif?s=337b150eb49b9e1f019305a02ddd7f75" alt="Bhc 3" width="480" height="288" data-path="images/bhc-3.gif" />
</Frame>

在此動畫中，您可以看到電池在第二個校正因子值上在電池寬度上具有均勻的灰階值。