> ## Documentation Index
> Fetch the complete documentation index at: https://support.lumafield.com/llms.txt
> Use this file to discover all available pages before exploring further.
# 檢查平面
> 以實際 2D 測量建立 3D 資料的固定平面
檢查平面是執行持續掃描檢查的基礎。使用檢查平面工具將 2D 平面資料鎖定到自己的資料物件中,以便進行測量和視覺化。
使用**重建或ROI**時,可以從基本平面、旋轉平面或自訂平面切片建立檢查平面。使用**網格或網格比較**物品時,只有基礎資料切片可以產生檢查平面。
使用相同的方法建立檢查平面並在基本、自編輯和旋轉切片平面上獲得尺寸。
建立檢查平面
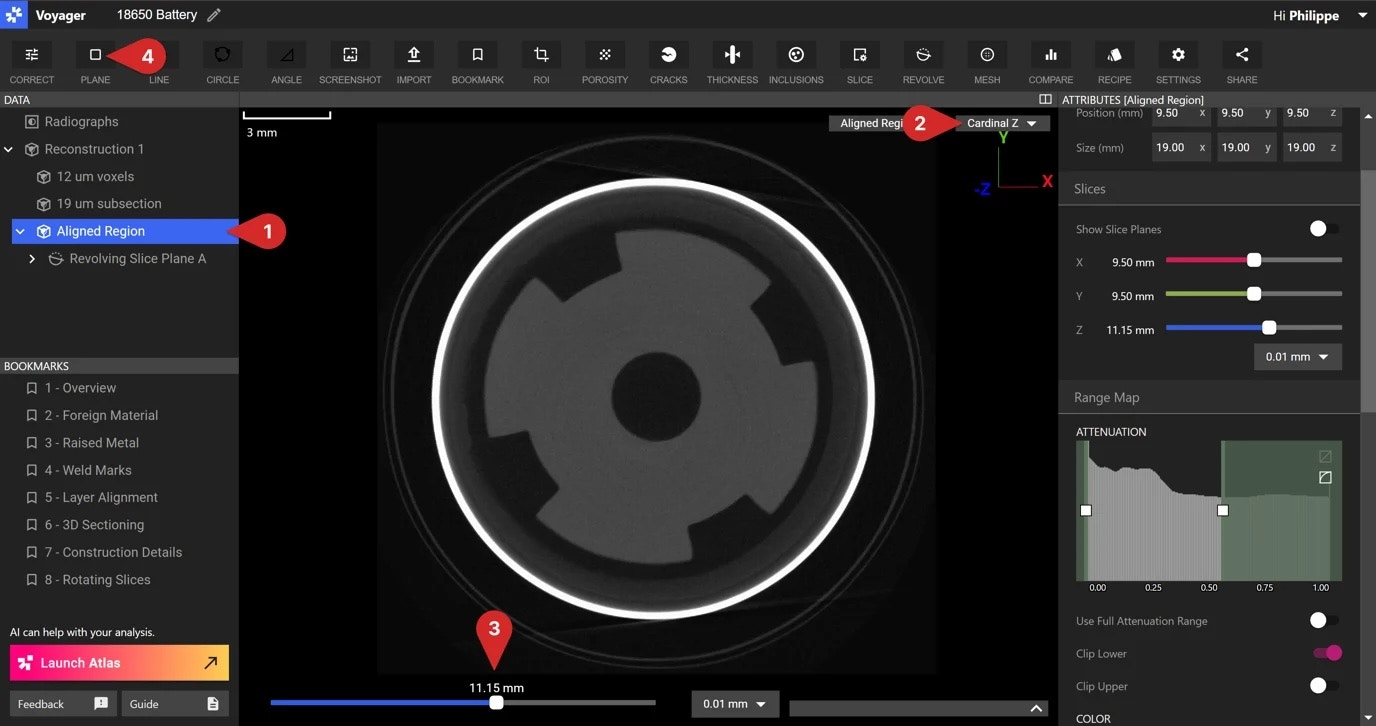
1. 選擇要標註尺寸的資料工件(重建、ROI、旋轉/自訂圖面、網格或網格比較)。
2. 在「Viewport」面板中選擇任意 2D 視圖,或如果使用分割視圖,則選擇Viewport的面板面板。這可以是基本的 2D 裁剪軸、旋轉裁剪平面圖或自訂裁剪平面圖。也可以直接從資料面板中選擇旋轉或自訂裁切平面圖。
3. 將 Viewport 底部的滑桿拖曳到所需的位置,或使用屬性面板中的滑桿,要選擇產生檢查平面的切片。
4. 選擇平面工具鎖定目前平面進行檢查並產生新的檢查平面資料物件。
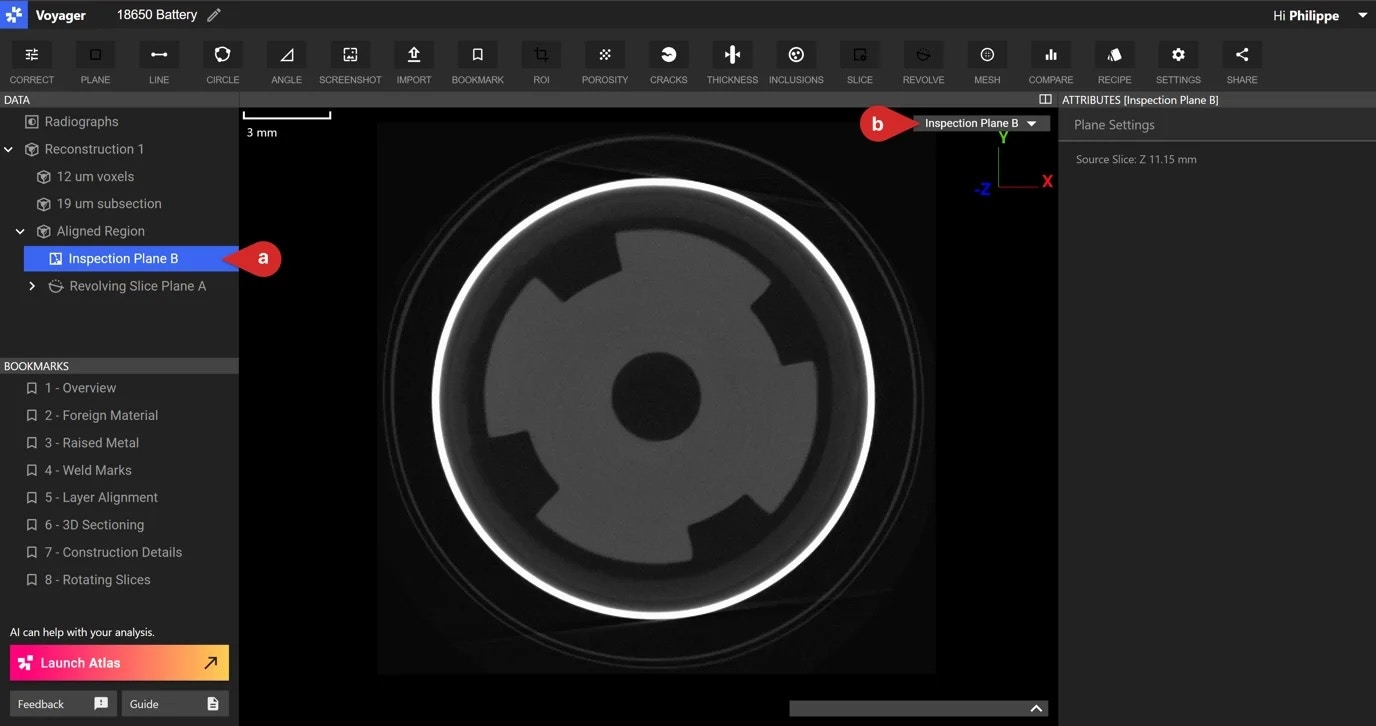
 建立後,可以直接在資料面板中選擇檢查平面或在 Viewport 右上角的視圖下拉清單中選擇檢查平面來存取它。
測量
檢查平面可以對掃描資料進行二維測量。請參閱[測量工具](/zh-Hant/voyager/voyager-measurement-tools)文章以了解如何在檢查平面上進行測量。