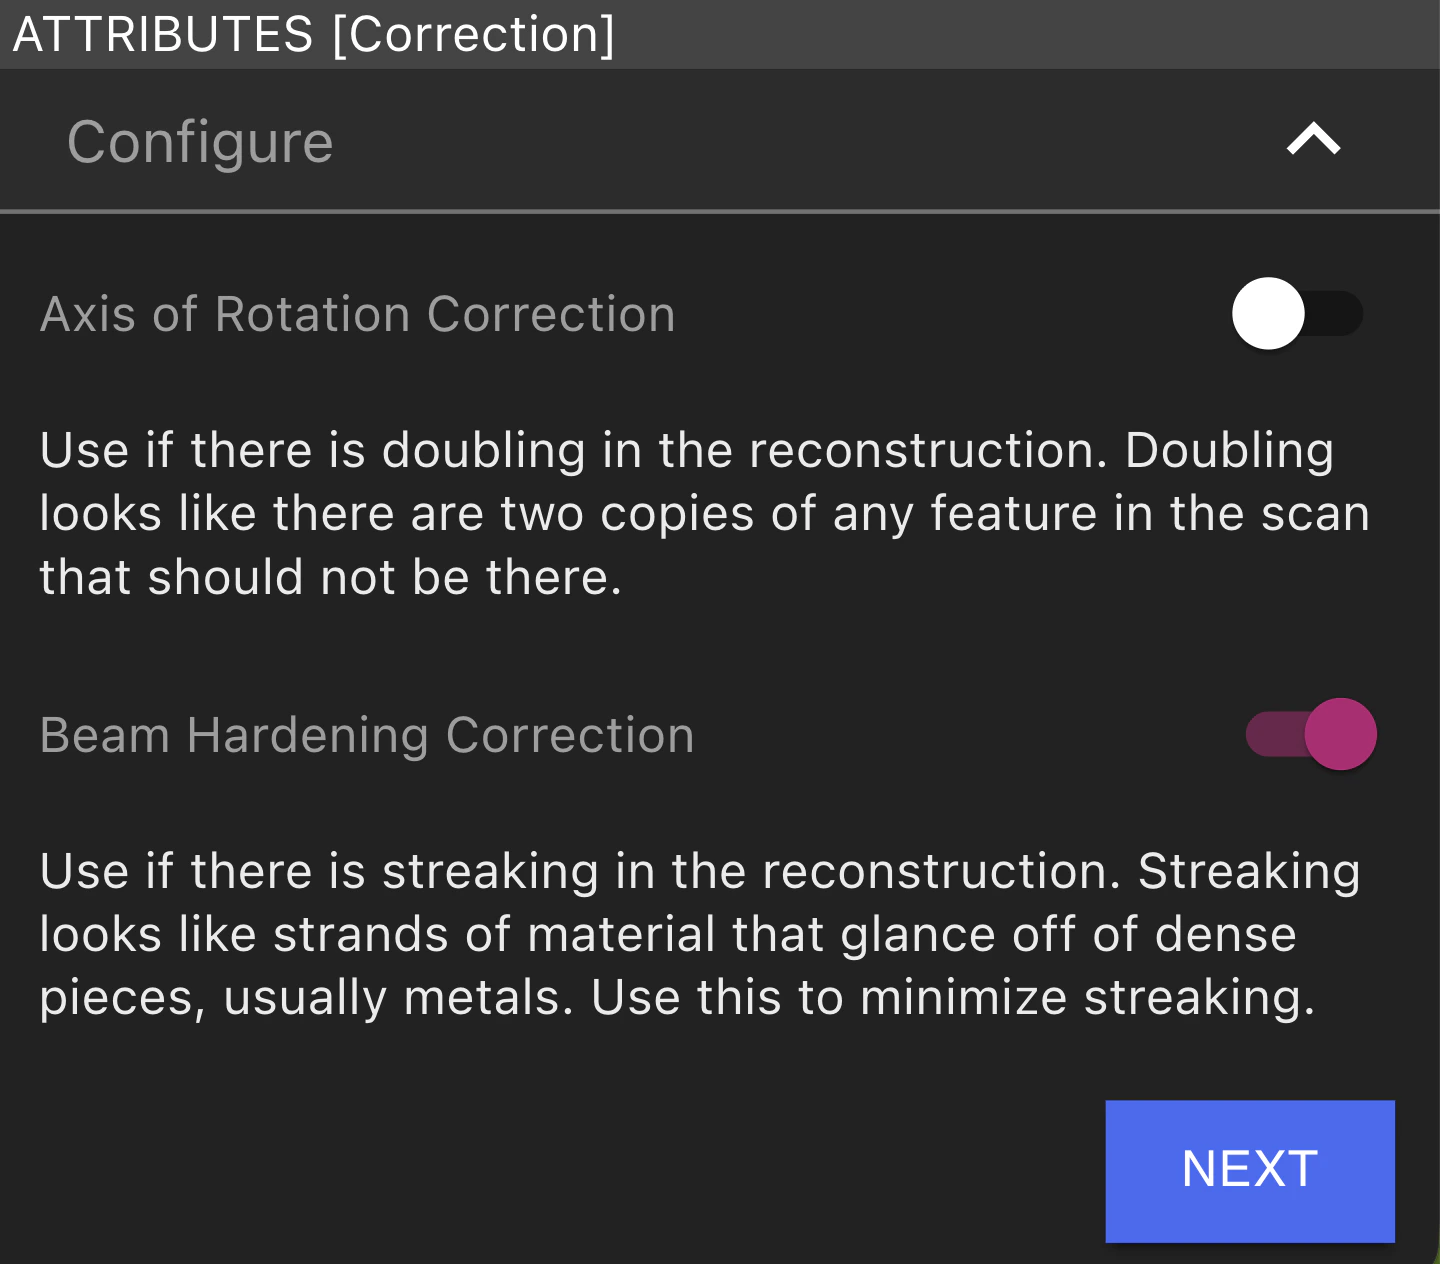
Use BHC to correct for beam hardening artifacts and reduce streaking artifacts in the Voyager software.
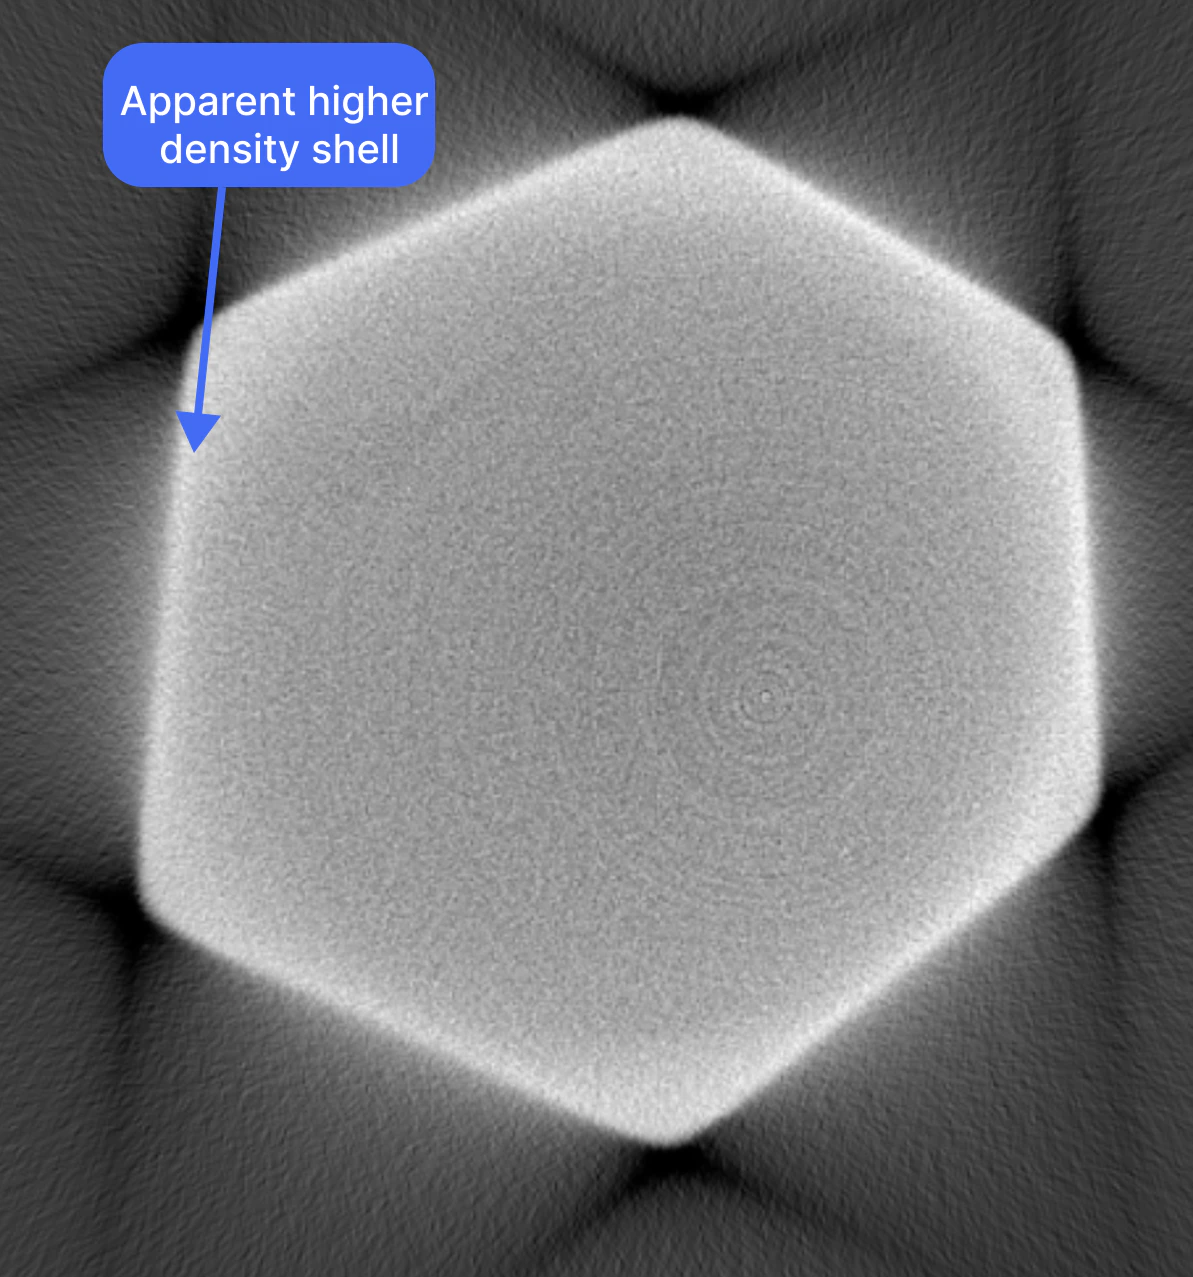
Beam hardening is a CT artifact that comes from the X-ray source being polychromatic: lower-energy photons are absorbed more than higher-energy ones. The beam’s average energy increases as it passes through material (the beam “hardens”).Reconstructions that display characteristic cupping (center darker than edges) and dark streaks between dense objects can benefit from Beam Hardening Correction. In the below image, the edges of the part appear to be higher density than the center, despite the part being monomaterial.
Click on the Correct button in the Toolbar to open the correction workflow.
Ensure the Beam Hardening Correction option is toggled on and click next.
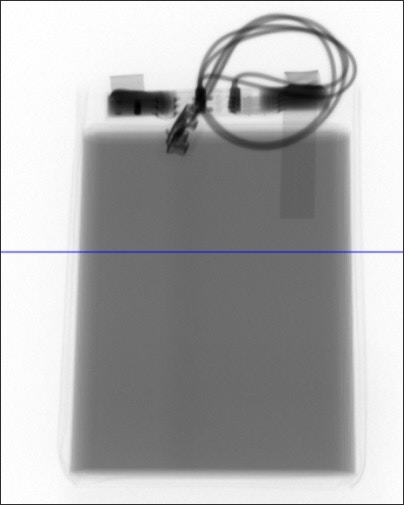
Adjust the slider so that the line intersects the part in an area of interest (i.e. a darker, more dense region where there is likely to be beam hardening artifacts). Select “Next” and wait for correction images to be generated.
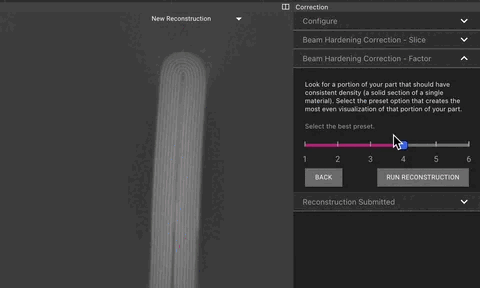
Once the correction preview images are available, load them and select the BHC setting that makes a single material as consistent a brightness as possible. Click Run Reconstruction and wait for it to generate (this new Reconstruction will show up in the list of other reconstructions in the data tab).
In this animation, you can see that the battery has even grey values across the width of the battery on the second correction factor value.
Was this page helpful?
⌘I
Assistant
Responses are generated using AI and may contain mistakes.