The Render Tool produces a downloadable image from a Voyager Project. Create an image with the following customization options:
- File Type: PNG, JPEG
- Transparent background toggle (for PNGs)
- Dimensions:
- 3840 x 2160 (4K)
- 1920 x 1920 (Square)
- 1920 x 1080 (Standard)
- 1640 x 856 (Landscape)
- 360 x 800 (Mobile)
In addition to creating Renders manually through the Render Tool, Recipes can be configured to automatically generate Render Bookmarks.
For generating videos of scan data, visit the Animation Tool article.
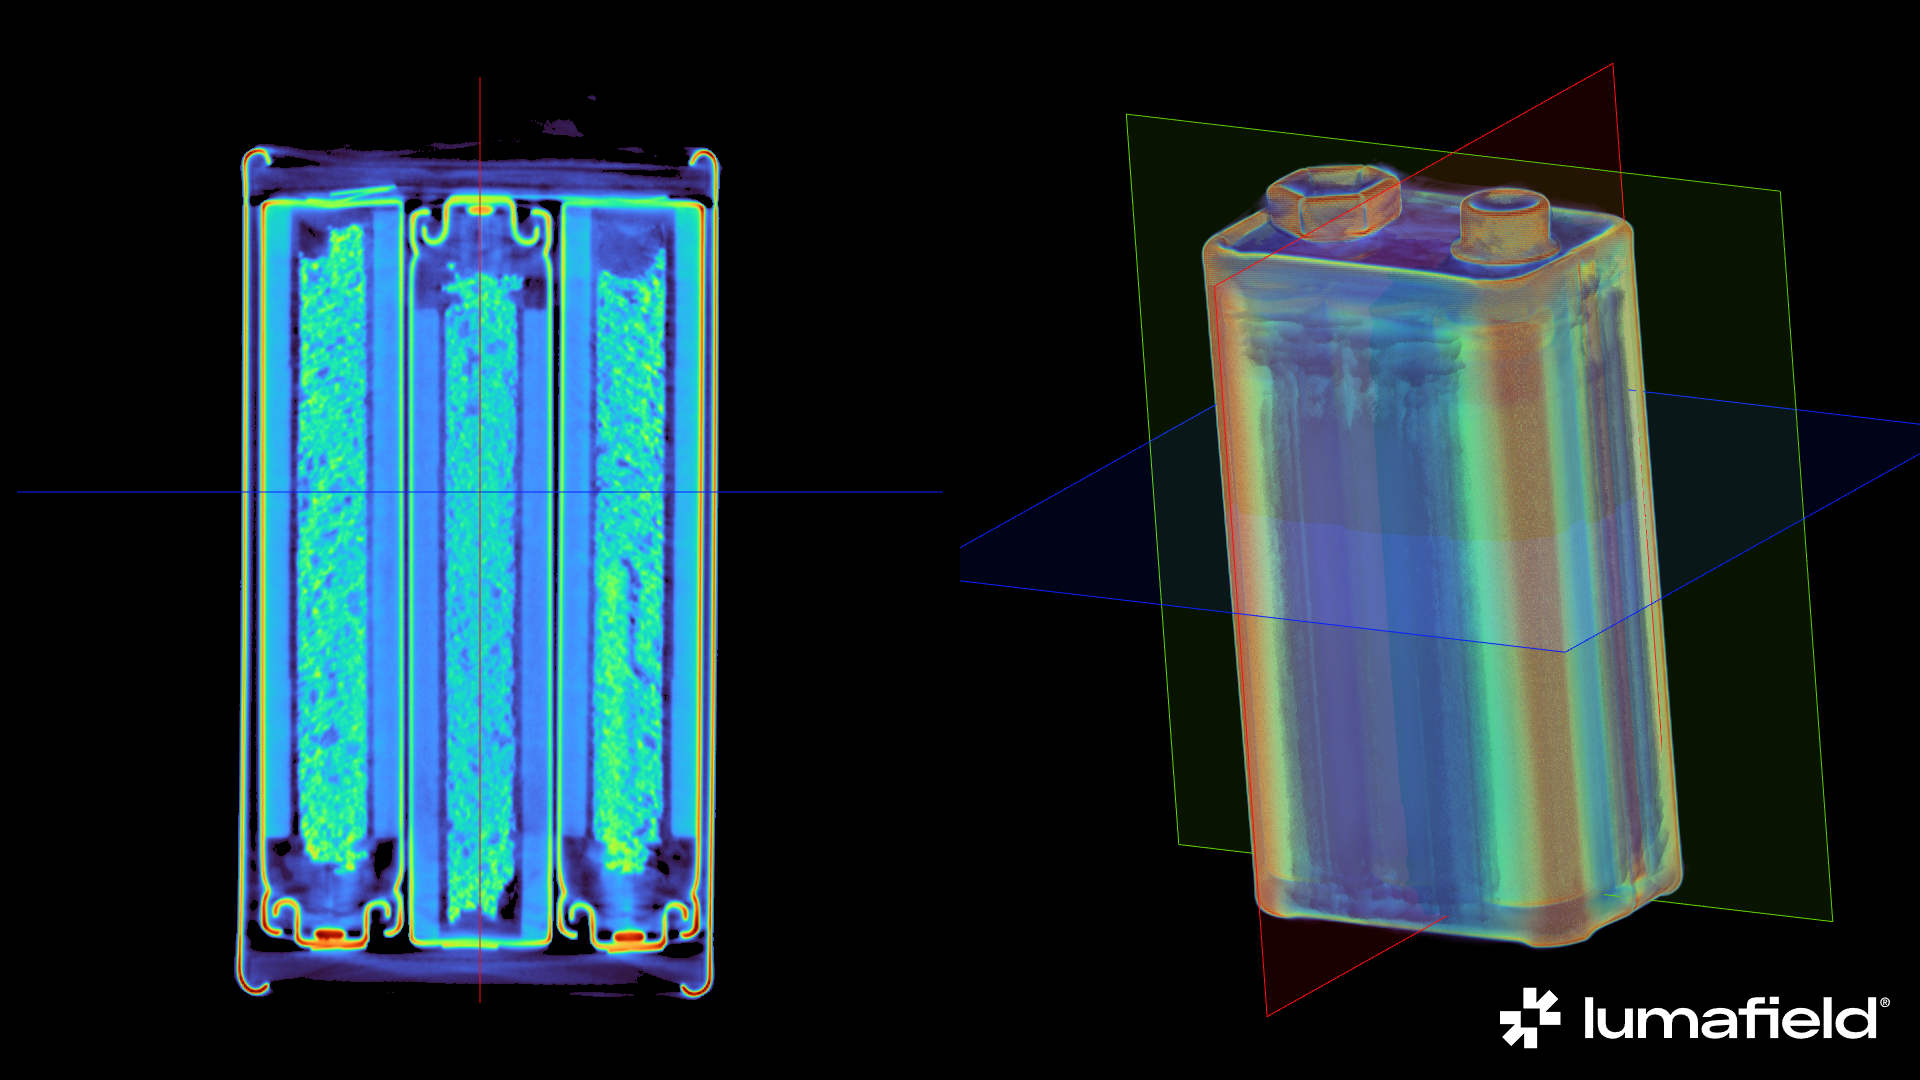 Example of a Render downloaded directly from Voyager
Creating a Render
Select any Data Object from the Data Panel or Bookmark Object from the Bookmarks Panel, then select the Render Tool from the Toolbar.
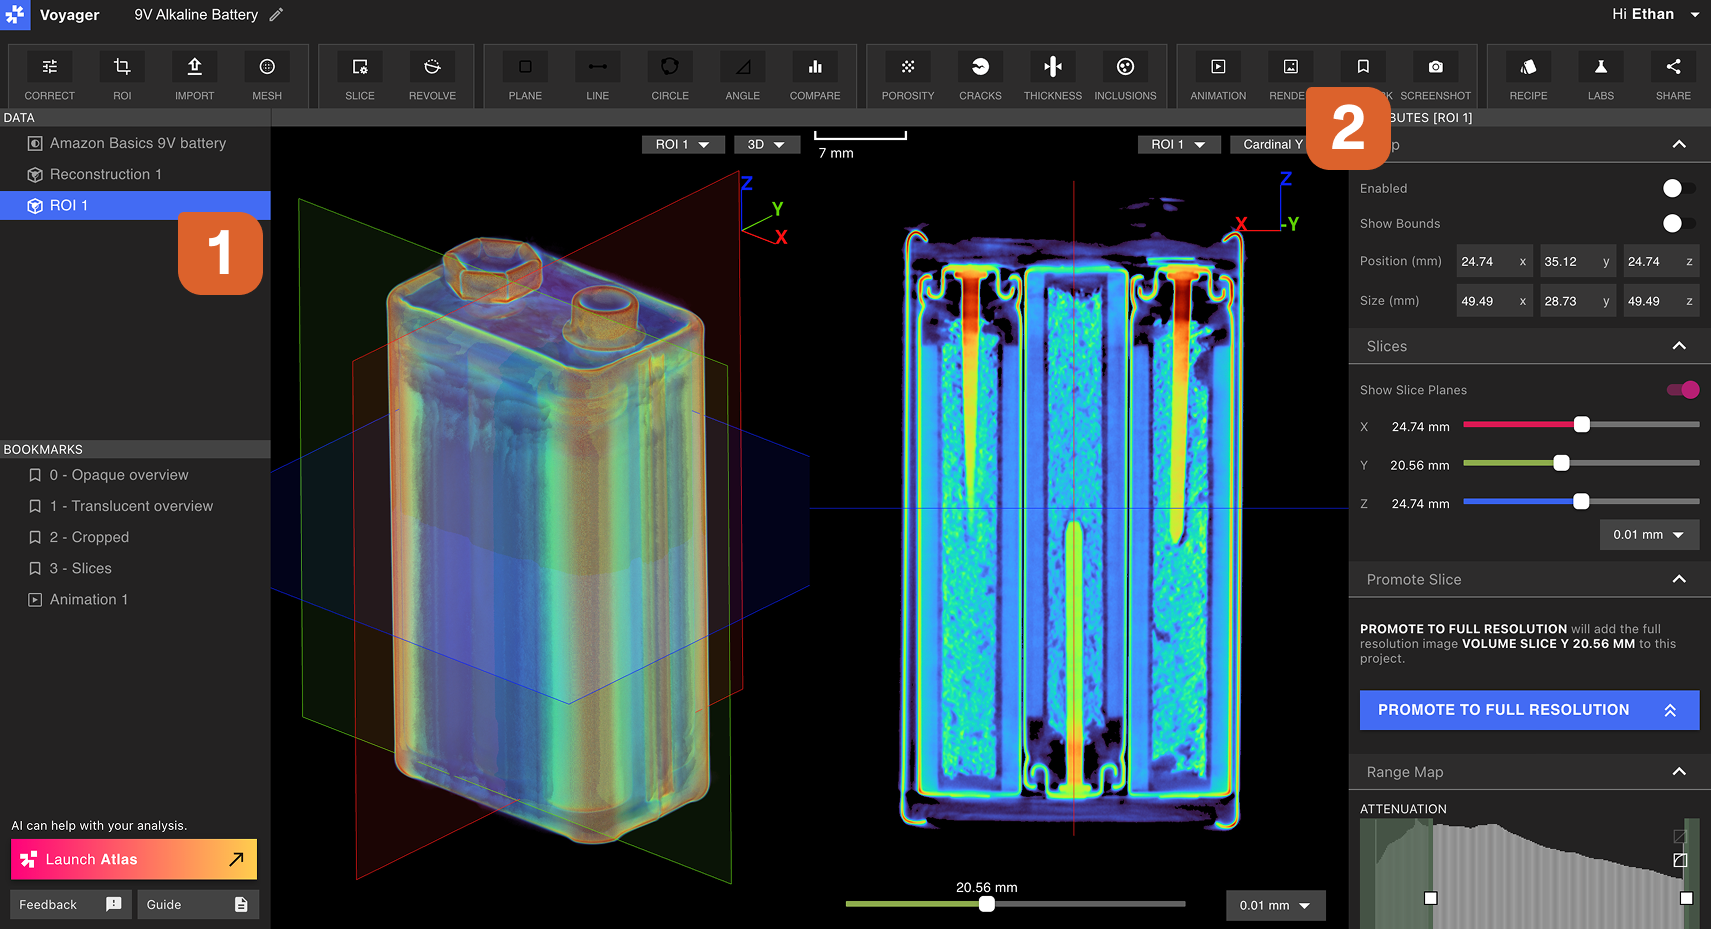 The Render Editor will open in the Right Panel. Choose all desired visualization settings within the Crop, Slice, and Range Map tabs. Manipulate the data in the Viewport to the desired view and orientation. Once satisfied with the visualization settings, select Confirm in the Render Editor.
Viewing, downloading, and sharing a Render
Open the newly-created Render by selecting it in the Bookmarks Panel.
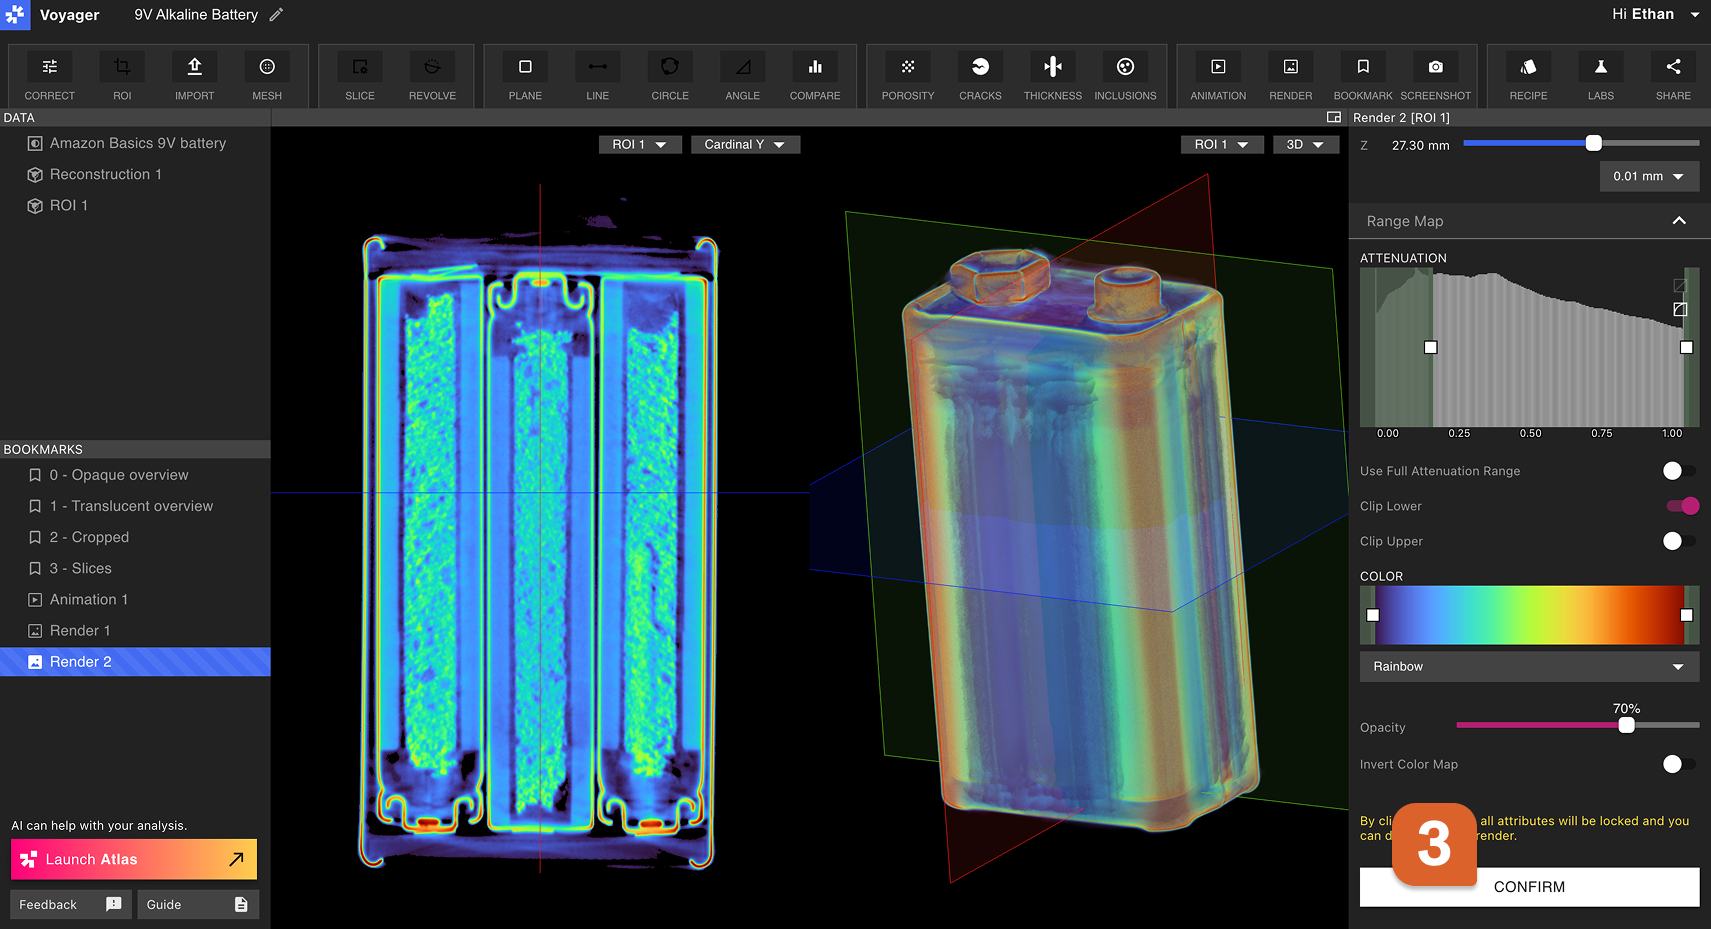
 To download a Render, choose the desired settings within the Image Settings Tab of the Attributes Panel, then select Generate Image. Generation progress is displayed in the Renders tab of the Attributes Panel. When the Render is fully generated, it will automatically download.

First-time downloads may be slow, but subsequent downloads with the same settings will be quick.