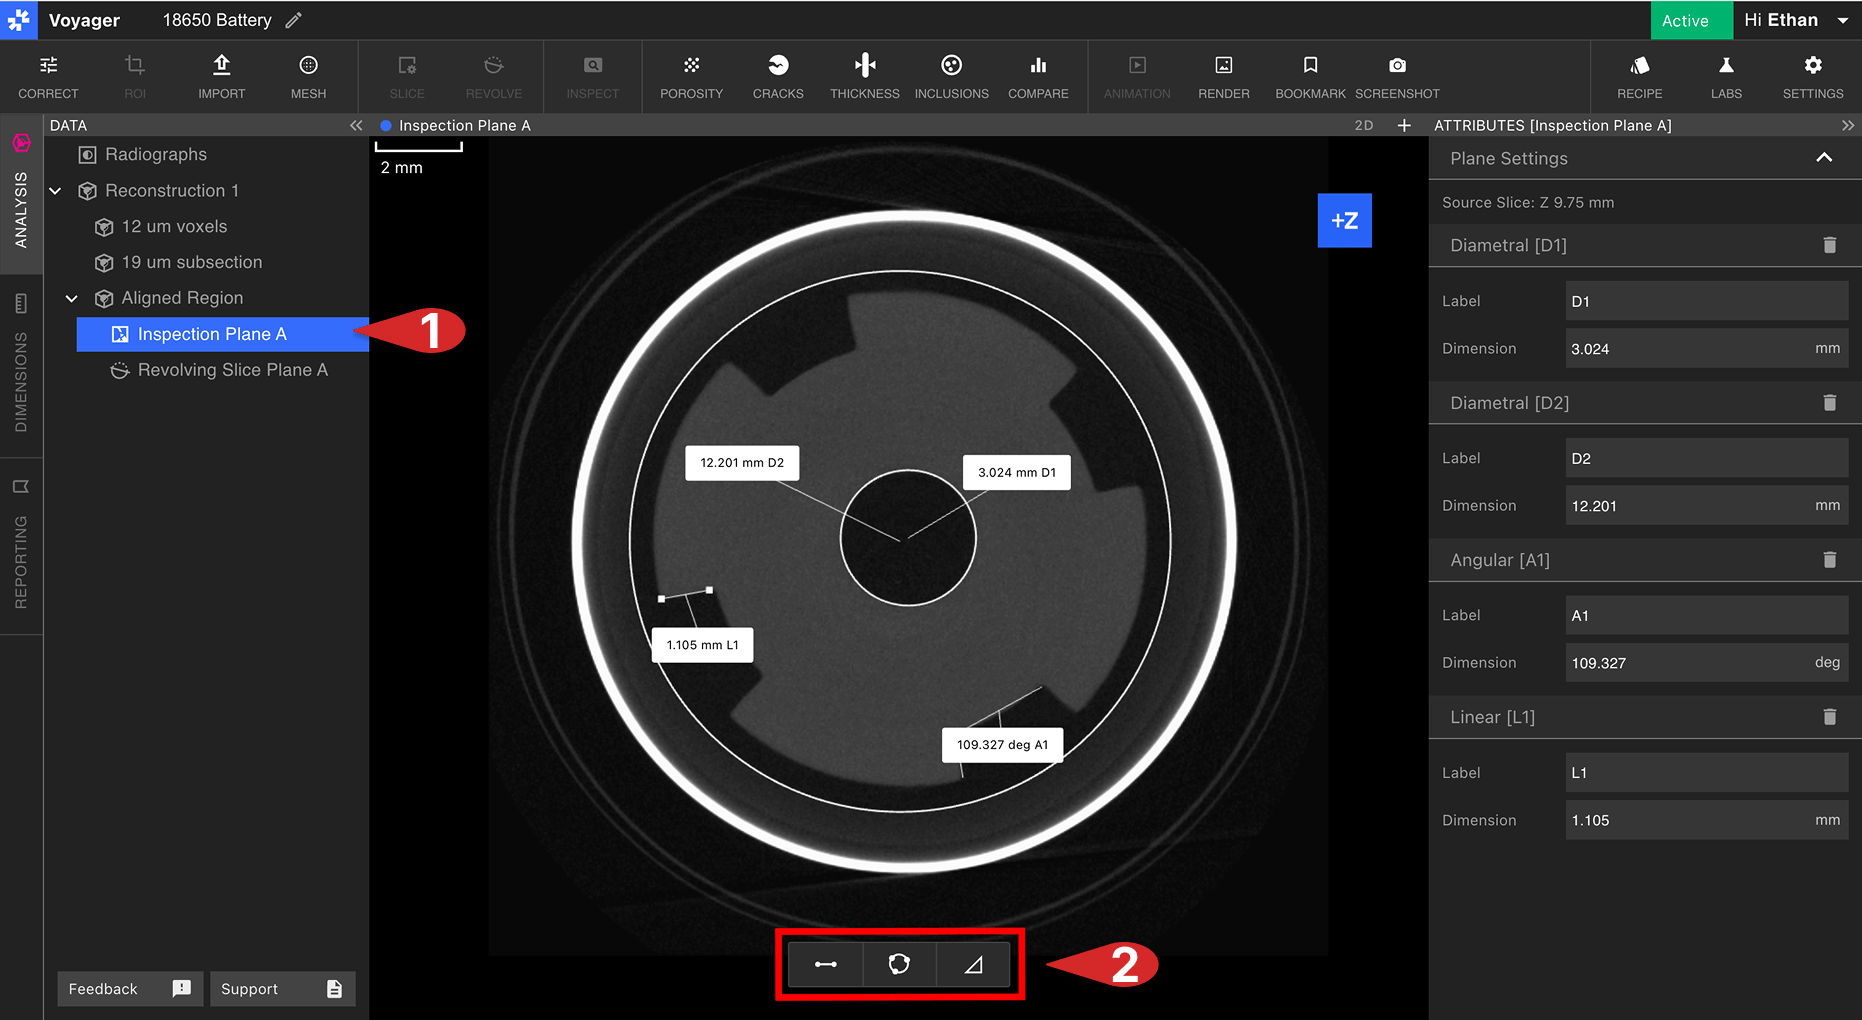
Circle feature
To measure the diameter of a circle, select the Circle feature at the bottom of the Inspection Plane Viewport. Select three points on the Inspection Plane that lie on the circumference of the circle. Finally, select a point in the Viewport to affix the dimension box to the Viewport.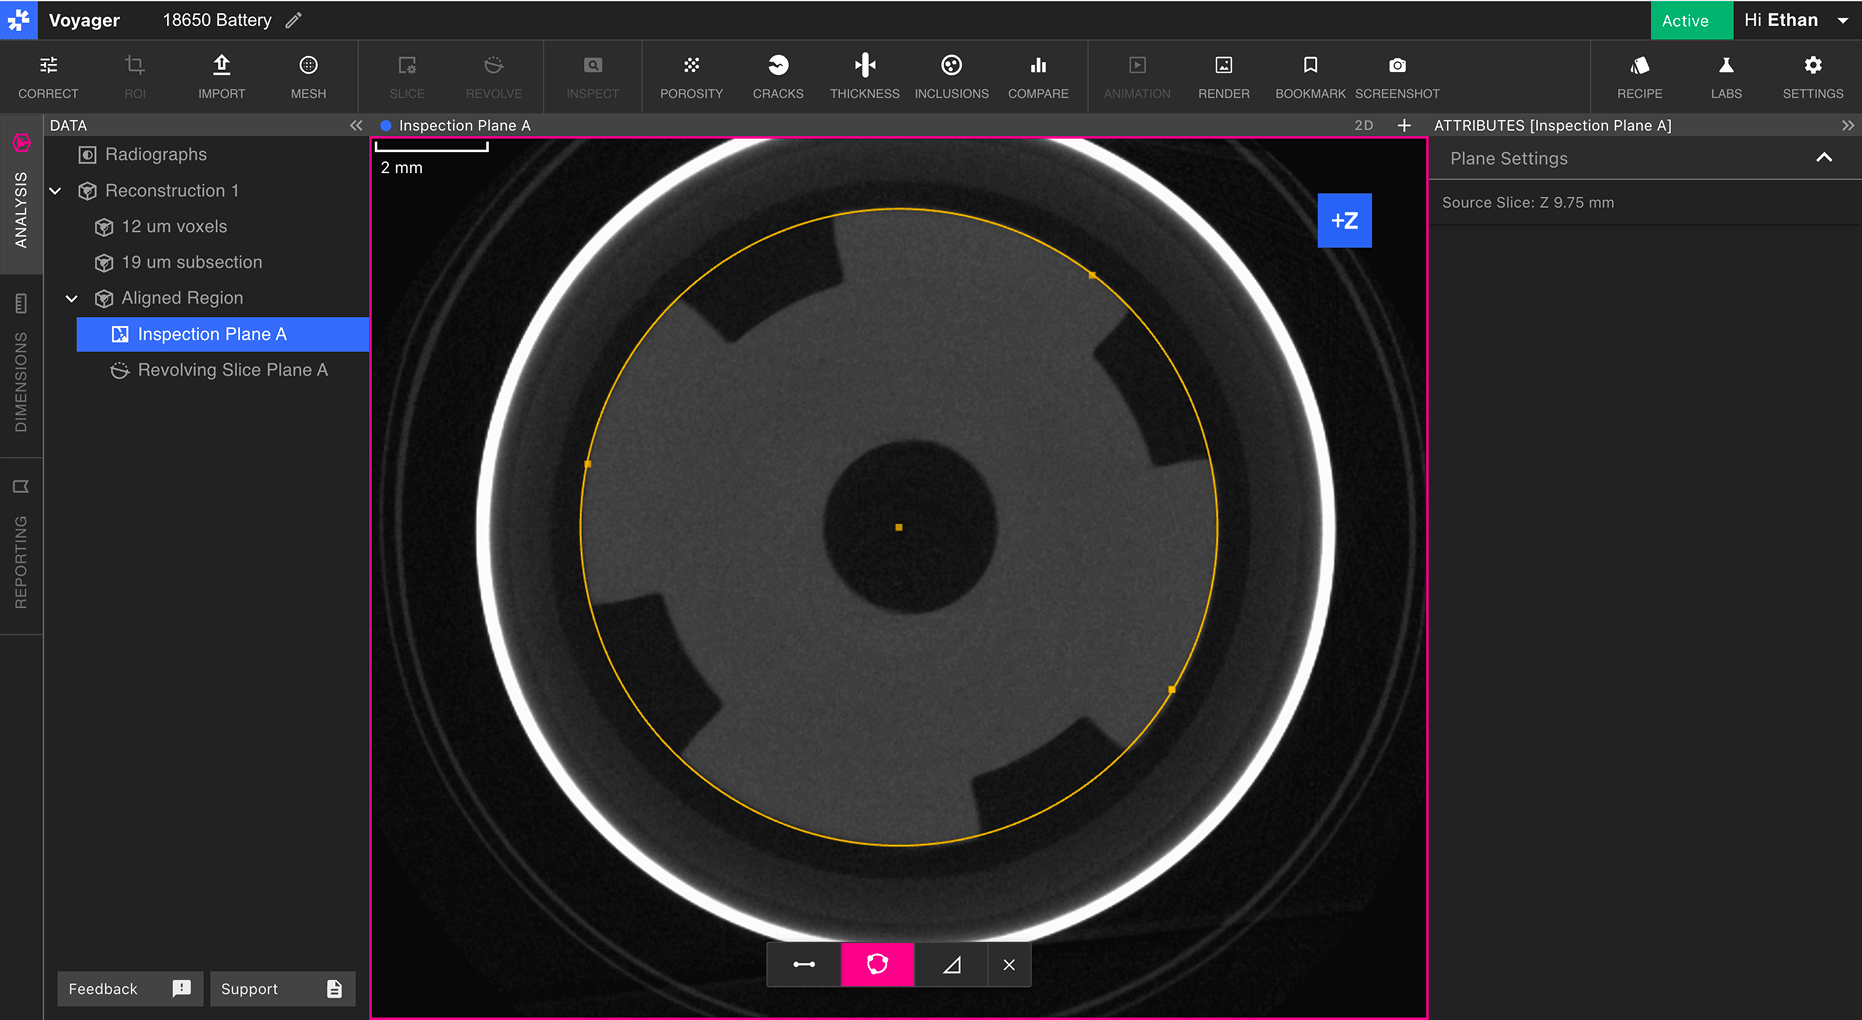
Line feature
To measure the length of a line segment, select the Line feature at the bottom of the Inspection Plane Viewport. Select the two endpoints of the line segment, and select a point in the Viewport to affix the dimension box to the Viewport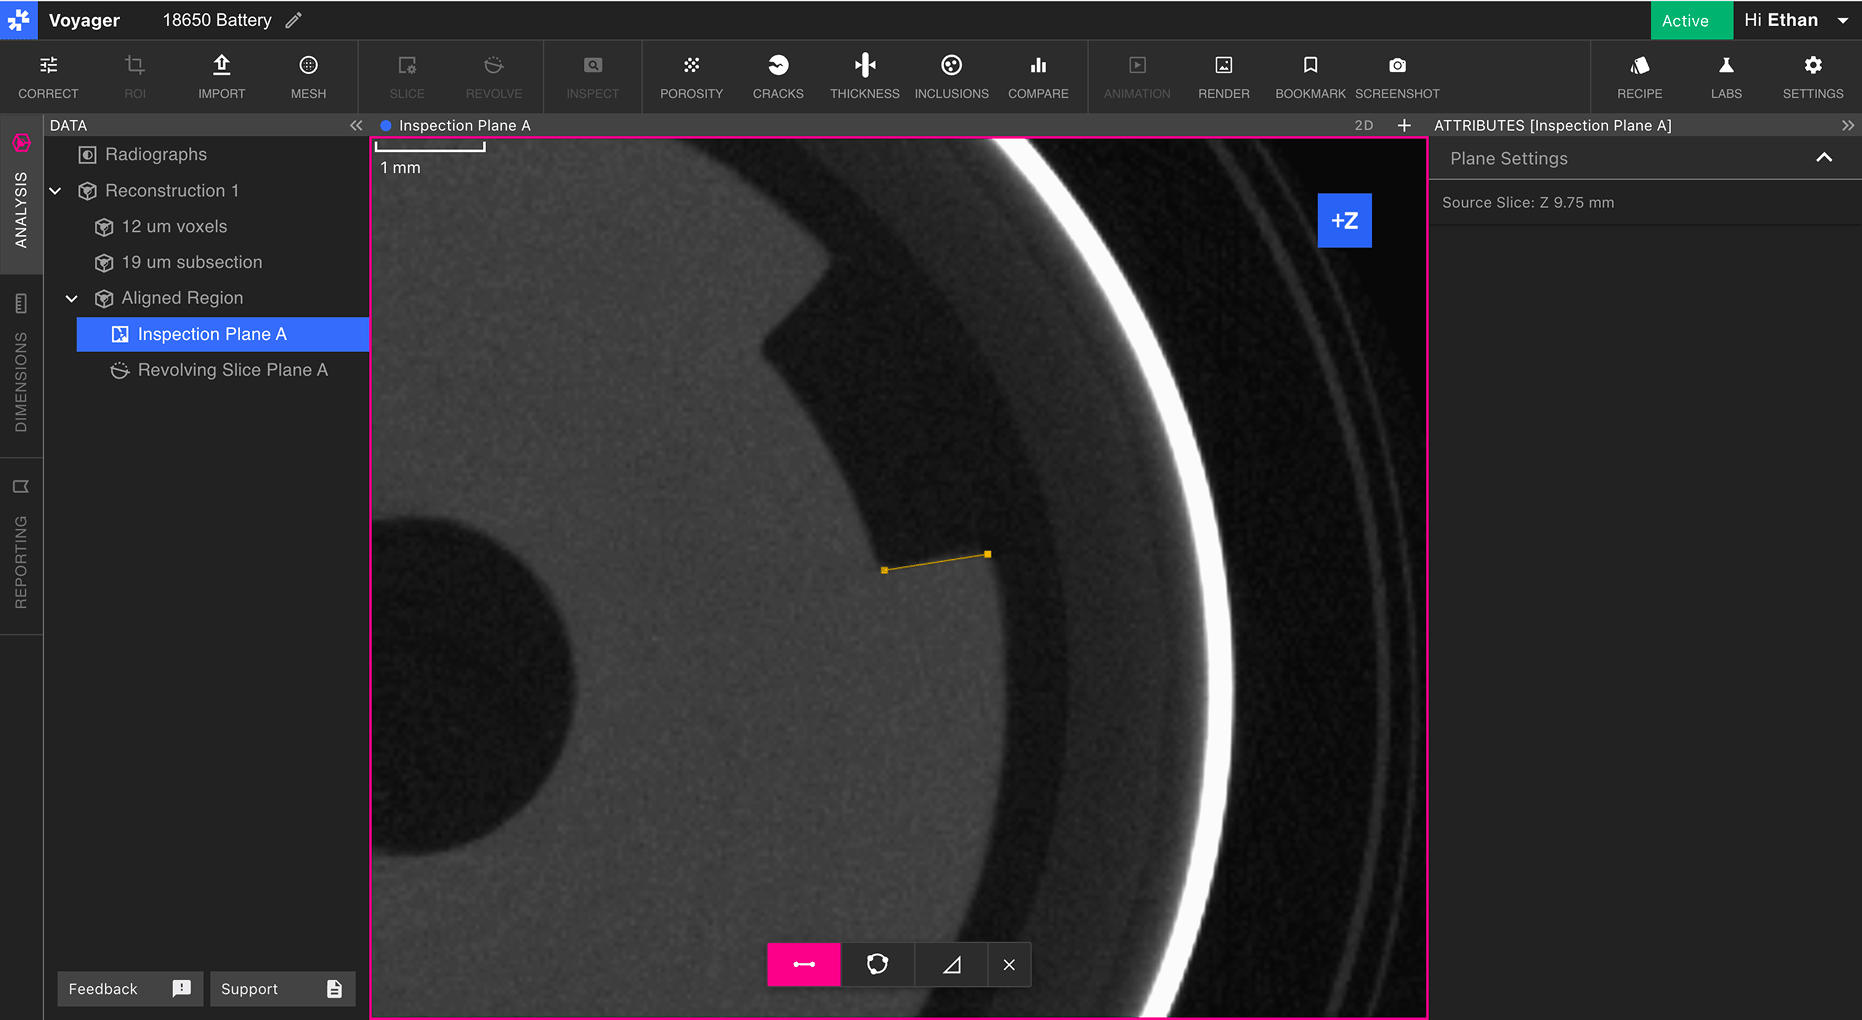
Angle feature
To measure an angle between two line segments, select the Angle feature at the bottom of the Inspection Plane Viewport. Select the two endpoints of the first line segment, then select the two endpoints of the second line segment. Finally, select a point in the Viewport to affix the dimension box to the Viewport.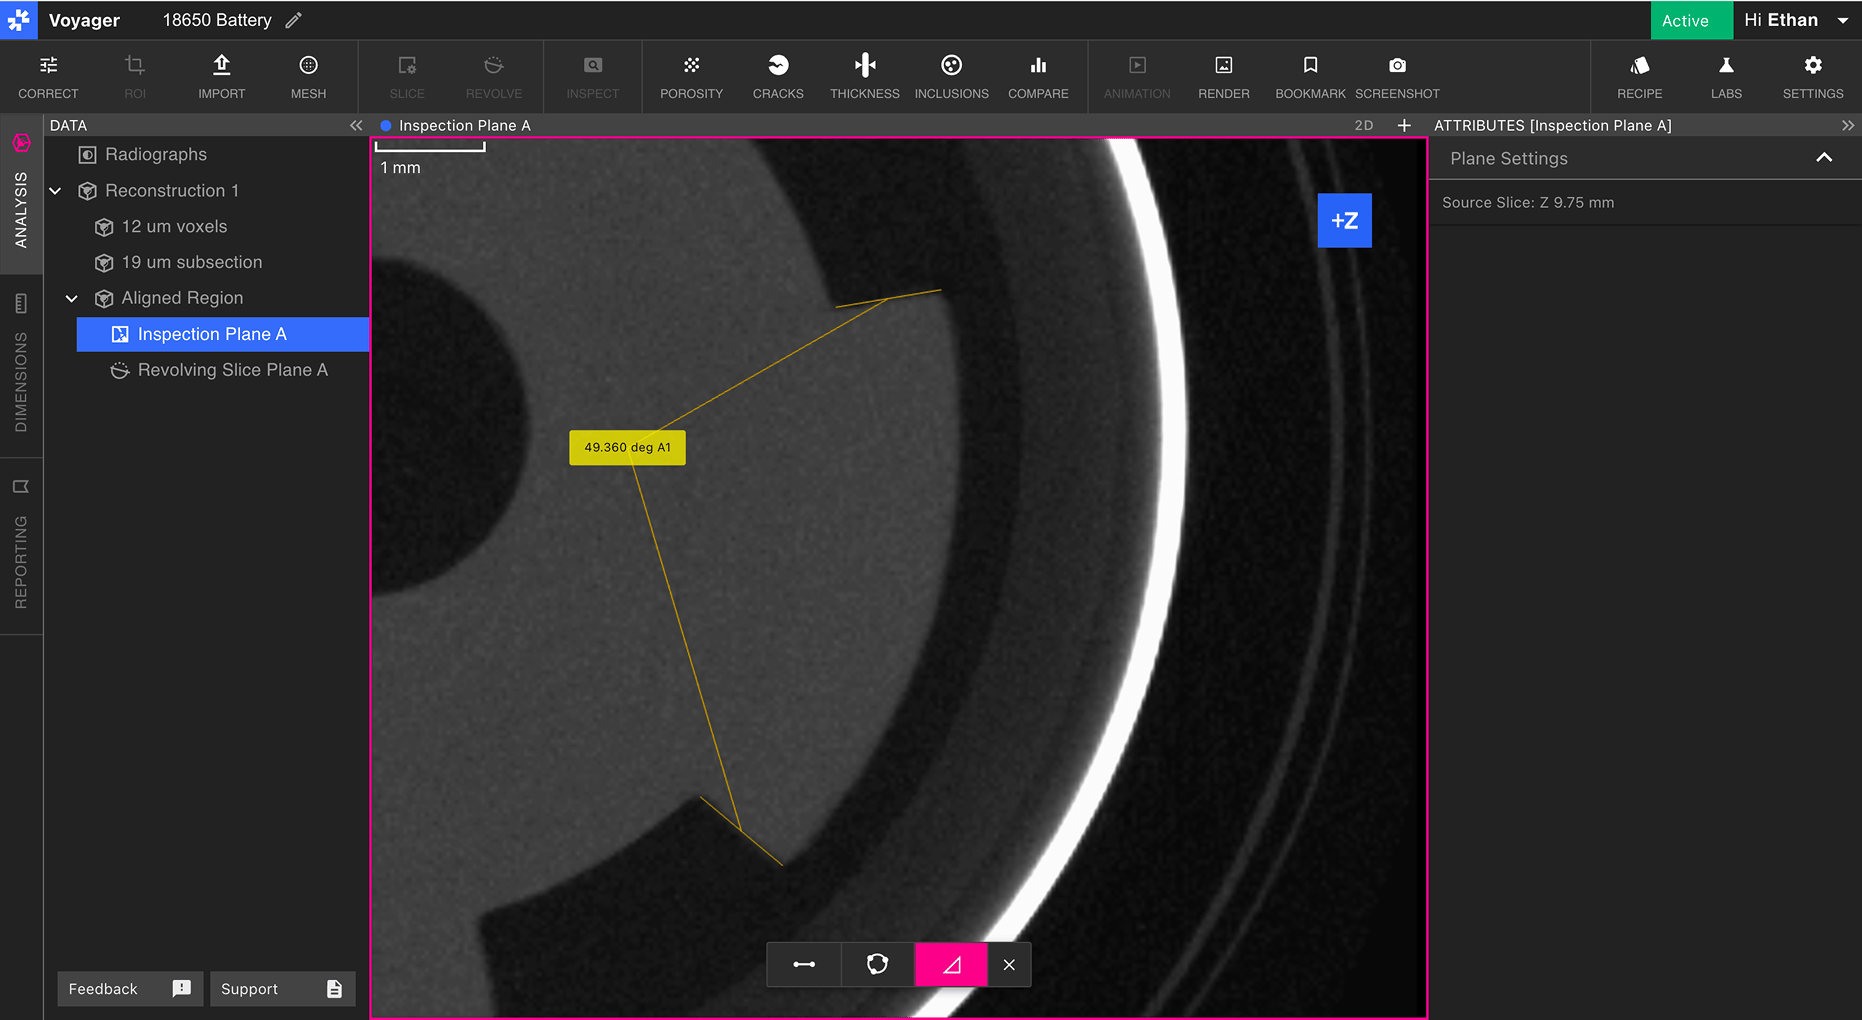
Customizing measurement labels
Measurements can be labeled from the Attributes Panel of the Inspection Plane. Modify the “Label” field to create a new display name for the measurement.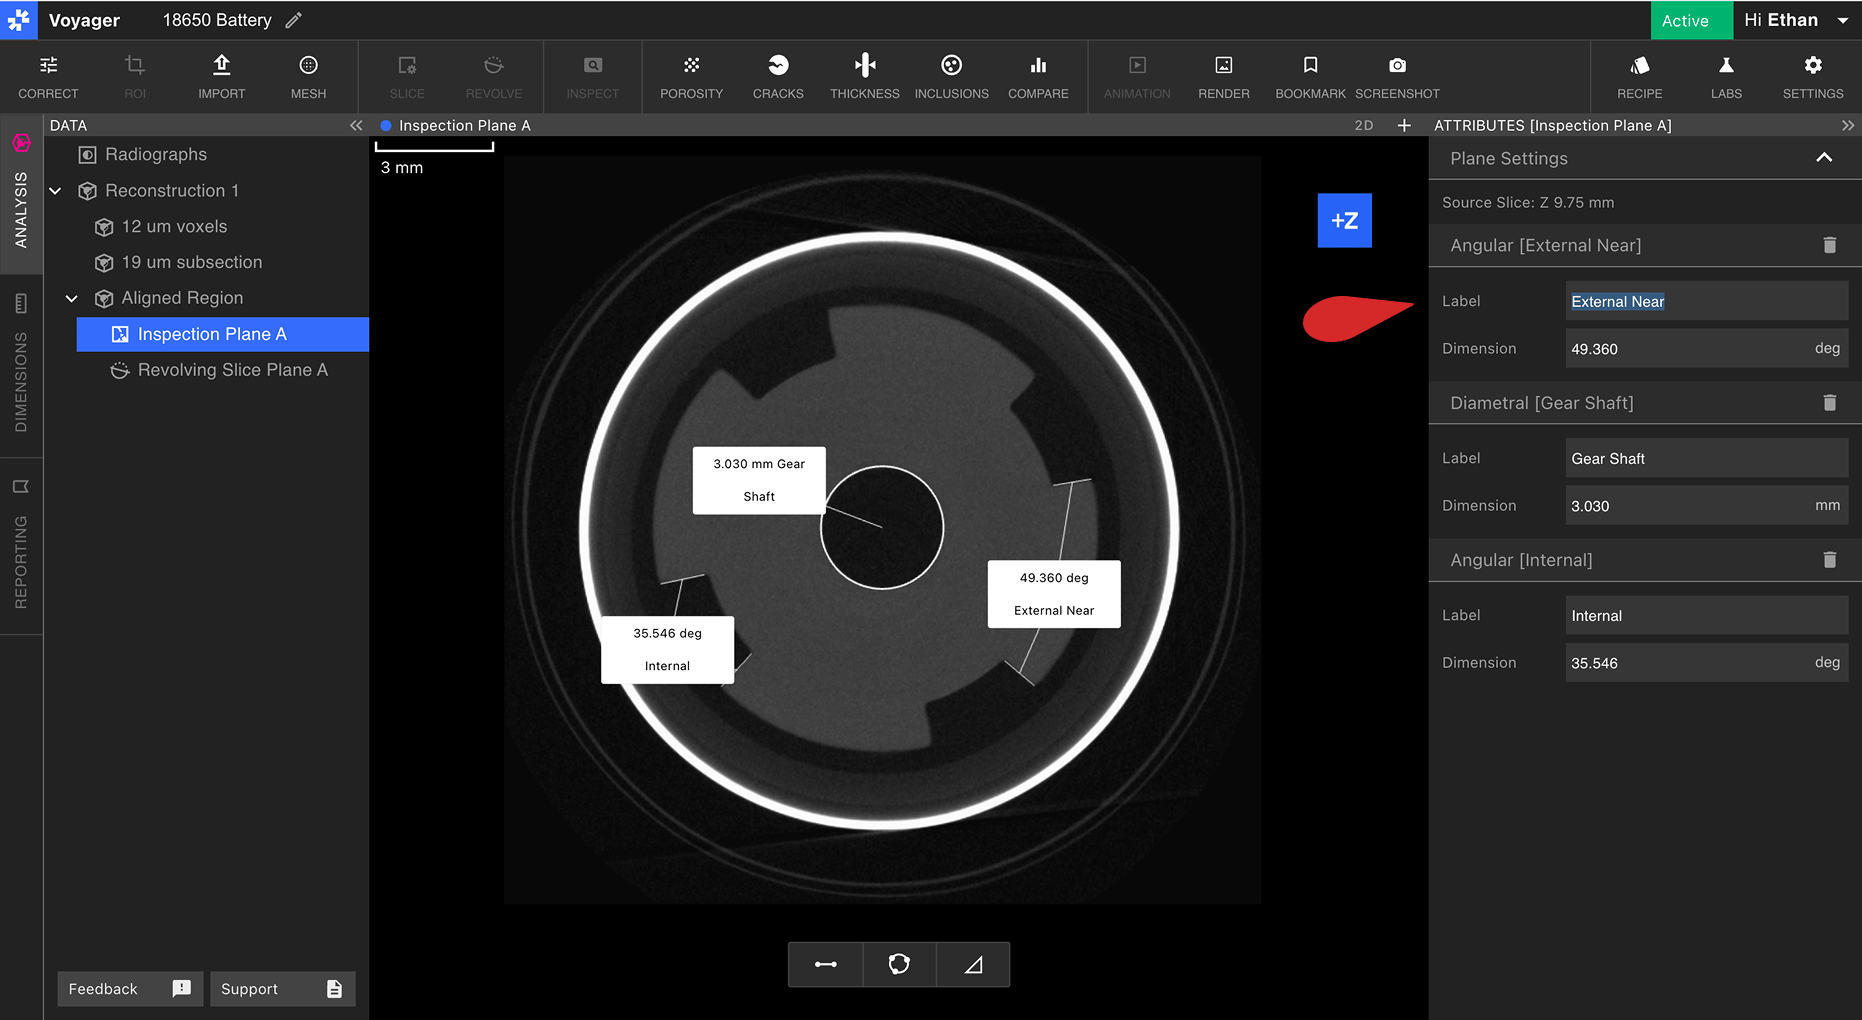
Measuring a Mesh
When taking measurements on a Mesh or Mesh Compare Data Object, Voyager supports Mesh snapping to enable more precise dimensioning workflows. Visit the ISO-50 & Mesh Snapping article to learn more.