Primary fixturing goals
Every fixturing setup should achieve three main objectives:- Remove all secondary motion: Ensure the part is perfectly immobilized. Any movement beyond the intended stage rotation will cause blur and compromise the accuracy of the reconstruction
- Part isolation: Elevate the part from the turntable to ensure capture of the intended geometry. This prevents high-density stage components from interfering with the reconstruction and ensures the integrity of your scan
- Artifact mitigation: Strategically orient the part to minimize artifacts during reconstruction. Proper alignment ensures the X-ray beam has the most efficient path through the material, resulting in superior scan quality
Note: The maximum weight supported by the scanner gantry is 5kg / 11lbs. If you would like to scan something heavier, please contact support@lumafield.com to learn about your options.
Fixturing orientation & strategy
To build an intuition for effective fixturing, it helps to understand the basic physics of CT: 3D reconstructions are created by measuring attenuation - the loss of X-ray intensity as photons travel from the source, through your part, and onto the detector. The denser the material, the more X-rays are absorbed or scattered.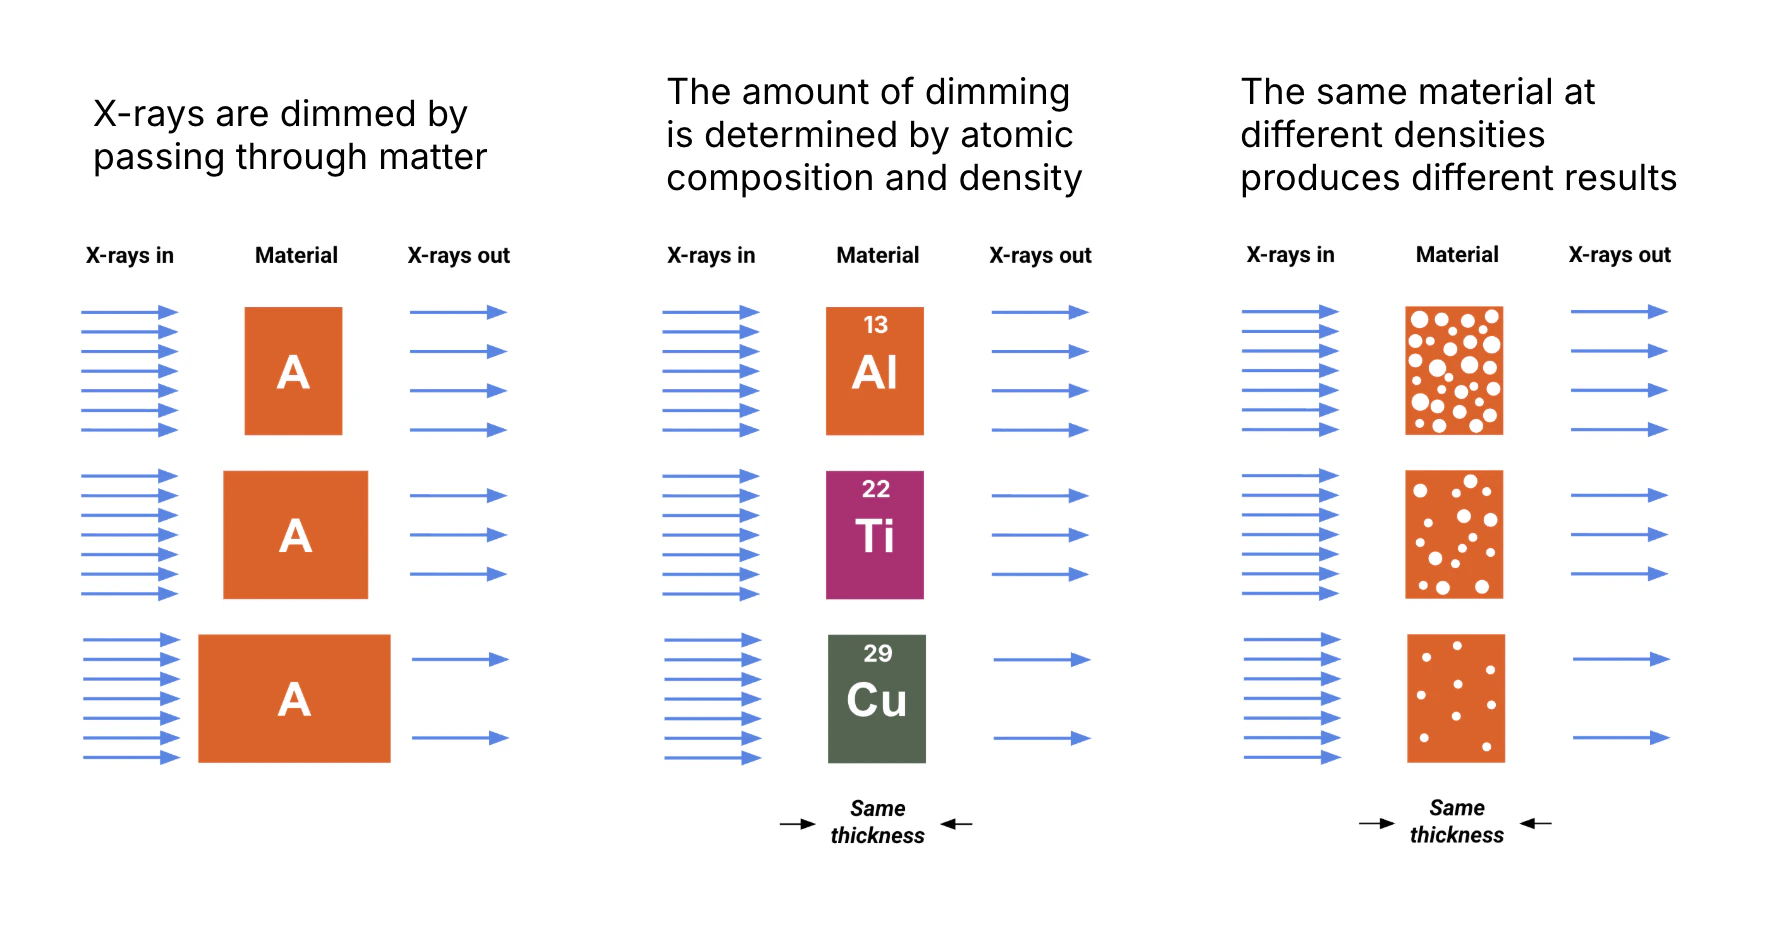
General recommendations
For most scans, follow these two baseline rules to ensure high-fidelity data:- Minimize the X-ray path: Aim to orient your part so that the X-rays pass through the least amount of dense material possible. A shorter path length increases the number of photons reaching the detector, which significantly improves the quality of your final reconstruction.
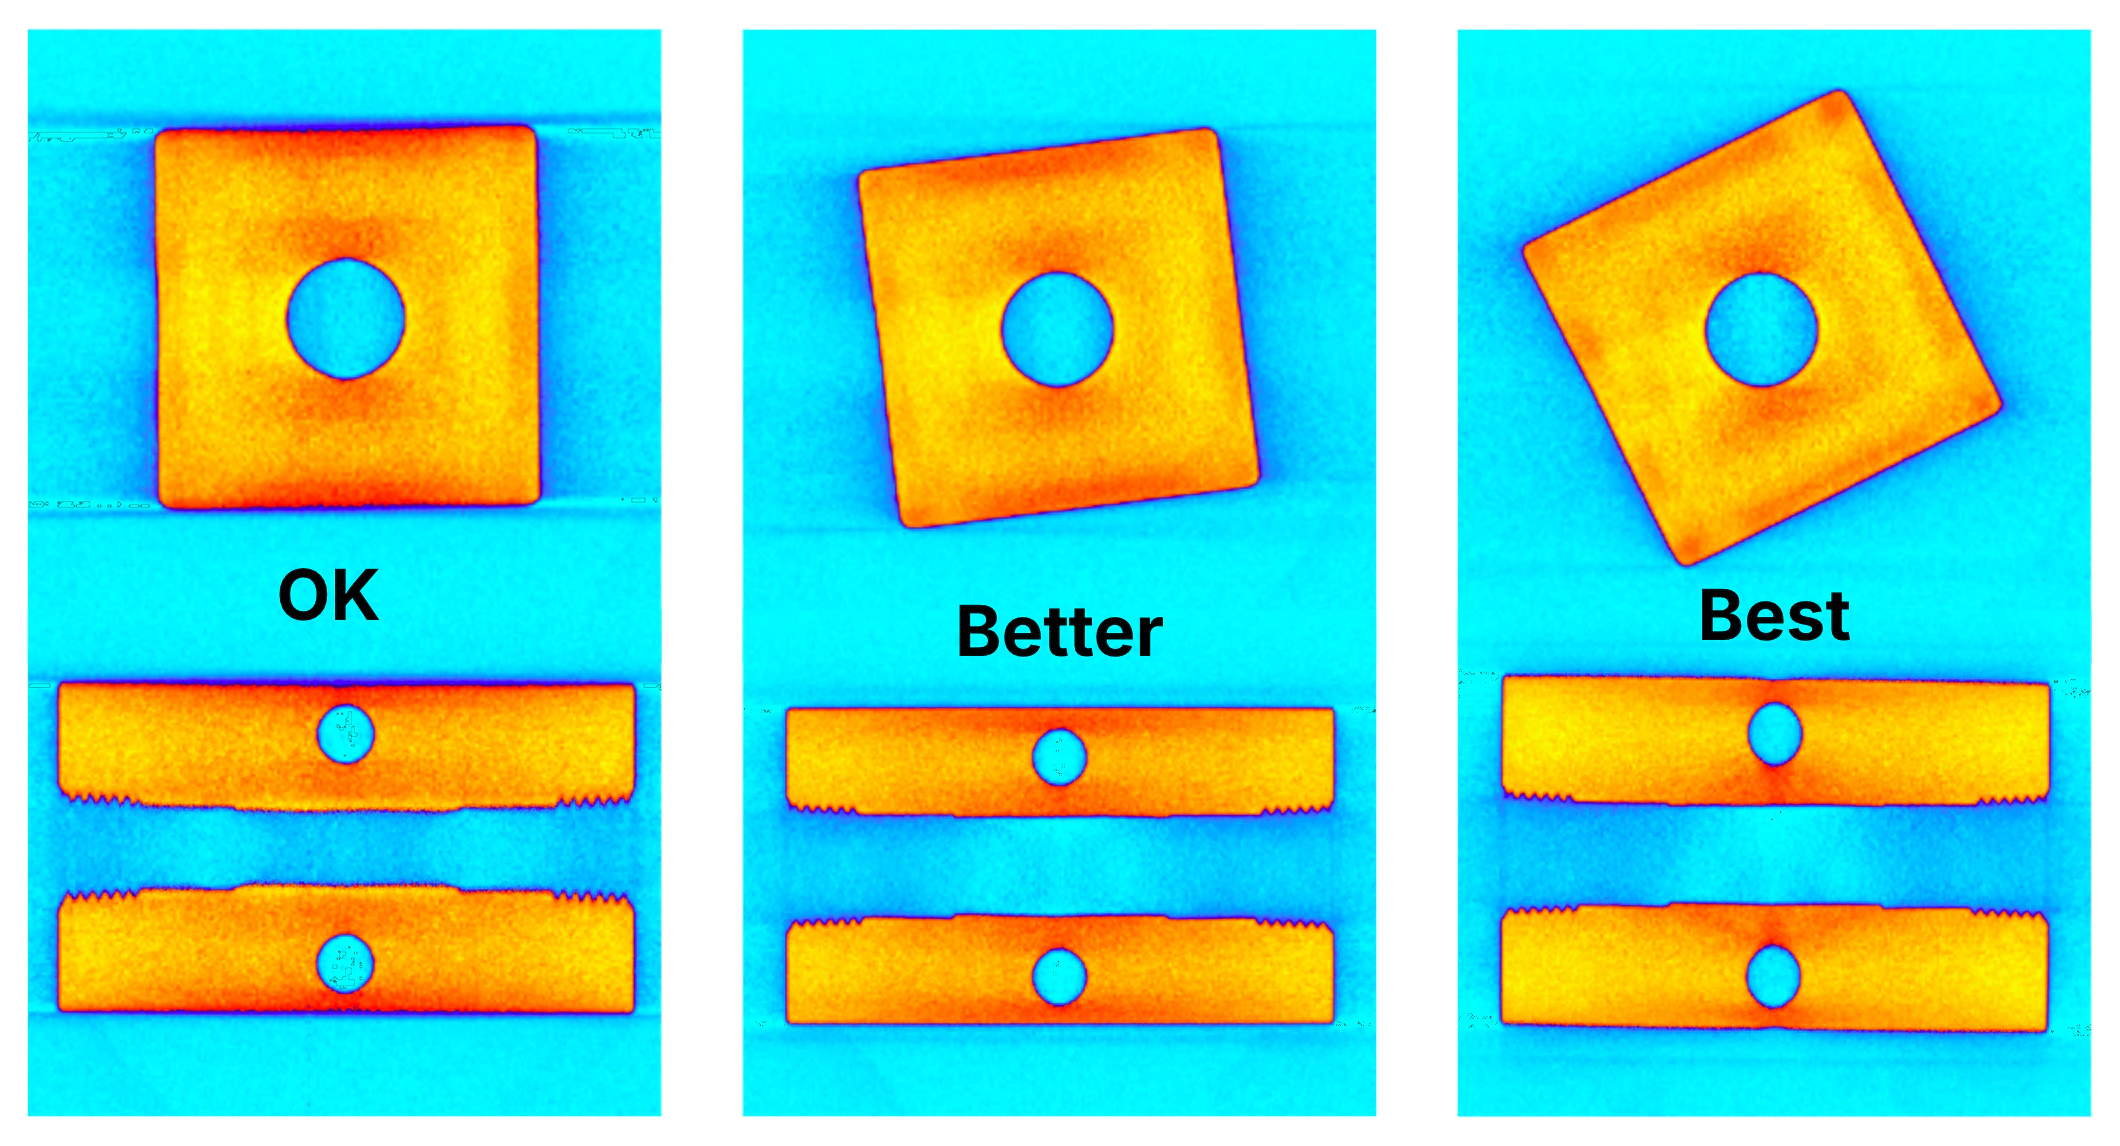
- Tilt your part: Flat surfaces that sit perfectly horizontal (parallel to the X-ray beam) are prone to cone-beam artifacts. These appear as streaks or “blurring” that can obscure critical data. Tilting your part, even slightly (5 though 30 degrees) can help greatly mitigate these artifacts
Advanced scenarios and trade-offs
Sometimes, the general rules should be set aside in favor of a more specialized strategy.- Focused area of interest: If your inspection is focused on one specific internal component, prioritize the orientation that provides the clearest view of that area. In these cases, you might tolerate cone-beam artifacts on parts of the scan if it means reducing metal artifacts near your target zone.
- Multi-material complexity (plastic vs. metal): Multi-material parts containing both low-density plastics and high-density metals are highly prone to metal artifacts. In these cases, it can be beneficial to choose a non-intuitive orientation where a longer overall X-ray path avoids passing through dense metallic components. This may result in a cleaner reconstruction of the surrounding plastic features.
- Tilting versus magnification: Tilting is essential for reducing artifacts, but it creates a larger rotational “swing room” that often forces the part further from the source, limiting your total magnification. This creates a fundamental trade-off between maximum resolution (high proximity) and image clarity.
Fixture basics
Here are some key considerations for selecting fixture materials and securing parts on your Lumafield scanner.Choosing fixturing materials
- Density and segmentation: Choose fixture materials that are distinguishably lower density than your scan object. This will make it easier to separate fixtures from parts using Voyager’s attenuation sliders. Low-density materials (foams, plastics) are preferred for widespread compatibility and easy data segmentation. Denser materials can be used for fixturing as long as they remain clearly distinguishable from the part in the scan. For example, when scanning an aluminum part, a moderately dense plastic fixture is still easy to filter out. Keep in mind that higher-density fixtures are less versatile and may be suitable for a narrower range of parts.
- Rigidity and stability: In addition, fixtures should be rigid and stable. A rigid fixture will not flex or compress under the part’s weight, and a stable setup keeps the part fully constrained so it does not rock or slide during the scan. Minimizing secondary motion helps produce sharper reconstructions, more accurate dimensions, and more consistent results from scan to scan.
Recommended fixturing materials
- Floral foam: useful for quick, custom press-fits
- Styrofoam: very low density and widely available
- PLA / ABS / PETG: 3D-printable plastics for repeatable, custom fixtures
- Carbon fiber: low density with high stiffness for robust fixtures
- Tape: fast, simple restraint for various parts
- Velcro straps: reusable, adjustable way to secure parts
- Rubber bands: versatile and reusable restraint for solid parts
Lumafield standard fixturing accessories
Your Lumafield scanner includes a suite of versatile, low-density accessories designed to simplify part setup. These tools allow for quick stabilization across a wide range of geometries.Note for Neptune MFX users: Your Microfocus system includes an expanded suite of specialized fixturing designed for high-resolution imaging. While not detailed in this general guide, these components are optimized for micro-scale stability. To learn more about maximizing the utility of your MFX kit, please contact support@lumafield.com.
Breadboard turntable
Lumafield’s Breadboards (also known as “Cheese Plates”) serve as a modular foundation for both standard and custom setups. Featuring industry-standard 1⁄4”-20 threaded holes, these plates are fully compatible with common CMM and CT fixturing accessories.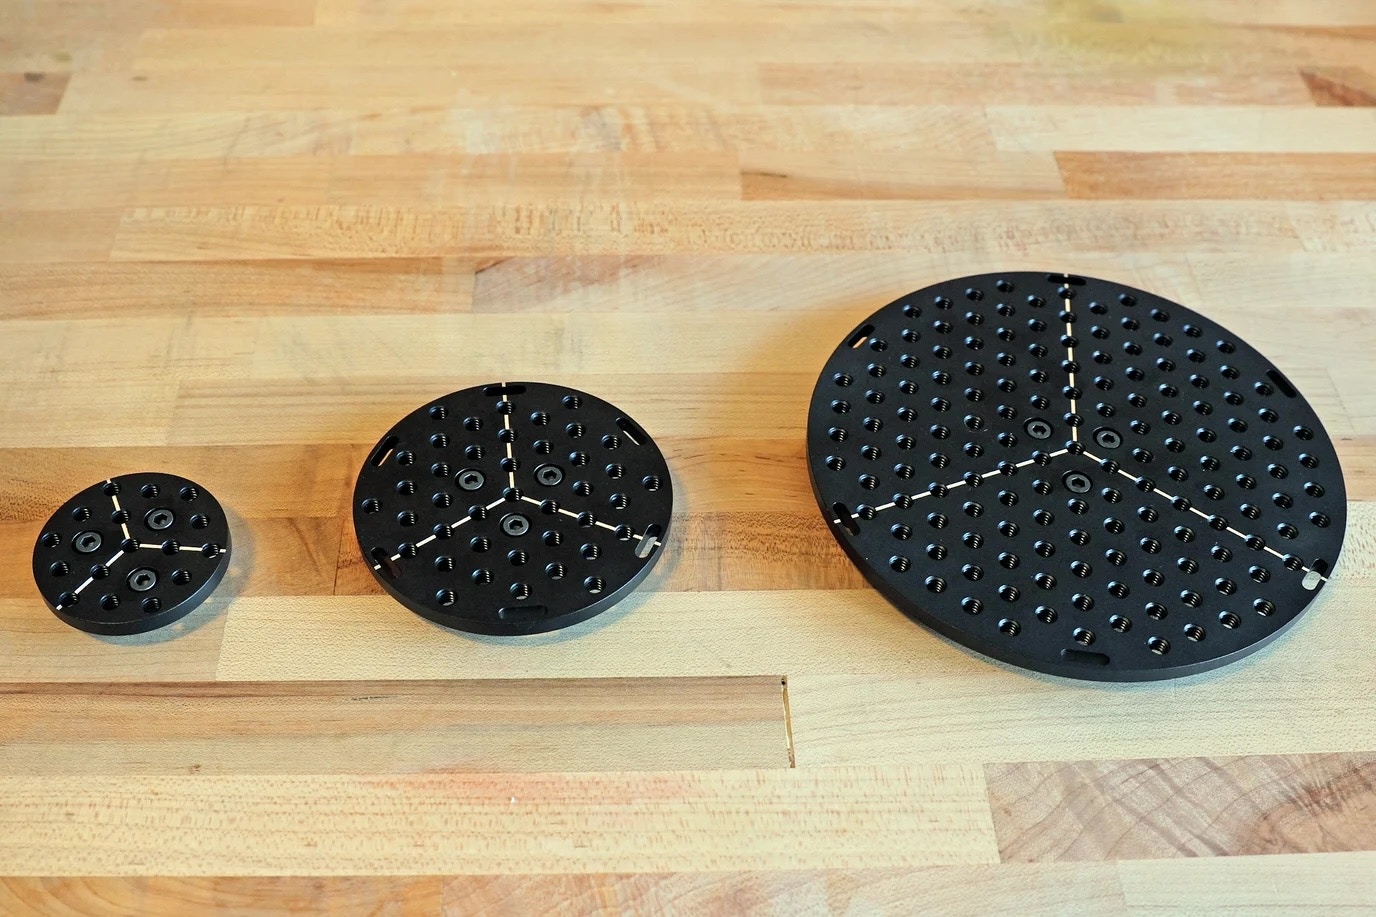
Angled Foam Fixtures
Lumafield’s Angled Foam Fixtures, also known as “Lazy Boys” are designed for speed and ease of use. These wedges help secure parts at a tilt to eliminate scan artifacts.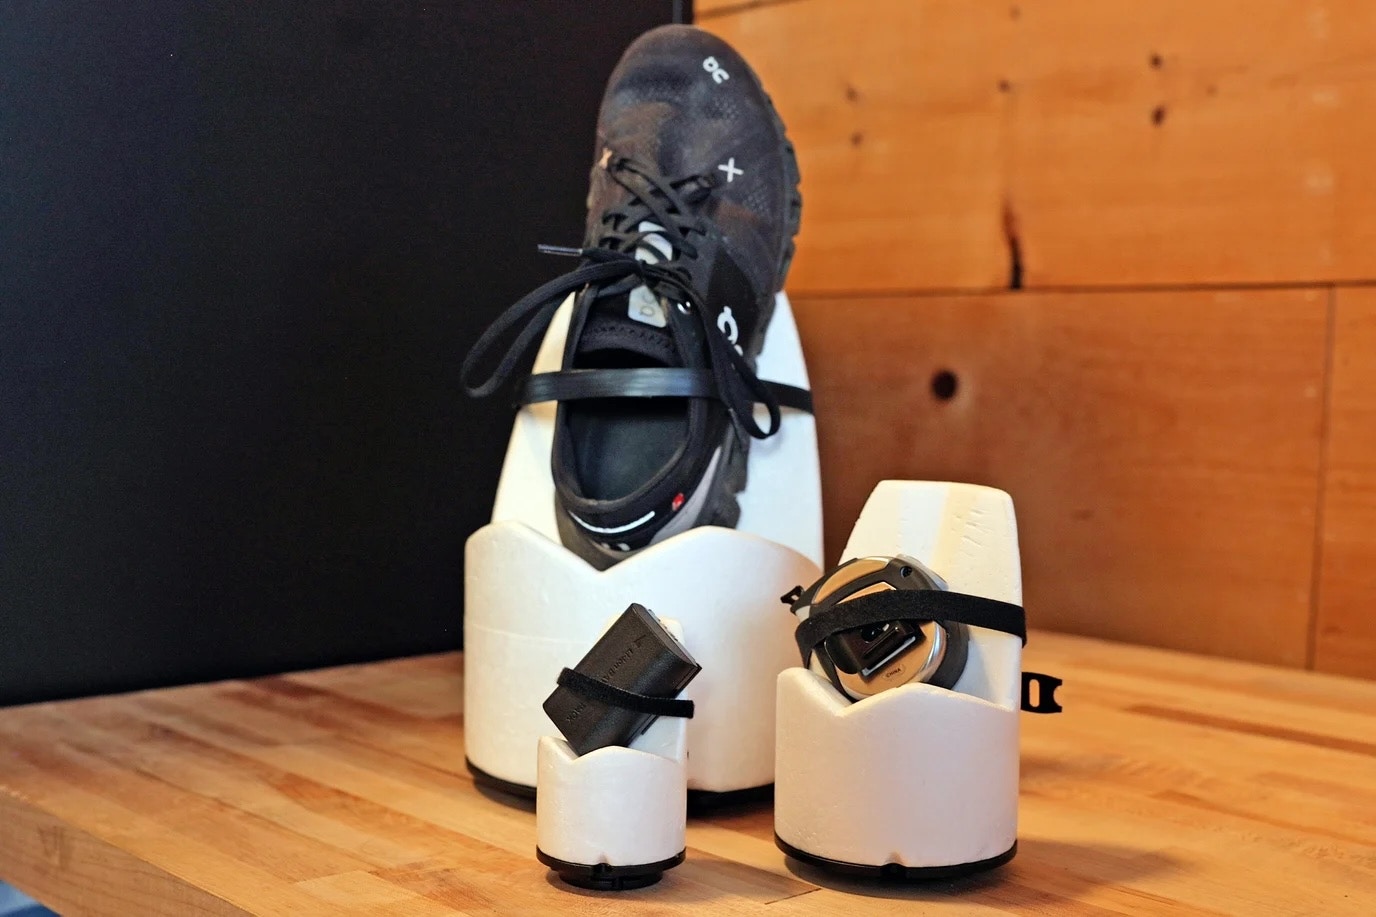
- Specifications: Available in three sizes (60mm, 100mm, and 175mm in diameter)
- Setup: Utilize the integrated pins to ensure rapid, error-proof assembly. The weighted metal base provides a stable foundation for this fixture. Use Velcro straps and elastic bands to securely restrain parts.
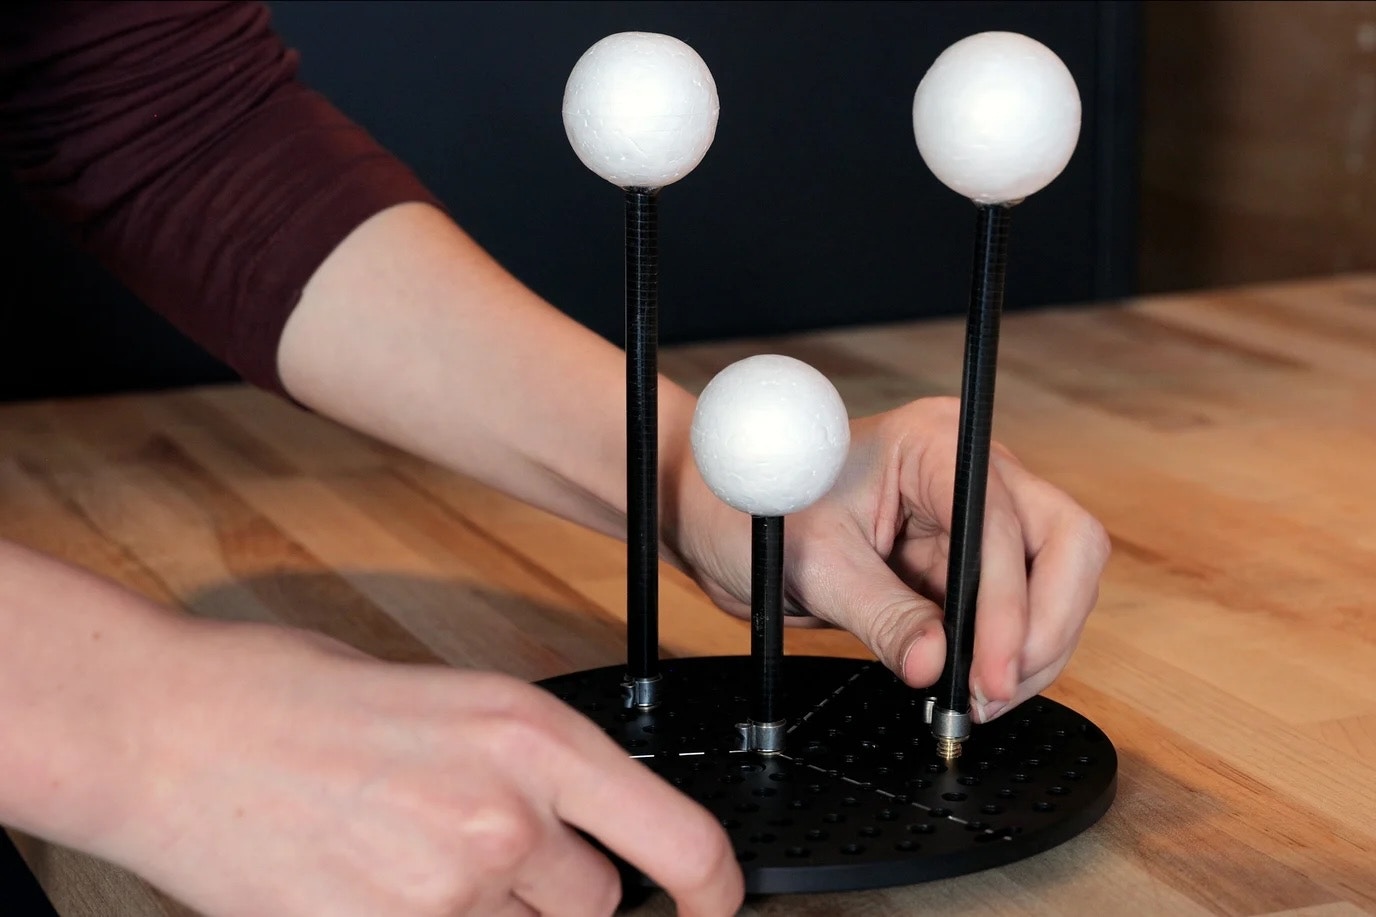
Lollipops
“Lollipops” (foam spheres mounted on carbon fiber rods) mounted in the Breadboard turntable make great fixtures for irregular or spherical parts.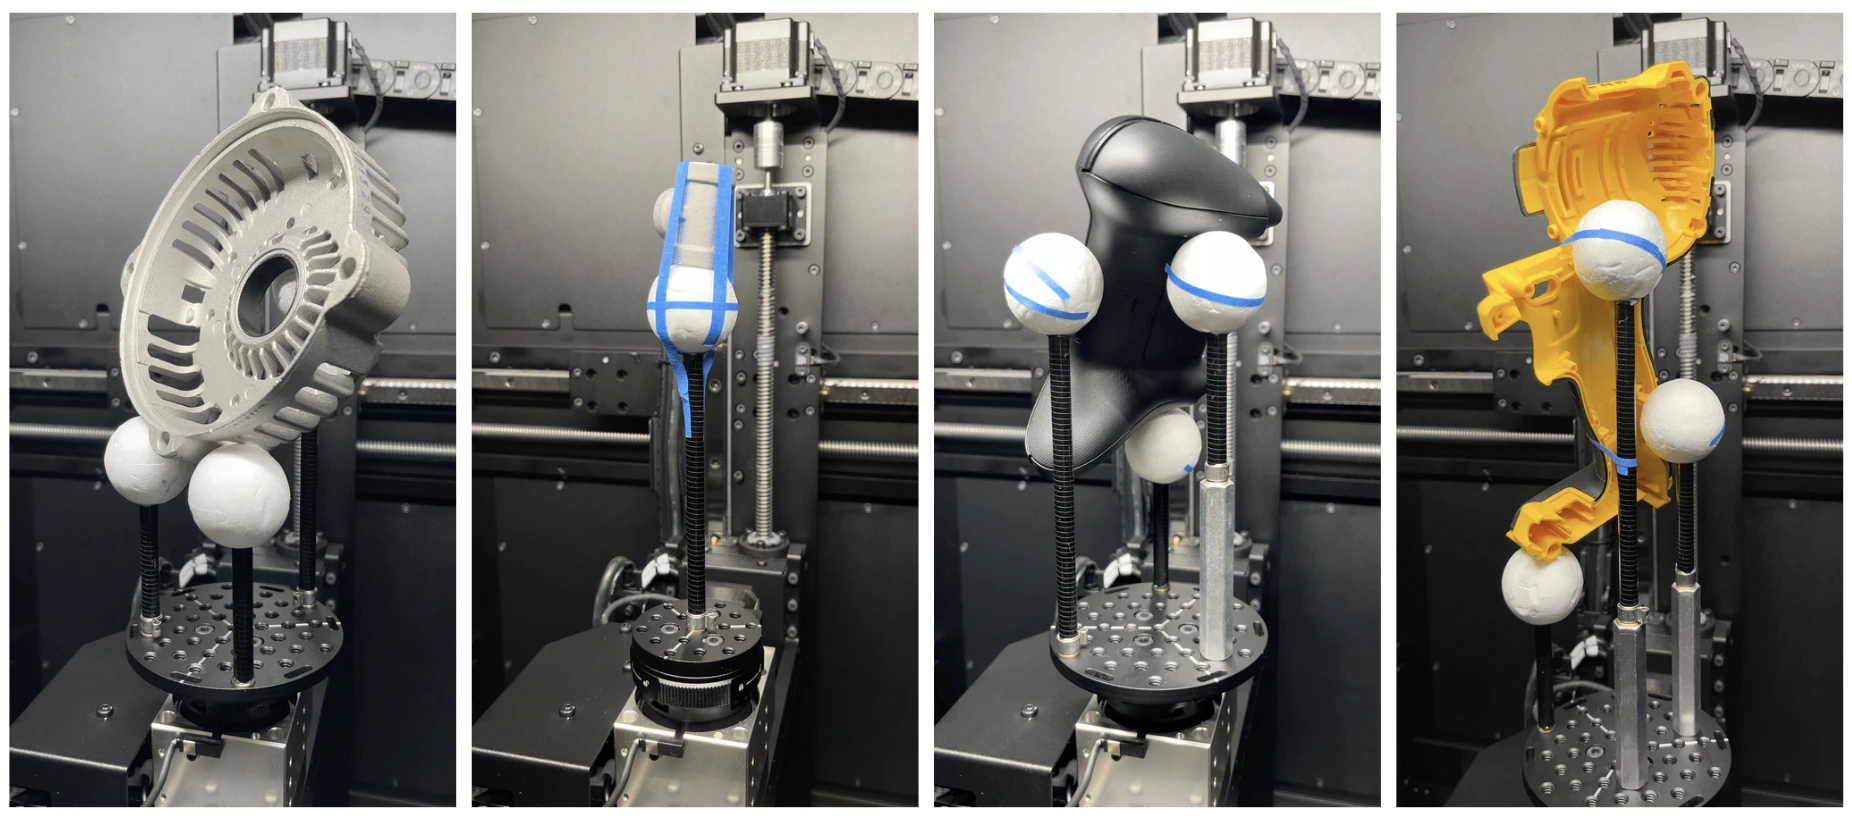
- Specifications: Lollipops are available in two bases sizes (100mm and 170mm tall); standoffs (1” and 3” tall) can be used for height adjustment
- Setup: For maximum stability, install three Lollipops into the Breadboard turntable to support your part. Use standoffs as needed for height adjustment and tape to help stabilize your part. Make sure to tighten the assembly by holding the carbon fiber shaft to avoid damaging the foam interface.
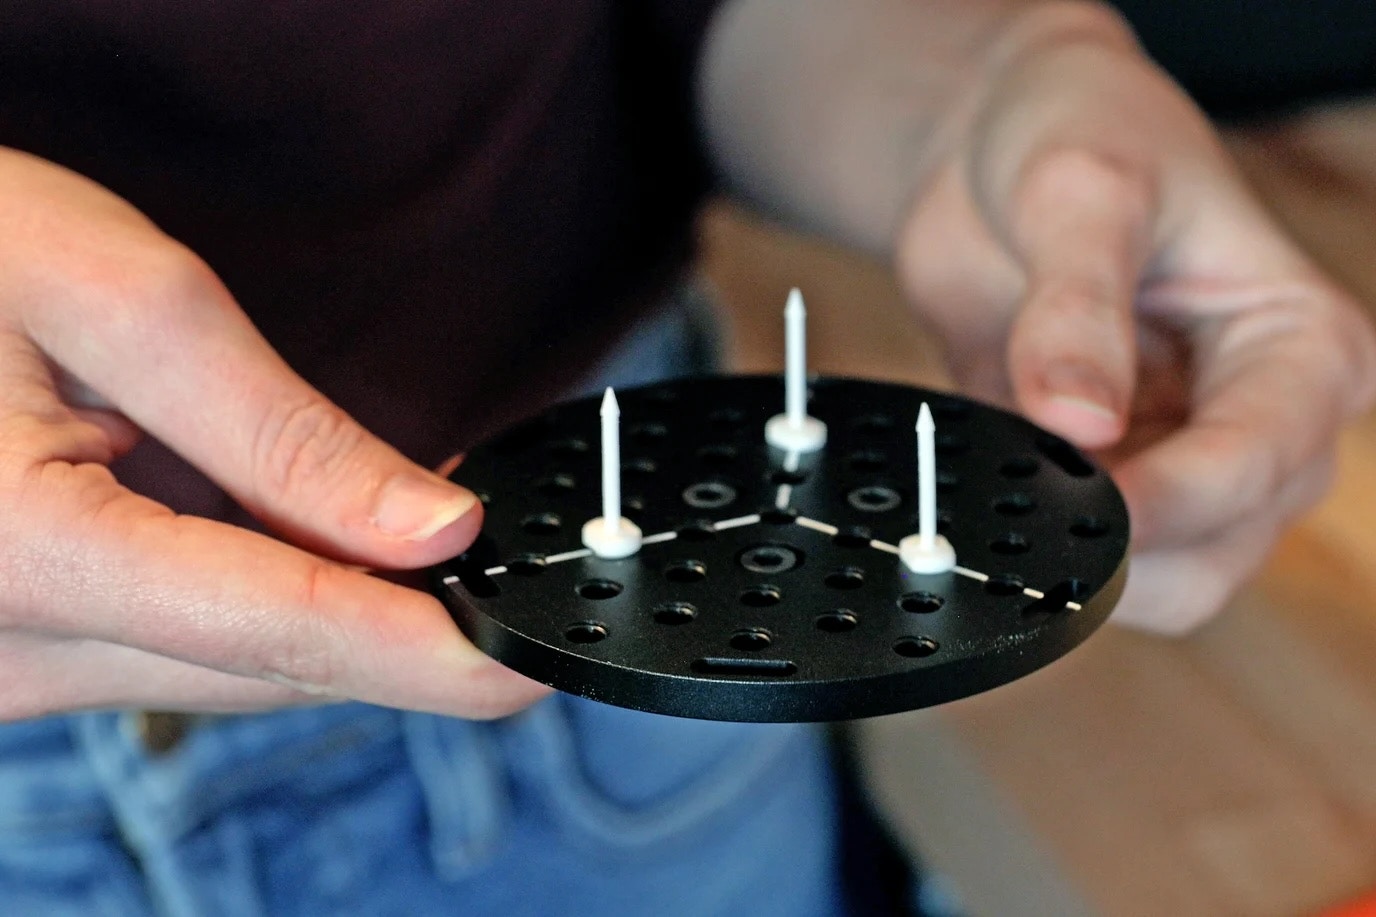
Floral foam and Foam Retention Spikes
This fixturing combination is ideal for parts that require custom press-fit nesting or foam modification. This example below shows a beautiful queen protea flower fixtured with floral foam on a custom build plate.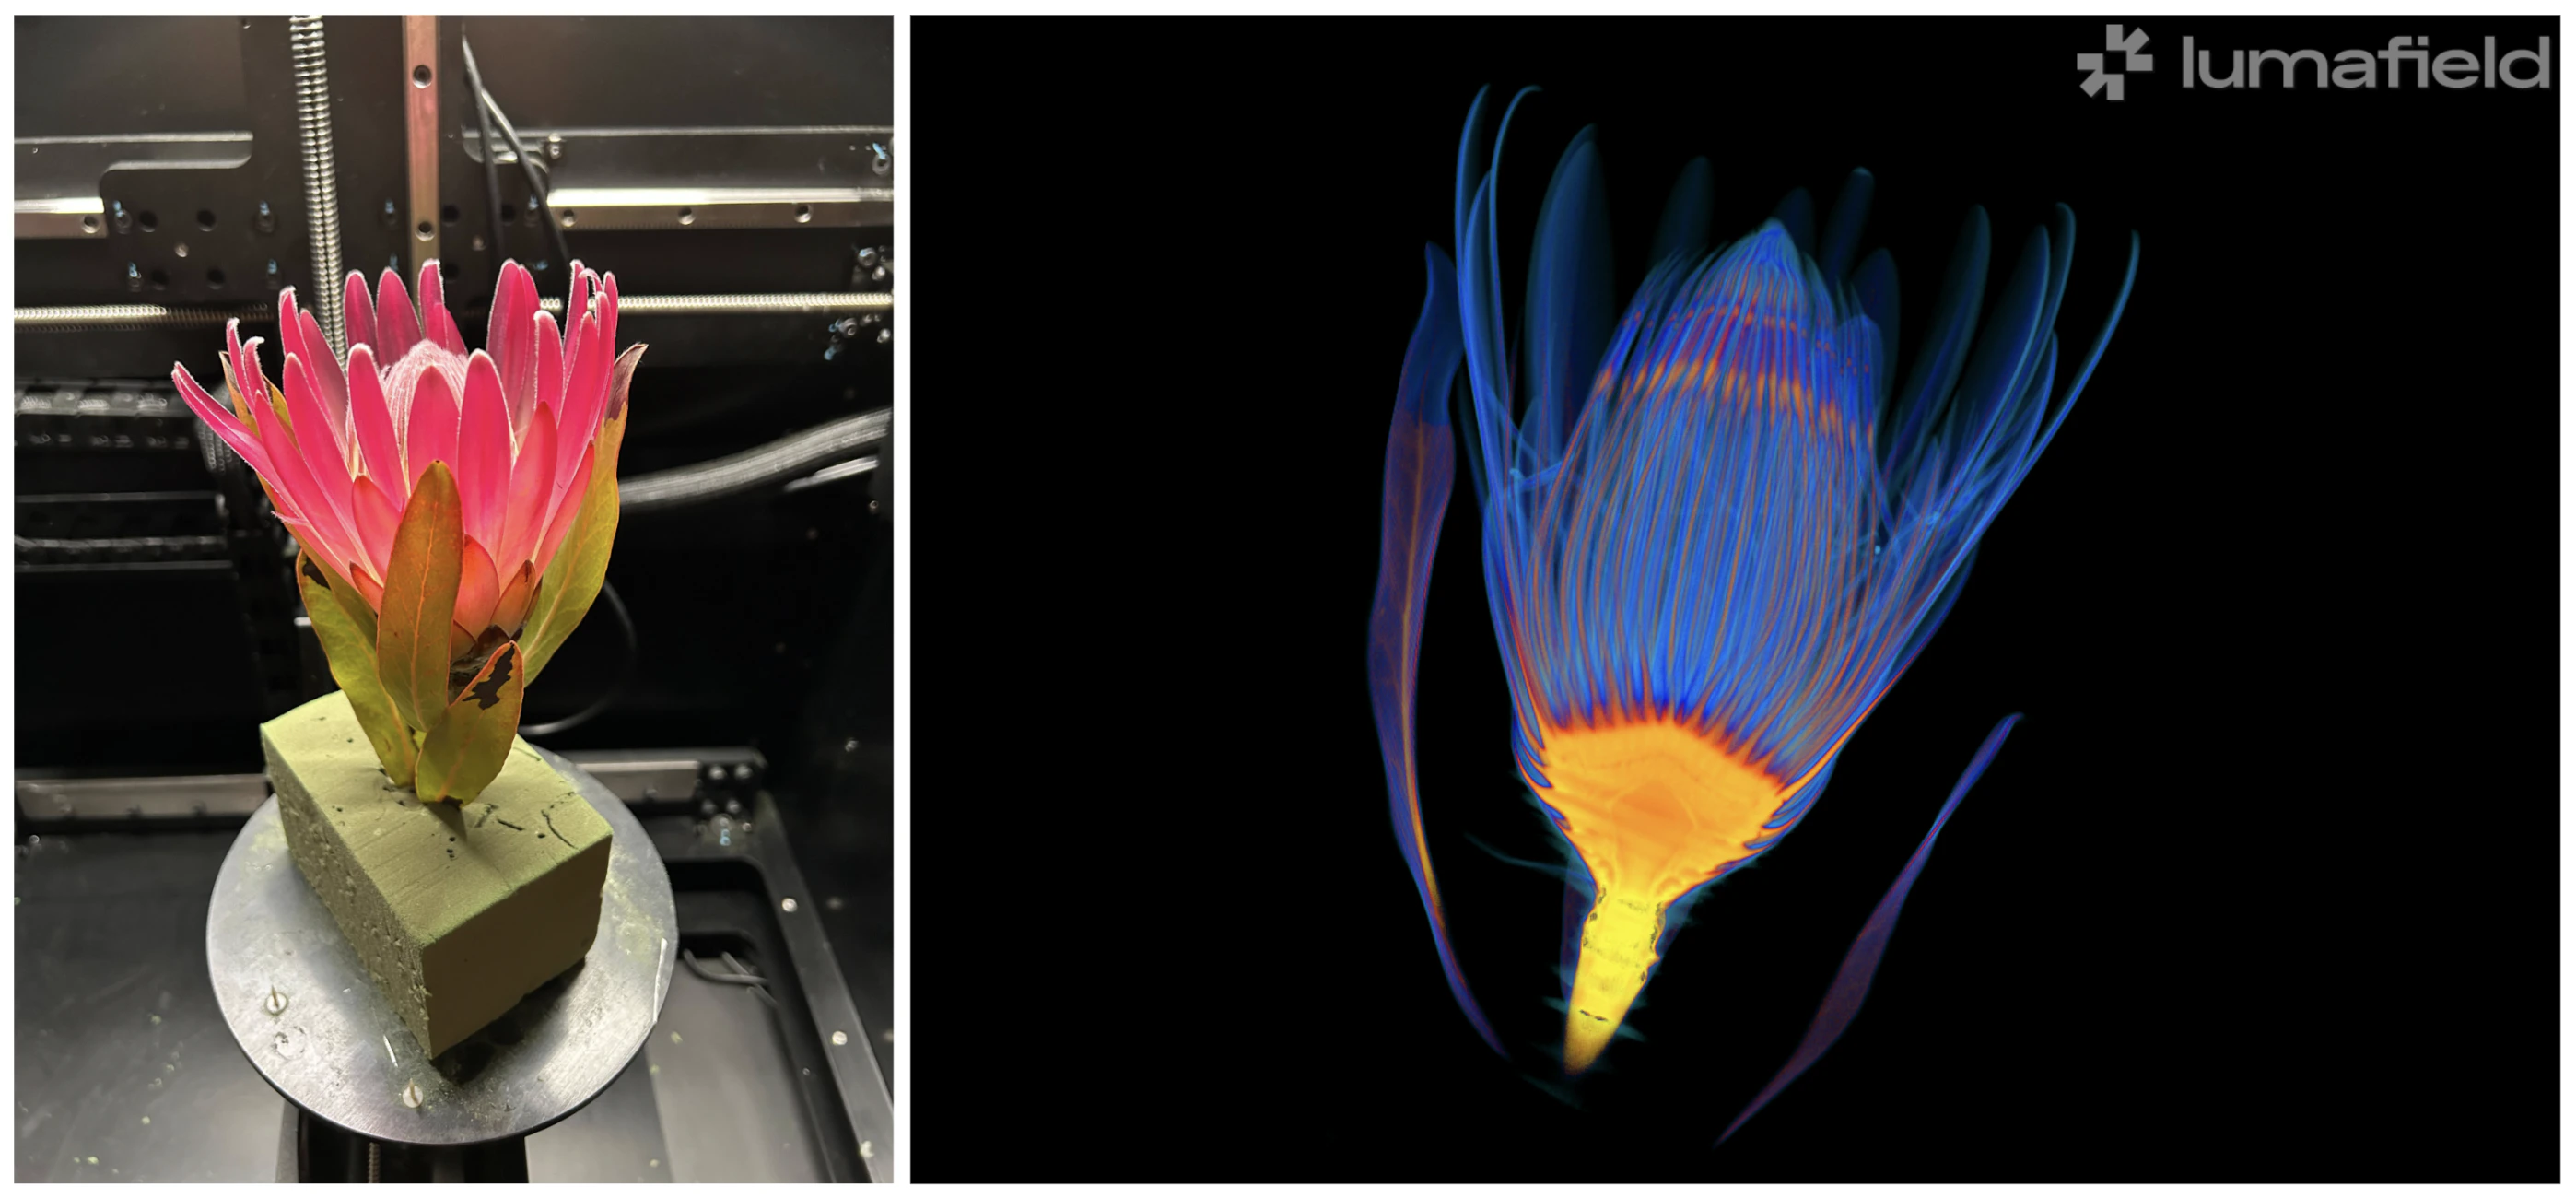
- Related resources: See the Resources section to download CAD of the Foam Retention Spikes (STEP & STL)
- Setup: Install three or more Foam Retention Spikes into an appropriately-sized Breadboard turntable with an adjustable wrench. Once installed, press a block of green floral foam onto the spikes until secure. You can then carve or press-fit your part directly into the foam.
Custom fixtures
For specialized applications, you may wish to design and fabricate your own custom fixturing. Use the resources listed in this section to ensure your designs are compatible with Lumafield’s motion stages and hardware.Lumafield’s modular system
Twist-to-release collet system (QS-60): Lumafield scanners utilize a QS-60 Twist-to-Release Collet to secure your fixture and part. Simply rotate the outer ring clockwise to lock your fixture in place and twist counterclockwise to unlock. Breadboard turntable: Lumafield’s Breadboard turntable utilizes a standard 1/4”-20 threaded grid. This design allows for the seamless integration of both Lumafield accessories and a wide variety of off-the-shelf components.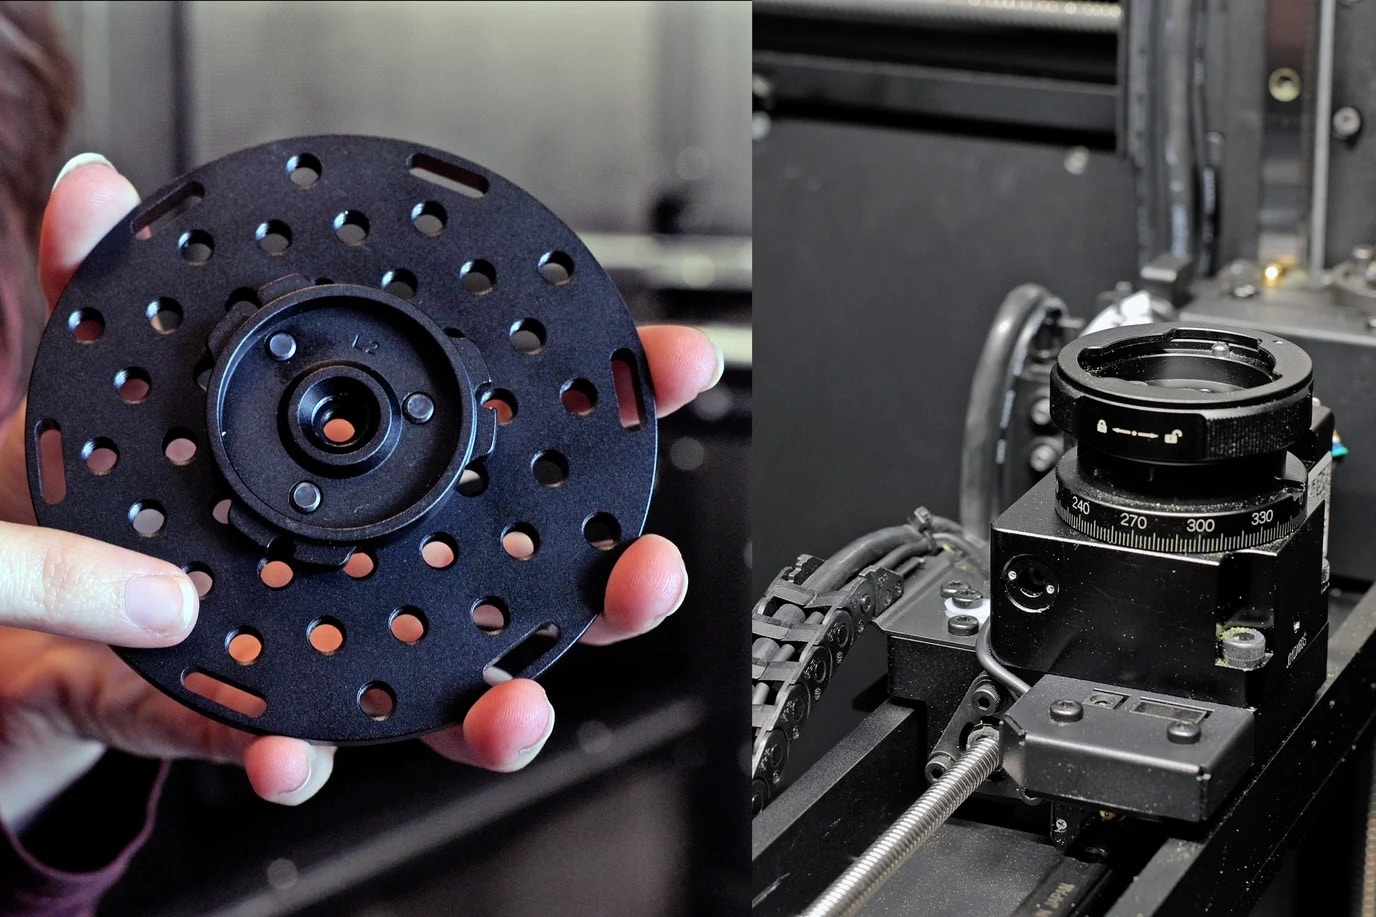
Resources
Use these CAD files and drawings to streamline your in-house design process. Technical drawings- QS-60 Collet Plate Drawing (PDF) - Essential dimensions for custom baseplates
| Component | Link |
|---|---|
| QS-60 Collet Plate | Amazon |
| QS-60 Collet Plate | B&H |
| Cone Support for Inspection & Measuring Kits | McMaster-Carr |
| Plastic 1/4”-20 Screws | McMaster-Carr |